Updated on 13/11/2025
Moovago’s map lets you visualize your entire business portfolio on an interactive map. However, as your portfolio grows, the map’s legibility may be compromised.
Let’s take a look at how to filter the items displayed on the map so you can access what you need quickly.
Filter contacts by caption
With default caption
The easiest way: use the legend!
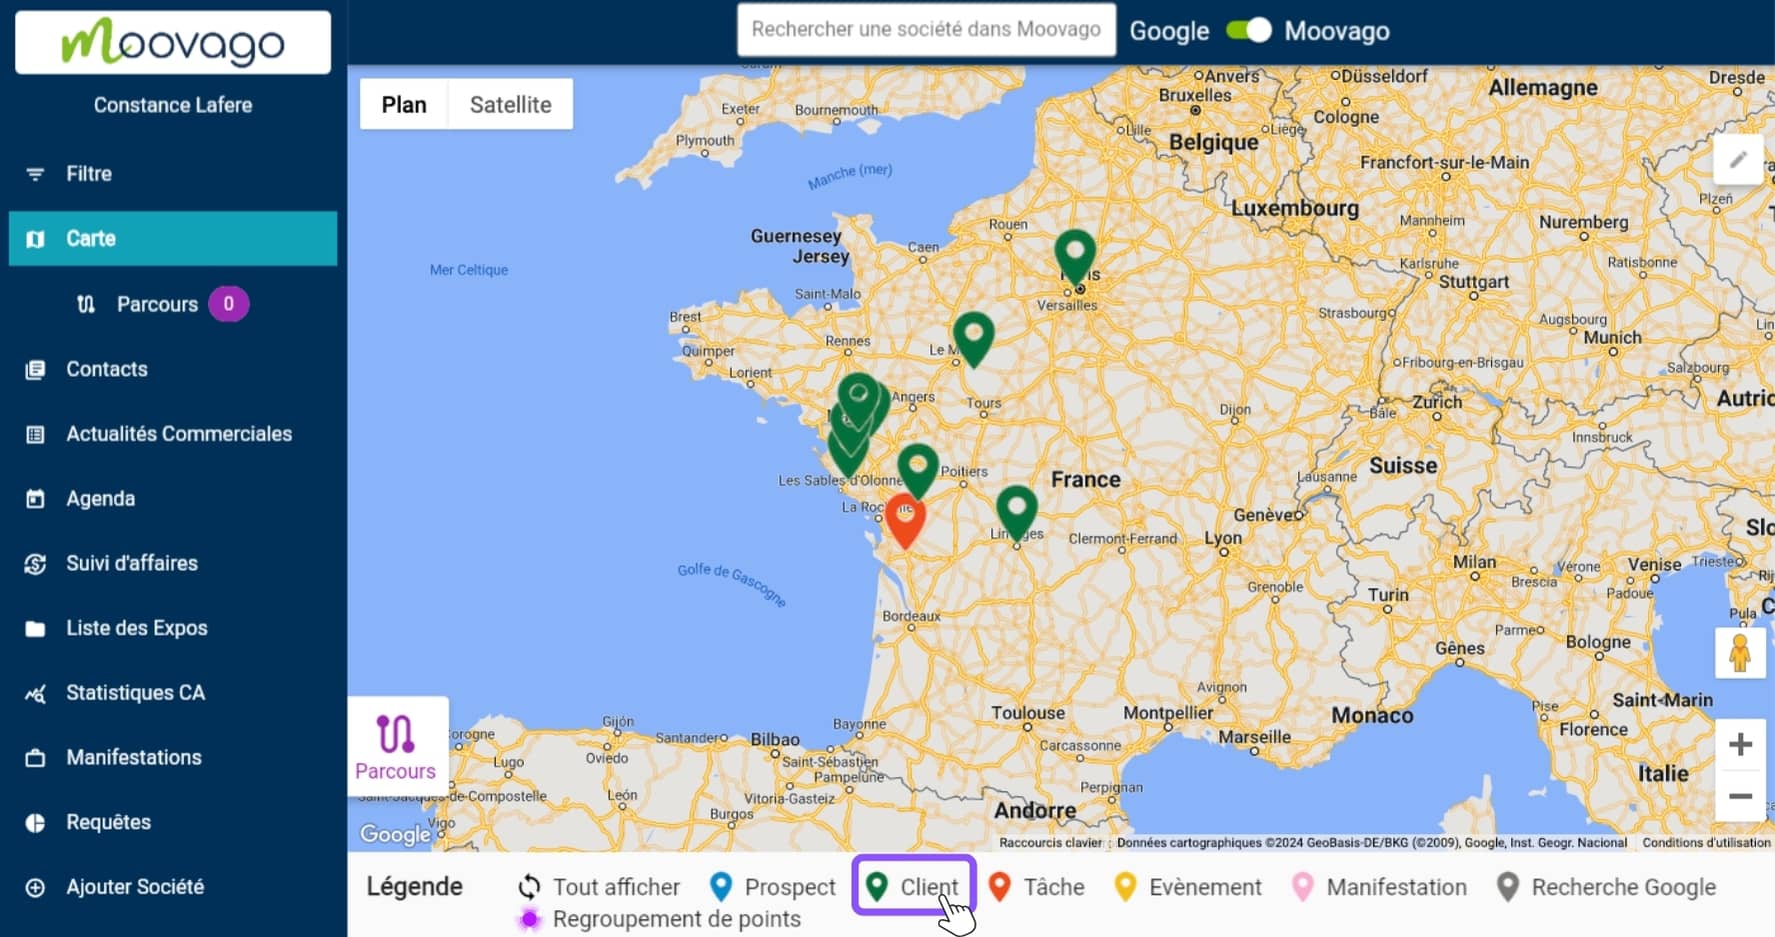
The Moovago map legend lets you filter contacts to display only one type of marker at a time on the map.
Simply click on the desired marker. For example, if you click on “Customer”, you’ll only see records with the status “Customer” on the map.
Note that if a customer has a task overdue or to be completed during the day, it will still be displayed, but in orange, to indicate that a task has to be completed for that customer. The same applies if the customer is linked to an upcoming event (such as an appointment).

Note that this does not work with “Google Search” markers (markers added via Google search), nor with point grouping.
With segmentation in the drop-down menu
If you need to view a certain number of contacts, but with different information, you can use the drop-down menu under “Legend”.
This feature allows you to visualize your segmentation questions on the map, customized from your settings. From the drop-down menu, select the type of data you want to see on the map: the color markers and legend will change automatically, to show your contacts in the light of new data.

Important note: custom view captions behave differently from Moovago’s default caption.
If you click on the name of an item in the legend, it appears as crossed-out, and the associated markers disappear from the map. Contacts corresponding to this data (e.g. sales process: “In progress”) are no longer visible.
To make them reappear, simply click again on the marker in the legend.

Filter via the "Filter" tab
How do the filters work?
If you need a more comprehensive way of filtering your contacts, and especially if you want to combine filter criteria, we recommend using the“Filter” tab.
Filters allow you to accumulate criteria, with a restrictive logic. When a filter is applied, Moovago will read the information in all the saved records, and the results will have to meet ALL the selected criteria. In other words, the more items you select, the fewer results you should get.
For example, if I select “France” in Country, then “Customer” in Status, then I’ll ONLY have contacts who are customers AND whose address is in France.
Note that filters can be used to filter not only the items displayed on the map, but also the data in the “Contacts” tab.
How do I apply a filter?
Let’s take a look at how to apply a filter.
To access Filters, click on the corresponding tab in the side menu.

In the screen that appears, you can choose the elements that will be used as filter criteria:
- Country: the country entered in the file address,
- Region (appears as soon as a country is selected): the region entered in the file address,
- Principal: the brand if you work for several brands, according to the list added from the parameters,
- Segmentation: segmentation questions according to your settings. When you select one, a tab with the different answers opens.
- Status: i.e. Customer or Prospect (or Suspect if enabled in your Settings),
- Keywords: keywords entered for this company,
- Reports : this field lets you filter your contacts according to whether or not they have had a report in Moovago over a given period (for example, a company that has not had a report in the last 30 days).
