Updated on 12/11/2025.
IMPORTANT NOTE: this option is only available on the mobile application.
Save time and reduce the risk of manual entry errors when creating new contact persons in Moovago.
How to create a new contact person from the phonebook
Prerequisites: before you begin
Before following this tutorial, please check that you have authorized the Moovago application to access your Contacts. To check, go to
- On iOS: Settings > Apps > Moovago > Contacts
- On Android: Settings > Applis > Moovago > Application authorizations > Contacts > “Authorize”
Once this check is complete, follow the steps below.
Step 1: Access the desired company file
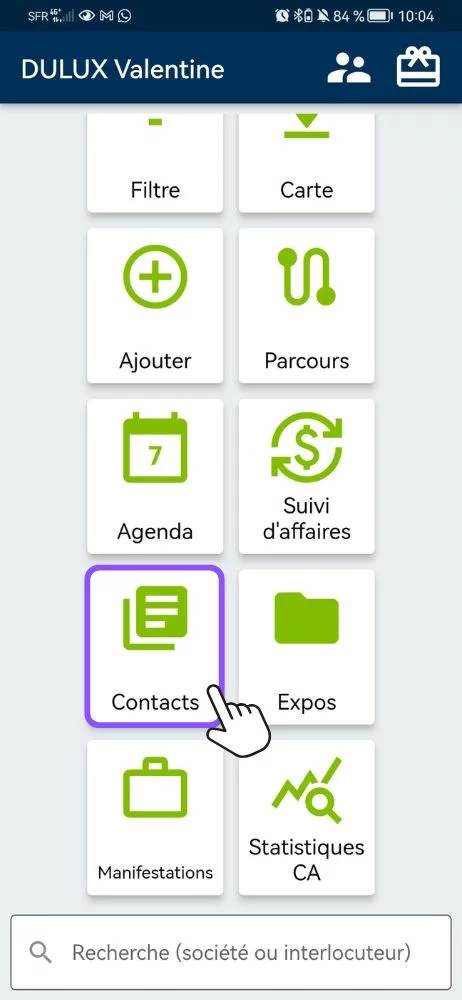
- On the Moovago home page, click on ” Contacts “.
- Select the company concerned.
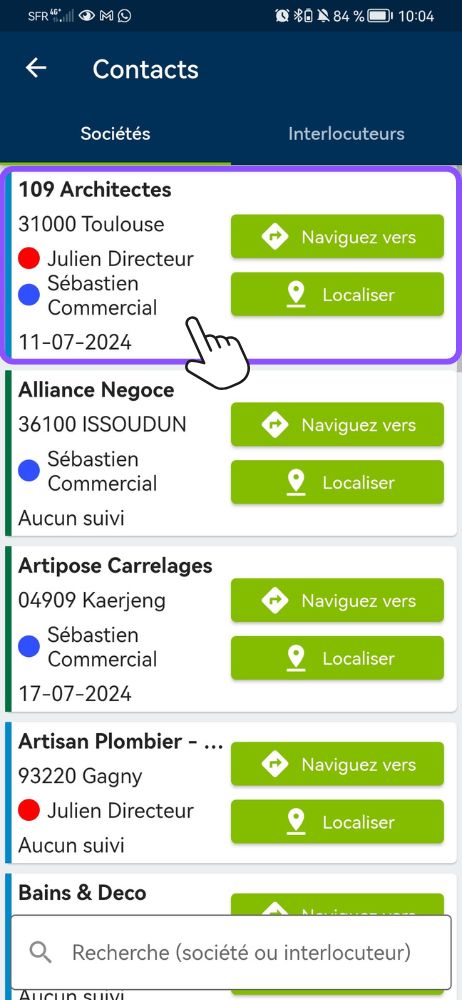
Step 2: Open the new user creation window
- In the company file, go to the “Contact persons” section, and press the “Add” button in this section,
- Then press“Import from phone” at the bottom of the screen.
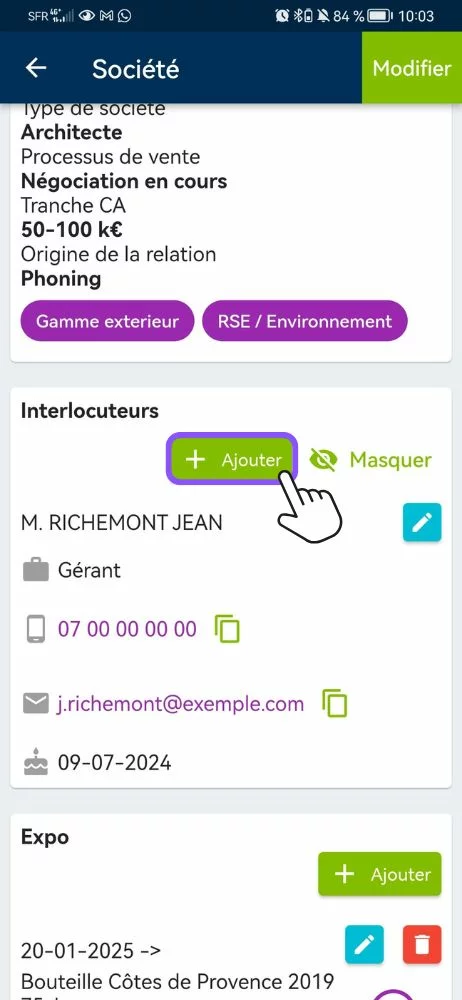
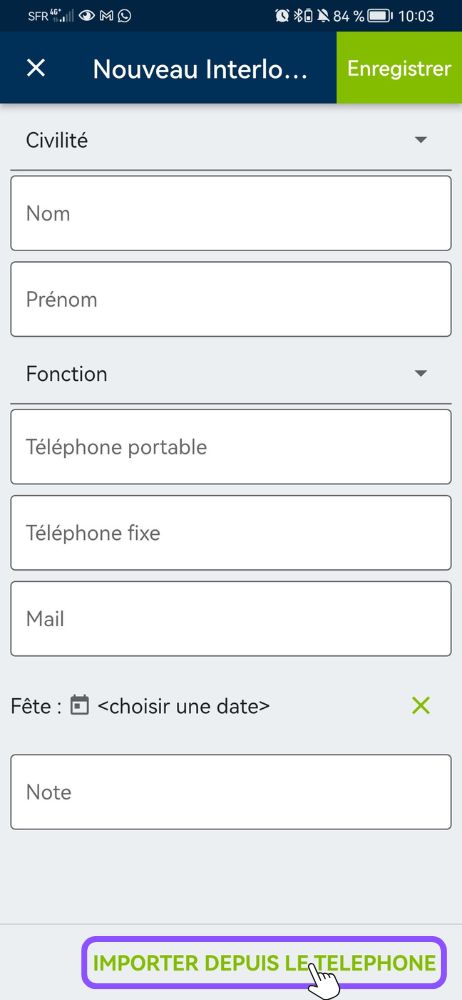
Step 3: Contact selection
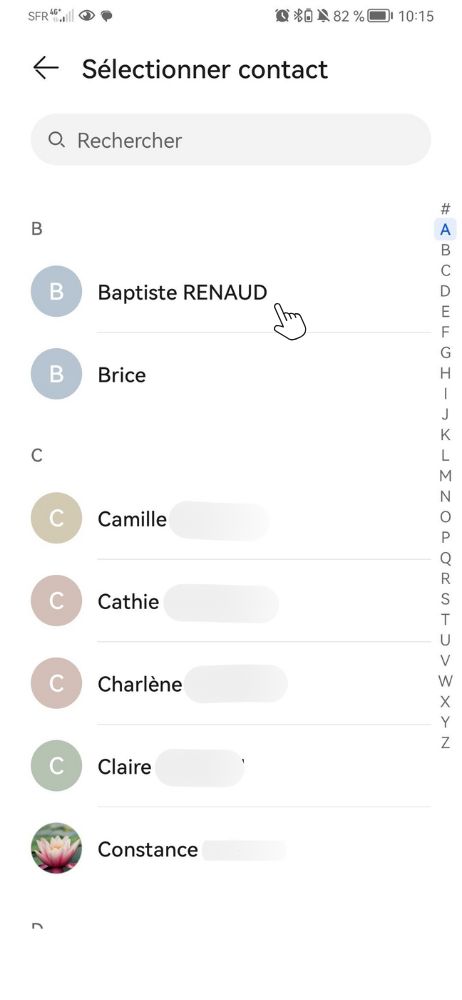
A window displays the contacts present in your application as a directory. Please note that the display may vary slightly from one device to another.
- In the window that opens, search for your contact (by scrolling the screen, or by searching for your contact using the search bar).
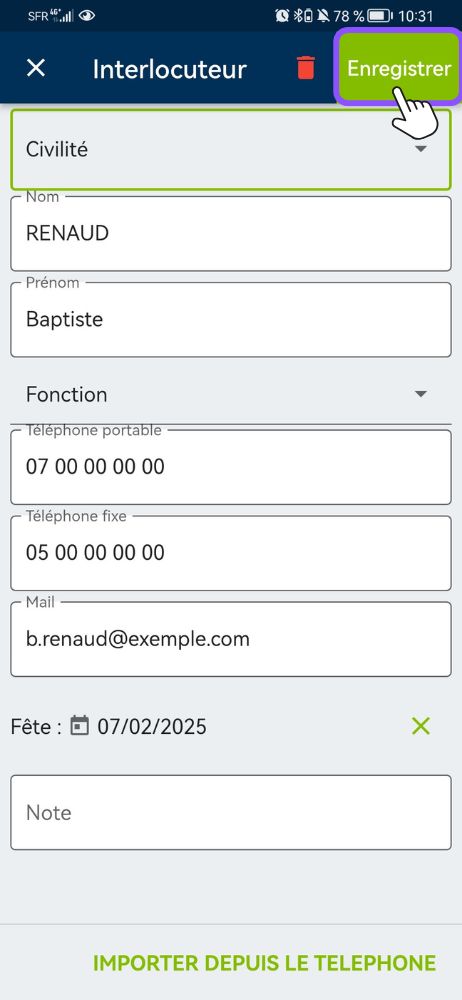
- Select the desired contact by clicking on it. The contact’s information is automatically imported into the corresponding fields in Moovago.
- Save your import by pressing ” Save “.
You can now see that your contact person has been created.
Corresponding fields
When Moovago imports a contact, it retrieves the information from the contact files in your phonebook, then enters it into the application’s fields based on the following correspondence:
| Moovago fields | Phonebook fields | |
|---|---|---|
| Android | iOS | |
| Name | Last name | |
| First name | First name | |
| Mobile Phone | Mobile, Laptop Work, Custom | Mobile, iPhone |
| Home phone | Home, Office, Main, Assistant, Custom, Other | Main, Home, Work, Other, Personalized |
| Email (1st to be filled in, regardless of wording) | ||
| Holiday | Birthday, Date of birth | Birthday |
| Civility | No synchronization possible | No synchronization possible |
| Function | No synchronization possible | No synchronization possible |
| Note | No synchronization possible | No synchronization possible |
To ensure that the information is entered in the right fields in Moovago, please make sure that the data is entered in the right fields in your directory.
In some cases, for example if several e-mail addresses are entered, Moovago will default to the first one. If you encounter any problems importing a contact, please do not hesitate to contact us.
How to update an existing contact person
The same procedure can be used to update contact person information.
To do this :
- Go to the relevant company file.
- Scroll down to the “Contact persons” section.
- Press thepencil icon (blue background) next to the contact person.
- Select the corresponding contact in your phonebook.
- Save to update information.
Frequently asked questions about importing contacts
No, synchronization only works in one direction: from the directory to Moovago.
No, data already present in Moovago remains unchanged. This feature is only used to add or update contact persons.
- On iOS: Settings > Apps > Moovago > Contacts.
- On Android: Settings > Applis > Moovago > Application authorizations > Contacts > “Authorize”
For the moment, it is not possible to import several contacts into Moovago at the same time.

