Updated on 12/11/2025.
The Moovago agenda lets you visualize your sales activity schedule, containing all the events you and/or your team will have to manage.
Follow the guide below to get started with the diary.
Create, modify, delete from calendar
It is possible to create a diary event from different pages in the Moovago application: the first is the “Diary” function in the left-hand menu.
To do this, click on “Agenda ” :
on a tablet or web browser, in the blue side menu,
or on mobile, via the button on the application’s home screen.
Create an event from the calendar
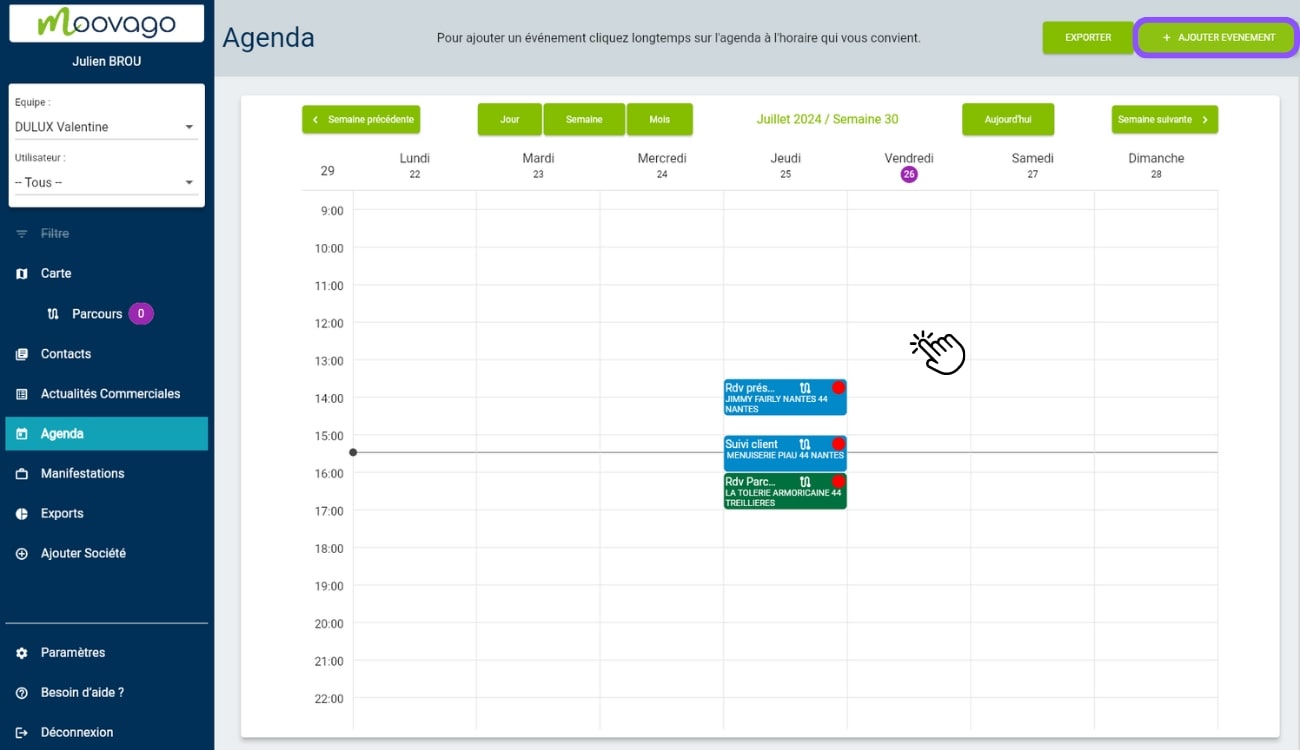
To create a new event from the calendar, you have two choices:
Click on the “+ Add event” button (web) or on the “Add”button (mobile) at the top right of the screen,
Long-click (with your finger or mouse) on the box corresponding to the date and time you wish to create an event.
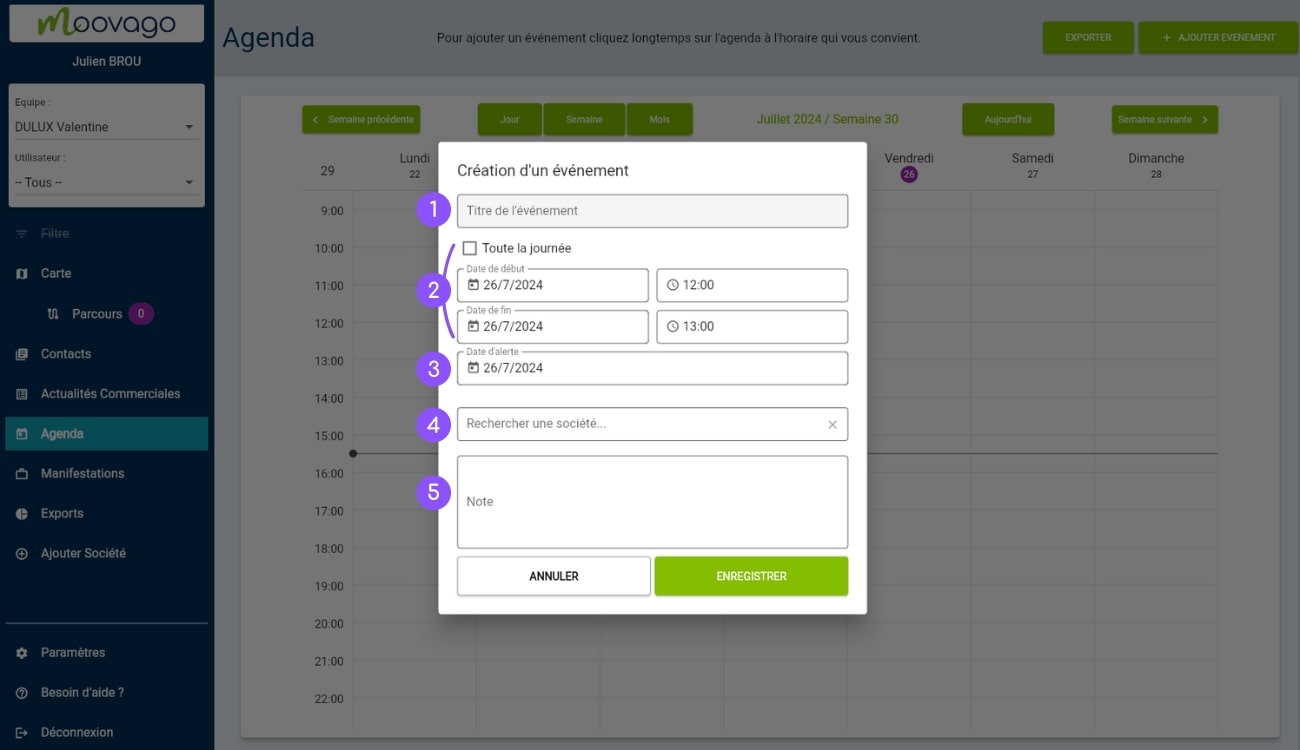
Event title: the name you want to give to your event,
Date selection information :
All day” box: indicates that an event takes place throughout the day. Once ticked, the “Start time” and “End time” boxes disappear,
Start date and time: the date and time when the event begins,
End date and time: the date and time when the event ends,
Alert date: allows you to define a date on which Moovago will remind you of this appointment,
A company search and selection field: allows you to search for a company and link it to this event. This simple operation is essential:
- To maintain your customer relations history: your events will be stored in the corresponding company files (“Events / Appointments” section).
- To view your appointments on the map: use your company’s postal address (yellow “Event” marker in the legend).
- To help you organize your routes, you can use your companies’ postal addresses to create a round based on all the appointments scheduled for a given day.
A Note field: a text field for specifying background information, topics to be discussed at the meeting, etc.
If you select a company using field 4, other elements will appear:
The company’s postal address,
“Assign to”, accompanied by a drop-down menu (if other users are linked to your session): lets you choose which user within your session will carry out this appointment,
“Contact persons”: tags allow you to quickly define which contact person within the company will be your contact during the event (the floor manager, the manager, the purchasing manager…).
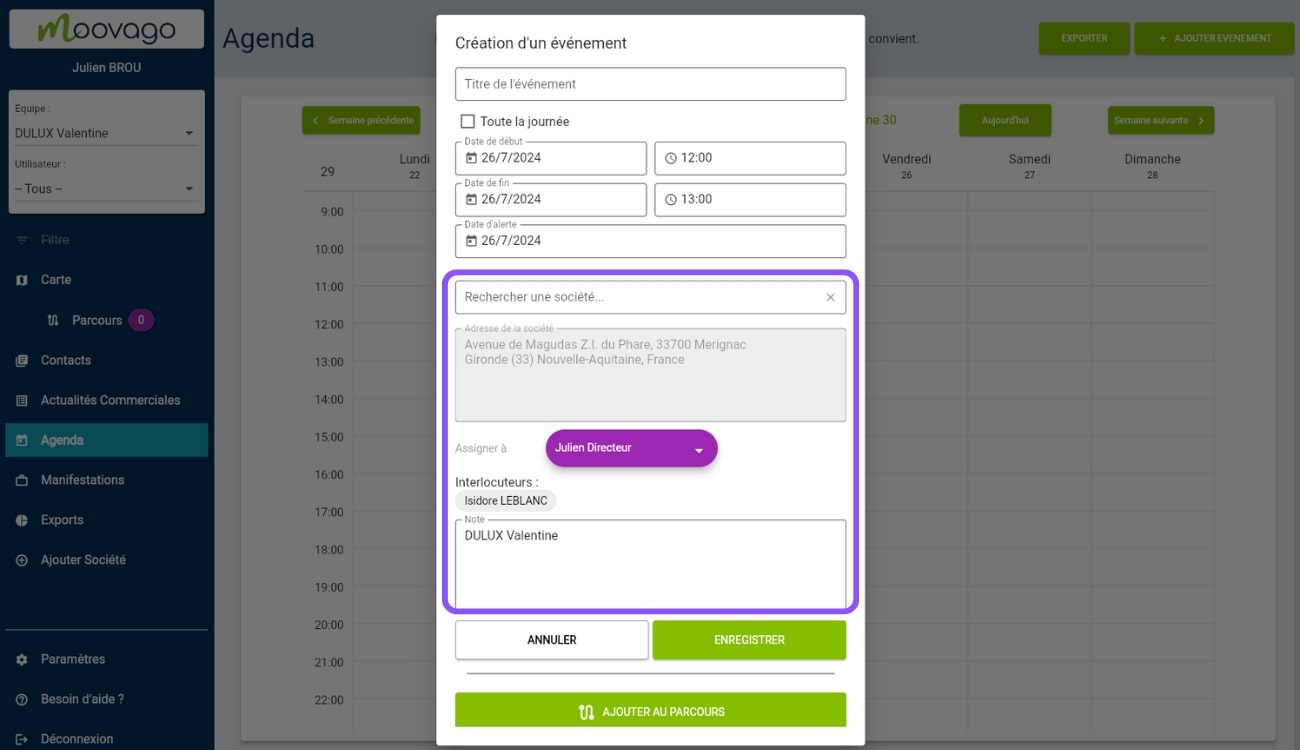
Once you have finalized your entry, click on Save.
The event is then displayed in your calendar. In a team, in company / admin view, the dot of the user responsible for the event is displayed in the top right-hand corner of the event insert. The color of the event represents its status: green if the linked company is a customer, blue if the linked company is a prospect and gray if the event is not linked to a company.
Modify or delete an event from the calendar
To edit an event from the calendar, click on it.
The pop-up window that appears summarizes the event, displaying its title, owner, company address, date and time, and associated principal. It also contains action buttons:
- Modify: to modify the event,
- Delete: to delete the event,
- Go to company : to access the company file,
- OK: to close the window.
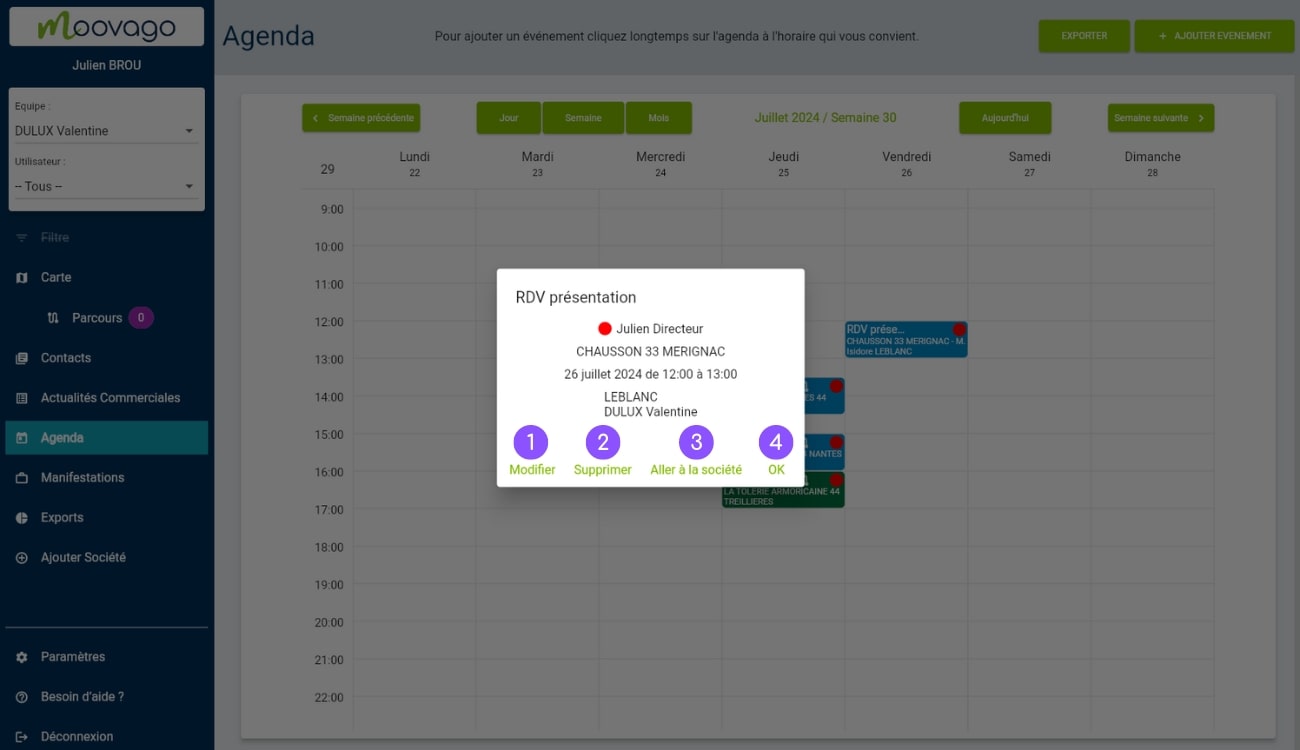
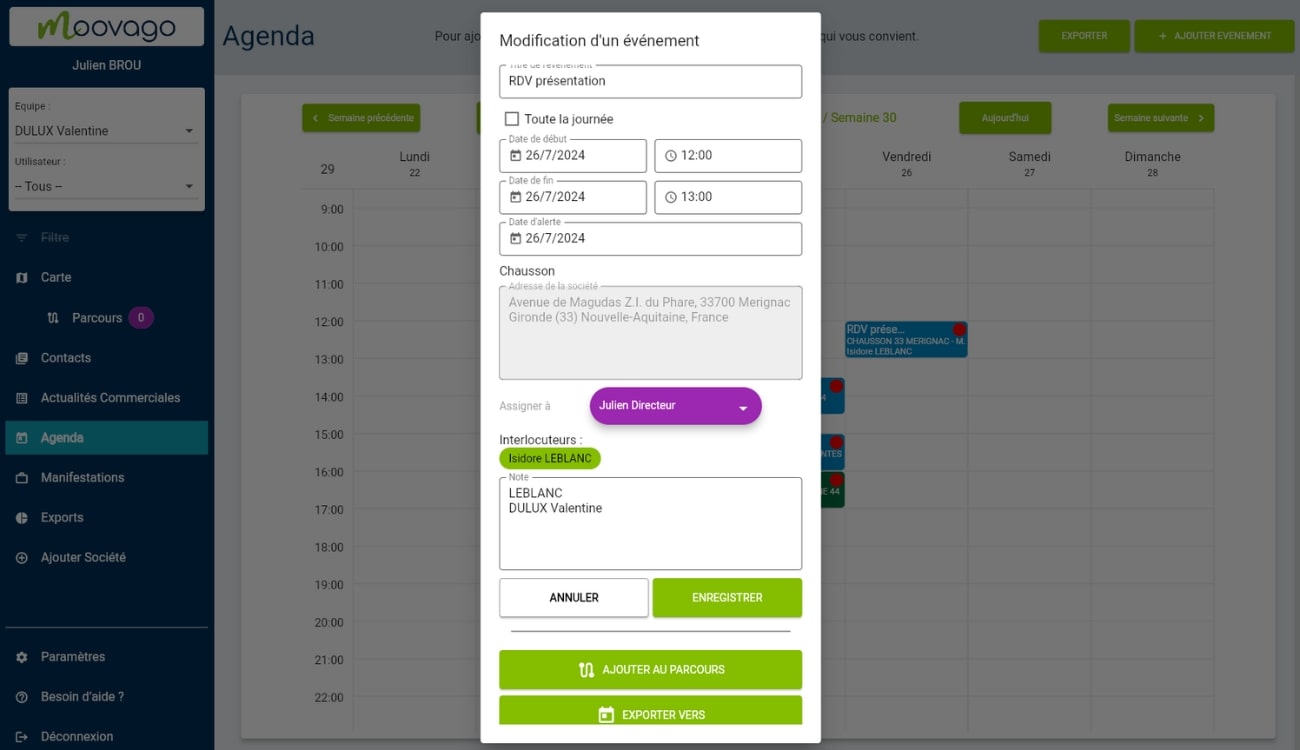
To modify the event, click on the “Modify” button (button 1). In the window that opens, you can change all the elements previously filled in during creation, with the exception of the company linked to this event.
Scroll down to the bottom of this screen and you’ll find two more buttons:
Add to Route: to add this event as a stage in the Route (in the Creation section). You can find them by clicking on the “Creation” tab of “Parcours”.
Export to: allows you to export this calendar event to a calendar external to Moovago. Depending on your phone’s settings, it will redirect you to a default application, or ask you to choose the application of your choice.
View, create, modify or delete an event from a company file
An event can also be created, modified or deleted from a company file.
View and manage an event from a company file
In any company file, you’ll find a RDV / Events section. This consists of a button for adding new events, and a table showing all the events associated with this company file.
A tab allows you to view past events (History tab) or upcoming events (All tab).
On the web, events are displayed in a table, with each line corresponding to an event. On mobile devices, events are not displayed in a table, but are separated by a line.
For each line, you can quickly consult :
- Start dateand time,
- End date and time,
- The title of the event,
- Linked contact person,
- (In team mode) the event creator,
- (In team mode) the event recipient,
- (If you work with several principals/suppliers) the principal concerned by this event,
- And at the end of the line, a purple button with a calendar, allowing you to export the event to another calendar (depending on your phone’s settings).
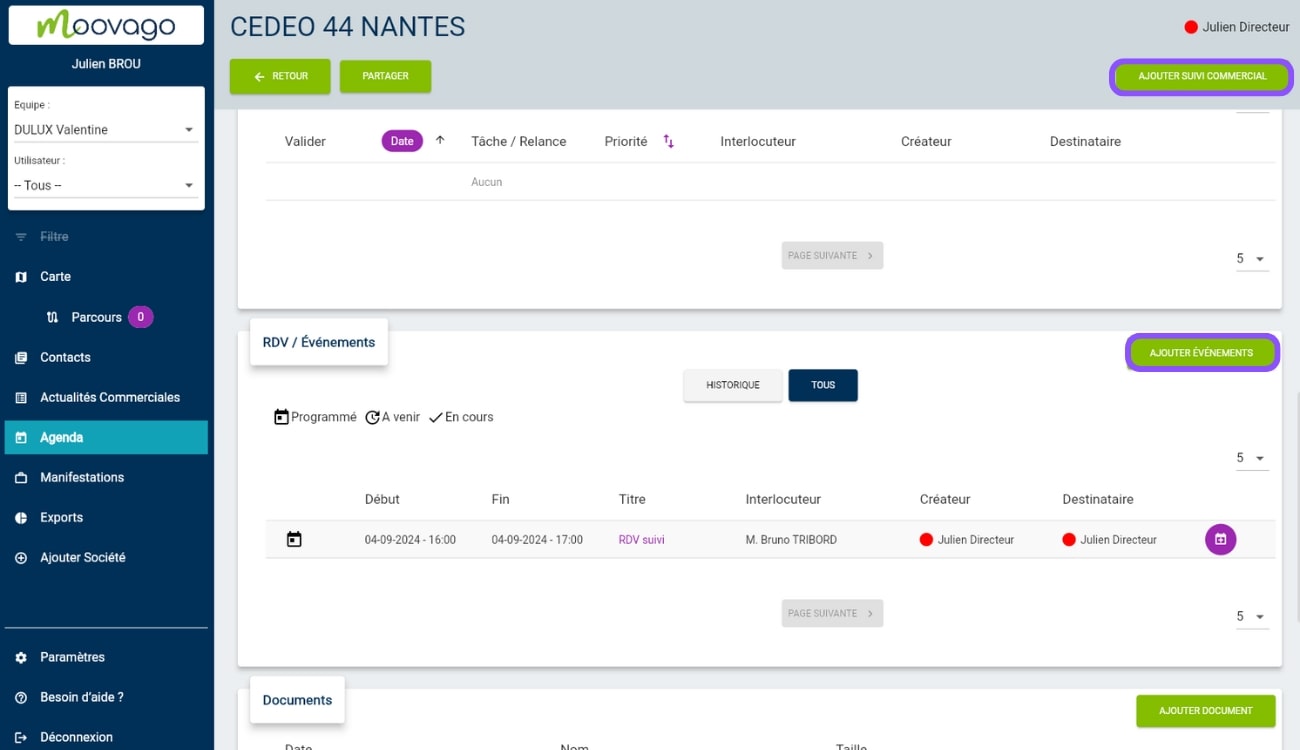
Modification of an event from a company file (on tablet and web browser)
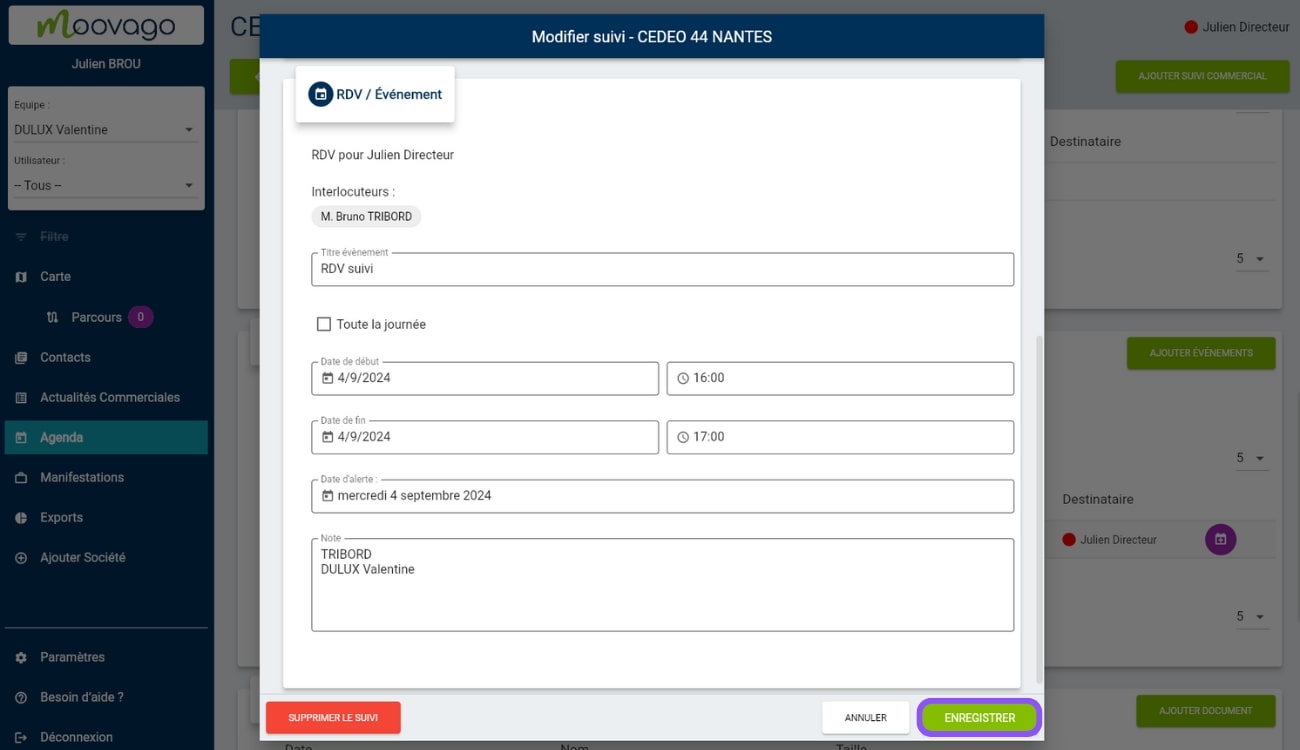
To modify an event from a company file, simply click on the event title in purple. The sales follow-up window linked to this event opens, and by navigating to the RDV / Event section, you can then modify the fields of your entry.
All the fields visible on this screen can be modified (the same fields as those shown above for the calendar). For example, you can :
- Change contact person,
- Change event date or time,
- Or use the notes to specify contextual elements.
When you have completed your changes, don’t forget to click on “Save”.
Deleting an event from a company file (on tablet and web browser)
To delete an event from a company file, follow the same procedure as for modifications:
- Click on the eventtitle (in purple),
- In the sales follow-up window, scroll down to the RDV / Events section and click on the “Delete event” button. Confirm to delete the event from the sales follow-up. If you’ve made a mistake, it’s still possible to go back by clicking on the “Restore event” button, which will cancel the deletion and restore your event.
Create an event from a company file
To create an event from a company file, there are a number of different options, depending on your situation.
- If the event you wish to create is related to an existing sales follow-up item, we advise you to use the existing sales follow-up for this item.
- If the event to be created has nothing to do with any other existing sales follow-up element, you’ll need to create a sales follow-up element.
Example:
You wish to create a report linked to an appointment you have just completed. You then need to reopen the sales follow-up for this item to enter an associated report. Each time you reopen the report, you'll have the report in front of you, and vice versa.
Read our article on sales follow-up to find out more.
Case 1: Adding an event to a new sales follow-up
From a company file, you can create an event as part of a new sales follow-up in two ways:

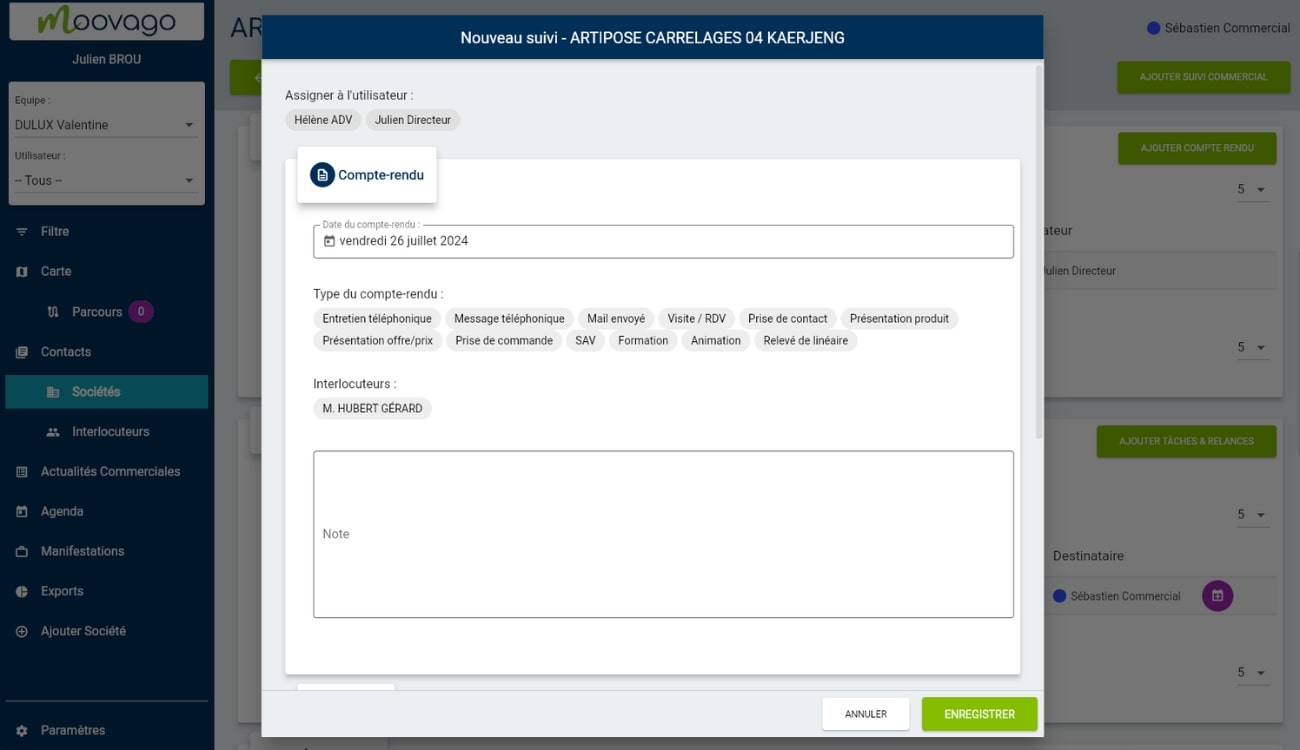
Click on the “Add sales follow-up” button in the top right-hand corner of the file (not available on cell phones): a blank sales follow-up window will open, and you will need to navigate to the bottom of the window to access the “Appointments / Events” section, then click on “Add an event“.
Click on the “Add events” button in the top right-hand corner of the “Appointments/Events” section of the company file. This screen takes you directly to the “RDV / Evénement” section of the sales follow-up: all you have to do is start entering data.
Case 2: adding an event to an existing sales follow-up
If, however, you wish to add an event to an existing sales follow-up, start by clicking on the title of the existing follow-up item. This will open the corresponding sales follow-up sheet. There, you can view the existing follow-up item(s), then scroll down to the RDV / Events section to add a new event.
How do I fill in the fields to create a new event?
The fields to be completed to create your event via sales follow-up are identical to those presented in the first part (for creation from the agenda). The only difference is that you no longer have to specify the company to which your appointment is attached: by default, it will be the company from which this sales follow-up was created.
You’ll find, in order :
The choice of the contact person you will meet at the event (choose from the contacts listed in the company file),
The title of the event,
An “All day” checkbox,
Choice of start and end dates and times,
Choice of alert date for this event (by default, the day of the event),
A note field to specify what you want about this event.
If you work with several principals/suppliers, don’t forget to enter the principal concerned by this event. On whose behalf do you intend to visit this customer? Go to the top of the sales follow-up form to indicate this via the drop-down menu.
When you’ve finished, click on Save.
Event management from sales news
With Moovago’s sales news, you’ll have a global view of all the sales follow-up you need to do.
All tracking elements are visible from the sales news. However, these take a different form on tablets and web browsers, and on cell phones.
On mobile, you’ll find all upcoming follow-up items (tasks, reminders and events), sorted according to different time scales:
To do: all items dated to the present day,
This week: all items scheduled for this week (from tomorrow until the end of the week),
The next 30 days (from tomorrow to the end of the month),
Later (later than 30 days).
Here’s how an event looks from mobile business news:
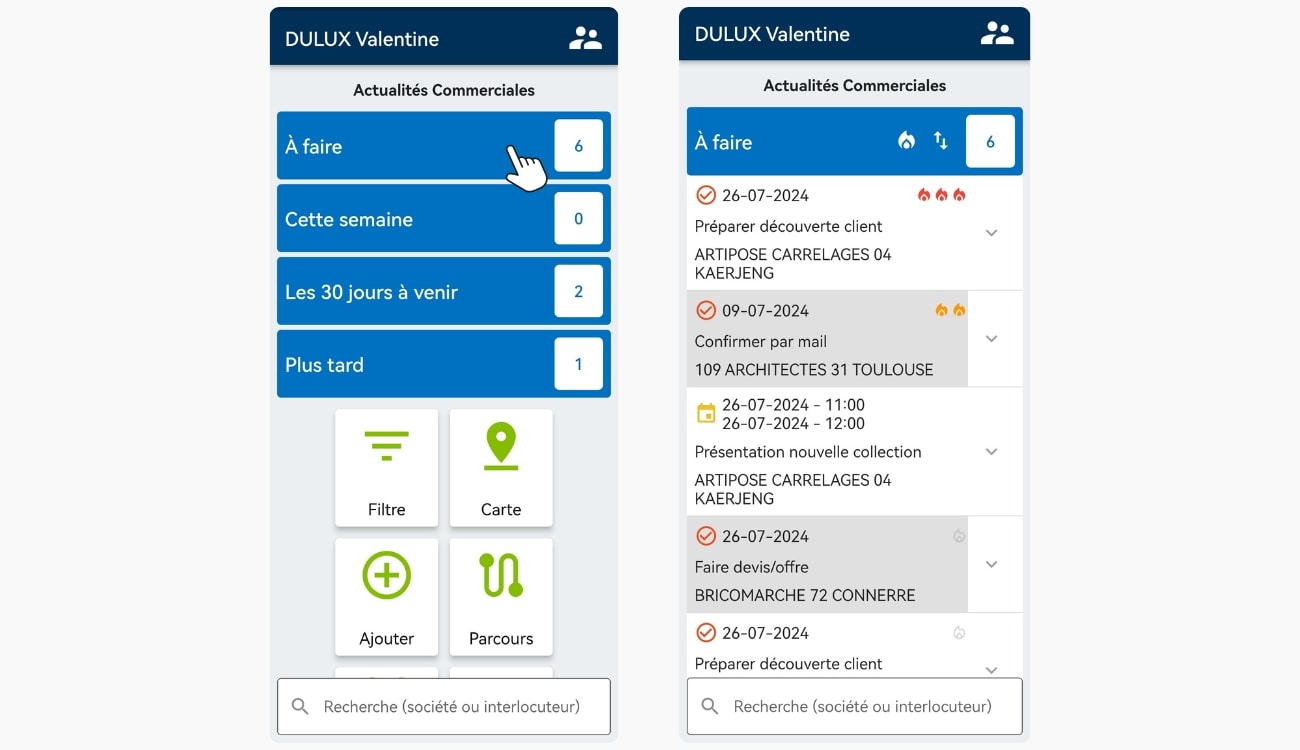
You’ll be able to view upcoming events assigned to you, and browse the company files associated with these events.
Note: it is not yet possible to modify an event or access its sales follow-up from the sales news. To perform these actions, you will need to go to the company file (see procedure explained earlier in this article).
On a tablet or web browserTwo tables enable you to view Tasks/Relays and Appointments/Events separately.
Apart from this detail, the section dedicated to events in business news is identical to the section dedicated to events in a company file (see organization and handling explained in the previous section).
Find out more about in our dedicated tutorial.
How do I synchronize my Moovago calendar with other calendars?
Since July 2024, Moovago has offered its users the option of synchronizing their Moovago calendar, and therefore all events, with two calendars of their choice:
Moovago with Google Calendar,
Or Moovago with Outlook.
This synchronization automatically transfers changes made in one calendar to the other. This connection can be activated in less than a minute from your settings, and enables you to bring all your events together in one place, so you can view and manage them more easily, and avoid double entry and wasted time.
