Updated on 12/11/2025.
An essential tool in sales life: the diary!
Moovago lets you synchronize your Moovago calendar with an external calendar of your choice (either Google Calendar or Outlook) in just a few clicks.
How does synchronization work? It’s simple: any additions, modifications or deletions made in one of the two linked calendars will be automatically carried over to the other.
Very practical for saving time and automating modifications between different software programs.
Let’s take a look at how to activate this synchronization between Moovago and Outlook.
Go to settings
To activate synchronization between Moovago and Outlook, go to your session settings :
- In the vertical menu at the bottom, click on “Settings”,
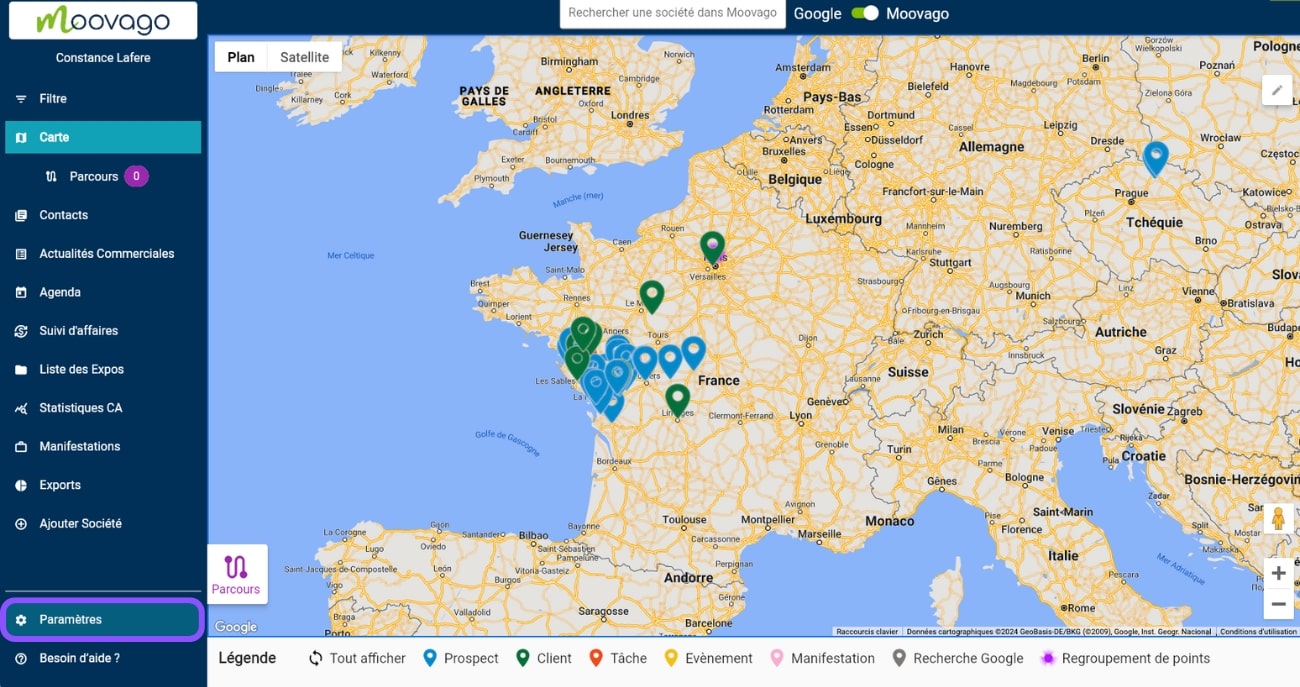
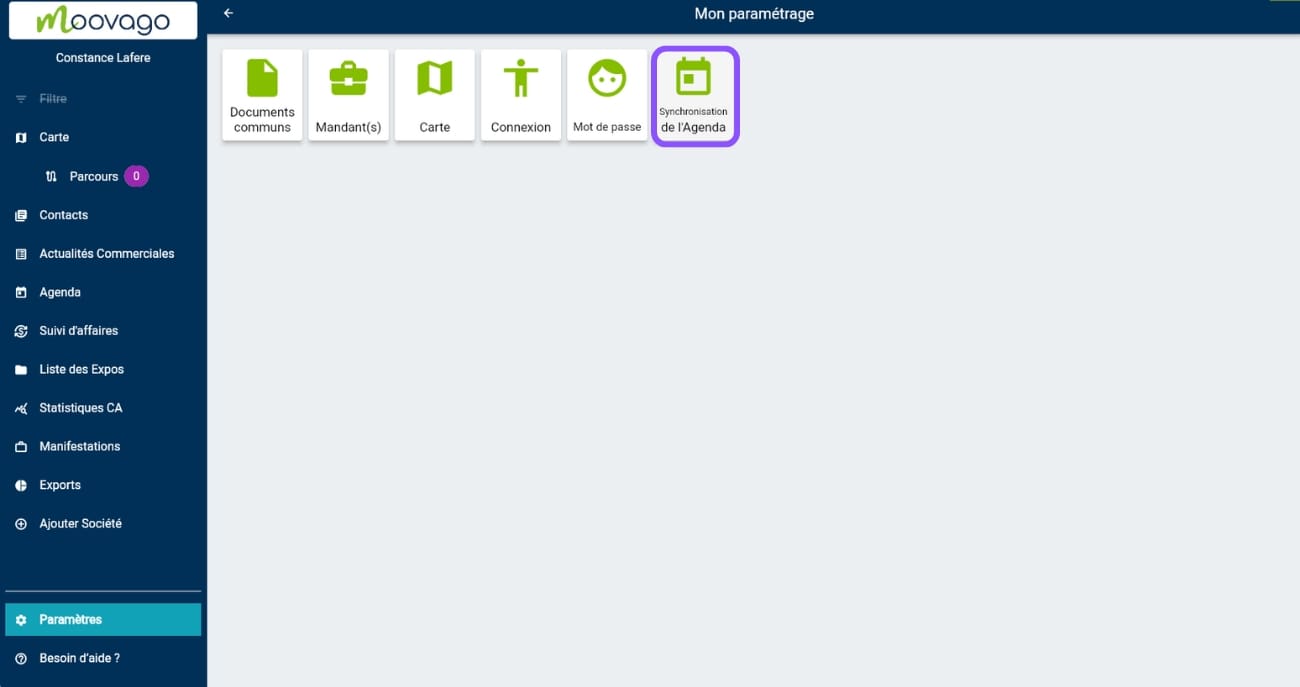
- Then, in the screen that appears, choose “My Session settings”,
- Finally, on the next screen, click on “Agenda synchronization”.
Start and configure synchronization with Outlook
Choose the calendar to synchronize
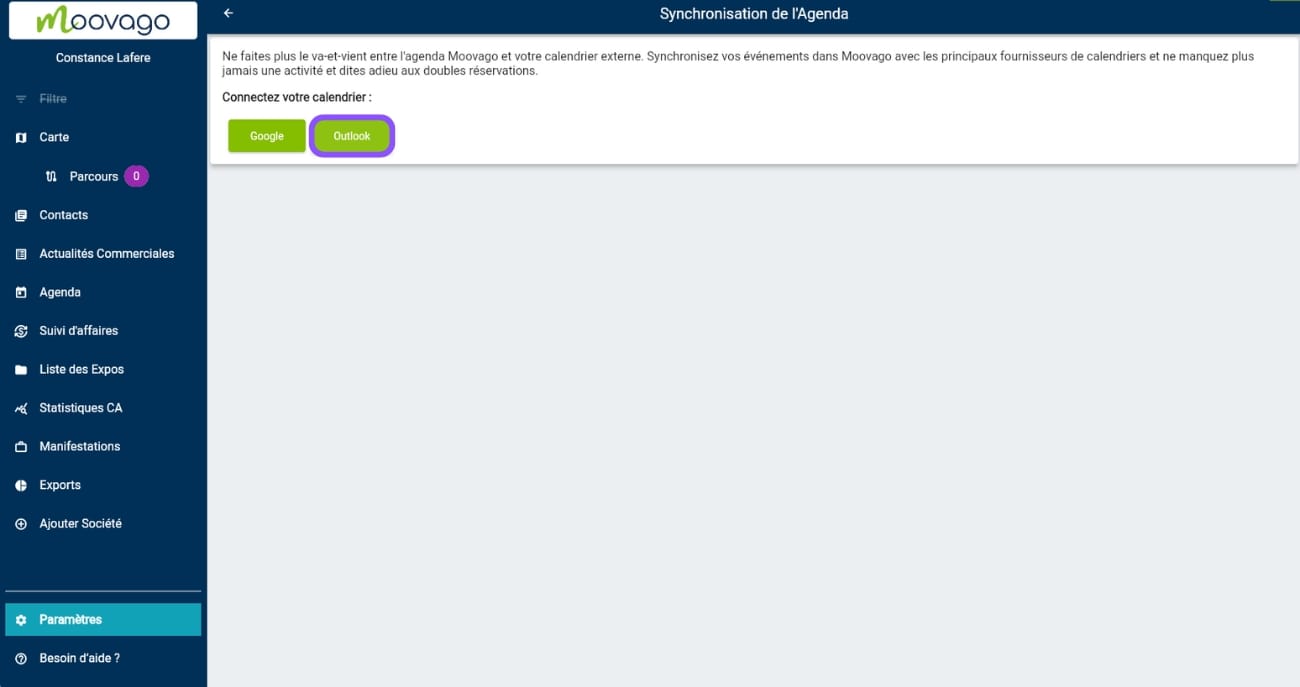
In the Calendar Synchronization screen, you can choose which calendar to synchronize.
Note that, for the moment, it is possible to synchronize a calendar with Moovago :
- with Google Calendar (see the tutorial on synchronizing with Google Calendar),
- or Outlook calendar.
To continue synchronizing your calendar with Outlook, click on the “Outlook” button.
Select the Outlook account to synchronize
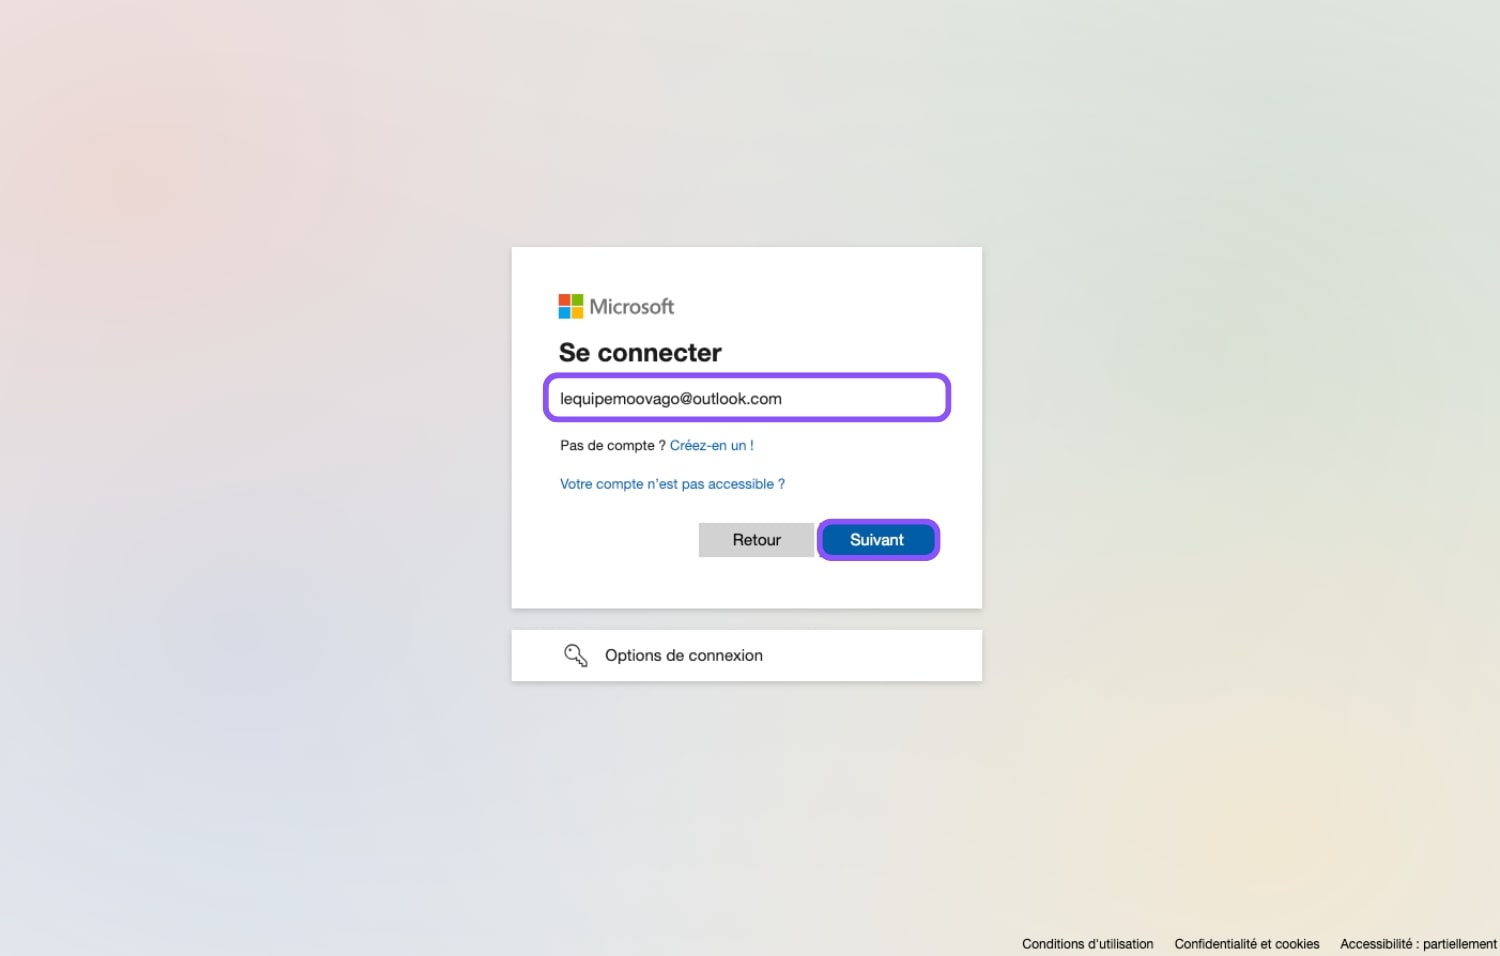
You will then be redirected to a new window, where you can choose the account whose calendar you wish to synchronize with Moovago.
In some cases, especially if you are already logged in to Microsoft on your browser, your account will be displayed directly on this screen. Simply click on it to proceed to the next step.
Alternatively, enter theemail address of your Outlook account, and on the next screen your account password.
Allow Moovago to communicate with your Outlook account
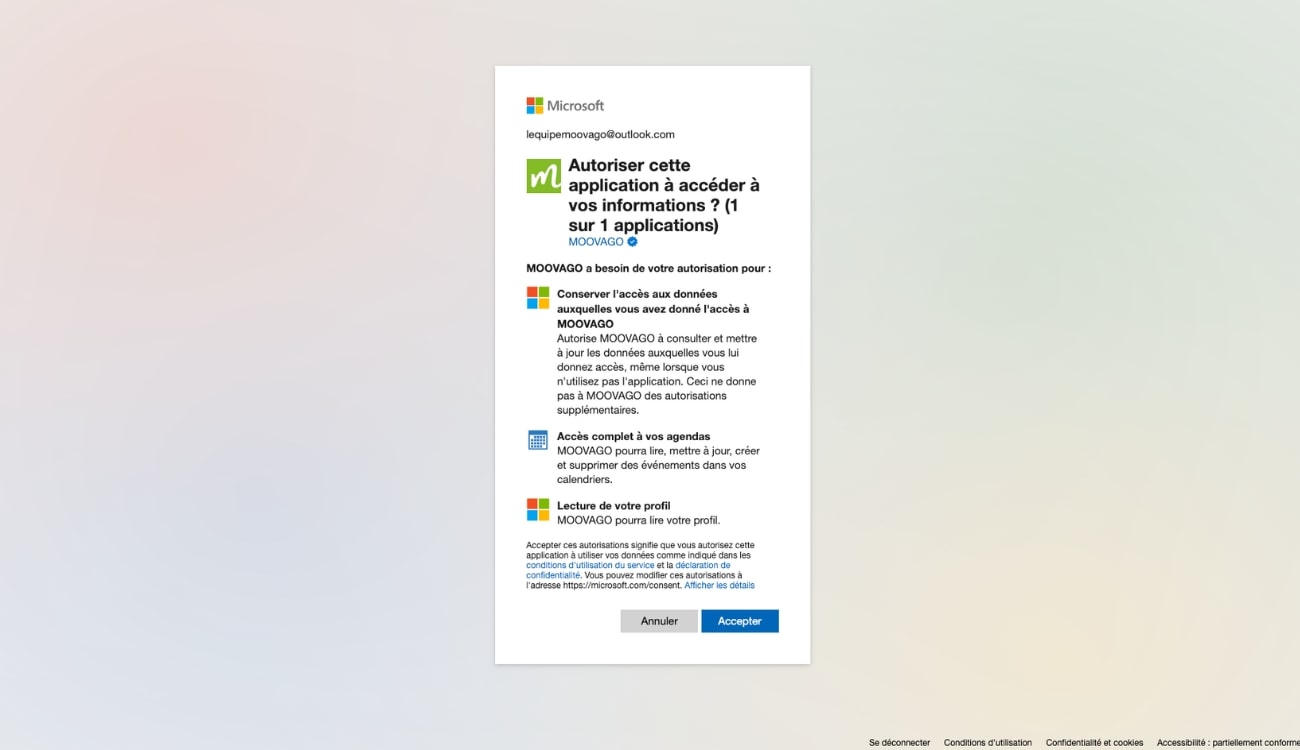
The all-important authorization stage!
In order to function properly, Moovago must have certain access rights to your Outlook account. The screen below allows you to view and grant these rights to Moovago. To validate synchronization, click on “Authorize”.
Otherwise (by clicking on Cancel), the synchronization cannot be finalized and you will be returned to a help page.
Choosing the right calendar to synchronize
Once you have granted Moovago the necessary authorizations, you will return to Moovago.
The Outlook account you’ve just added will be displayed, but you’ll need to enter some other information before the synchronization takes effect.
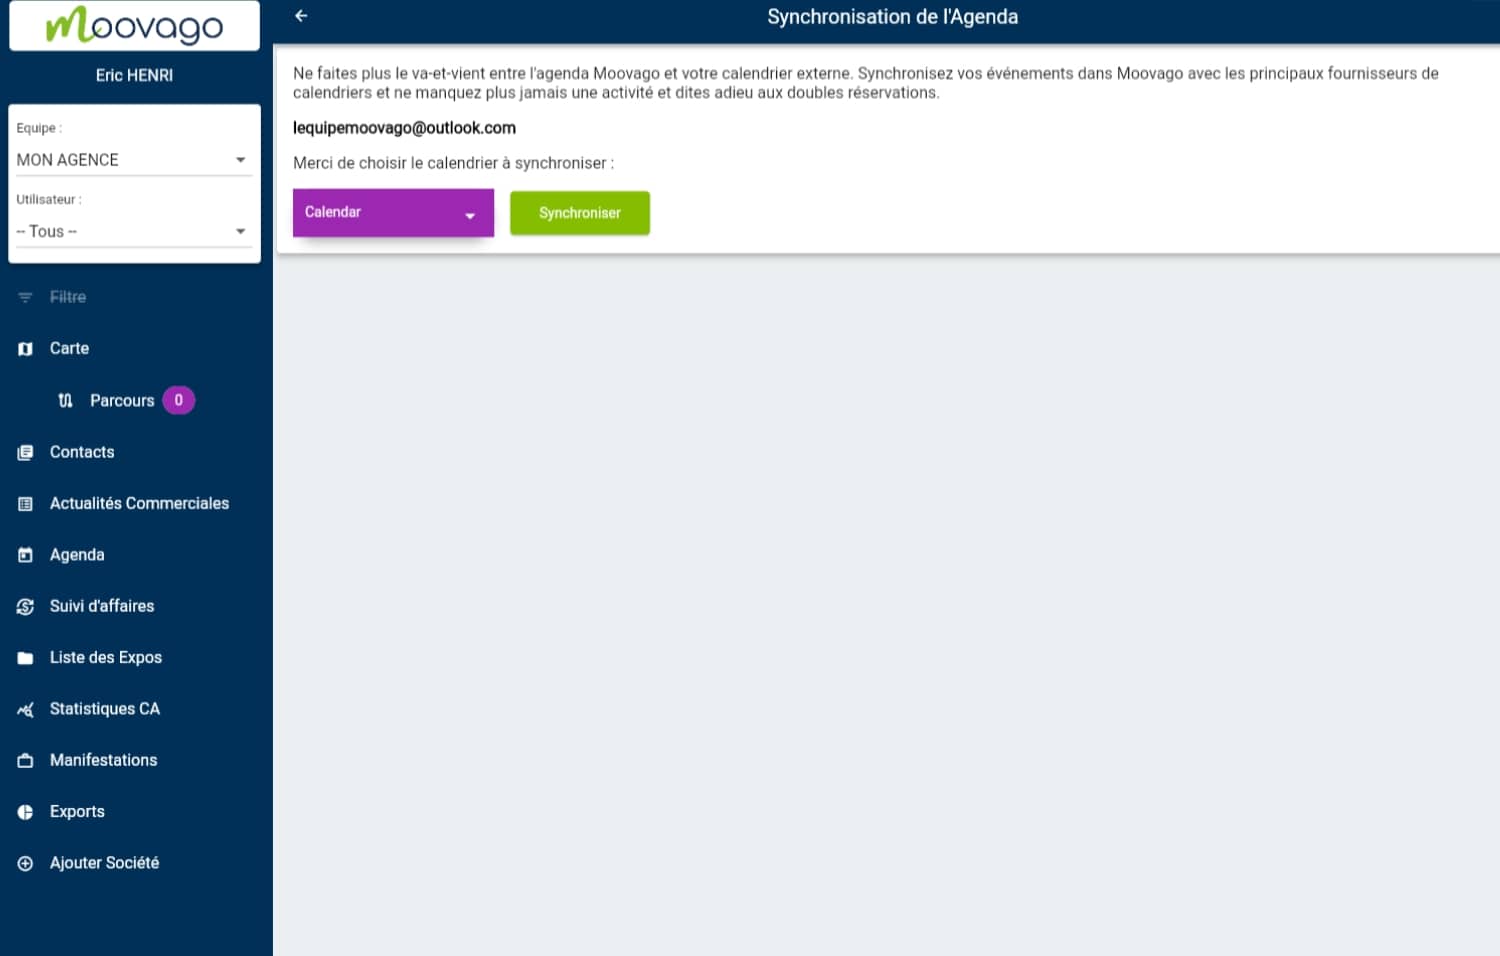
A drop-down menu (in mauve) displays all the calendars on the selected Outlook account, and lets you choose just one to synchronize with Moovago.
Let’s take a concrete example, with a fake Outlook diary below:
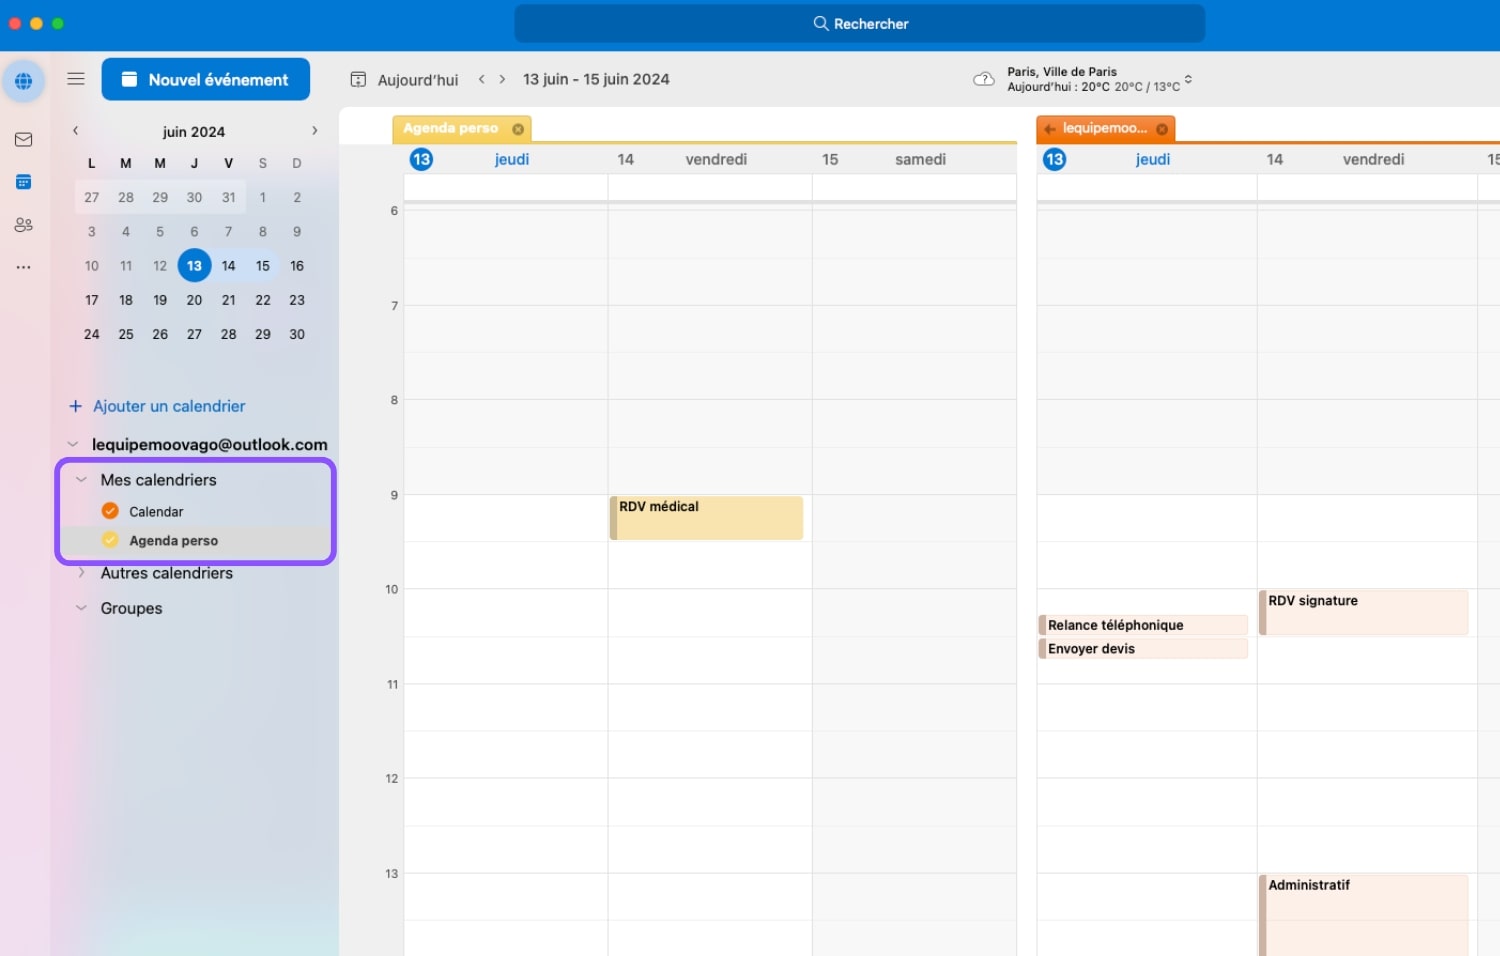
On this Outlook account, we have two calendars, corresponding to a professional calendar (called “Calendar” by default), and a personal calendar (“Agenda perso”). Here, we want to synchronize only business appointments with the Moovago calendar.
In the drop-down list, check that you have selected the right calendar (in our case, “Calendar”), before clicking on “Synchronize”.

How do you check that your calendars are synchronized?
Once you have validated the synchronization, an“active” message will be displayed below your calendar.
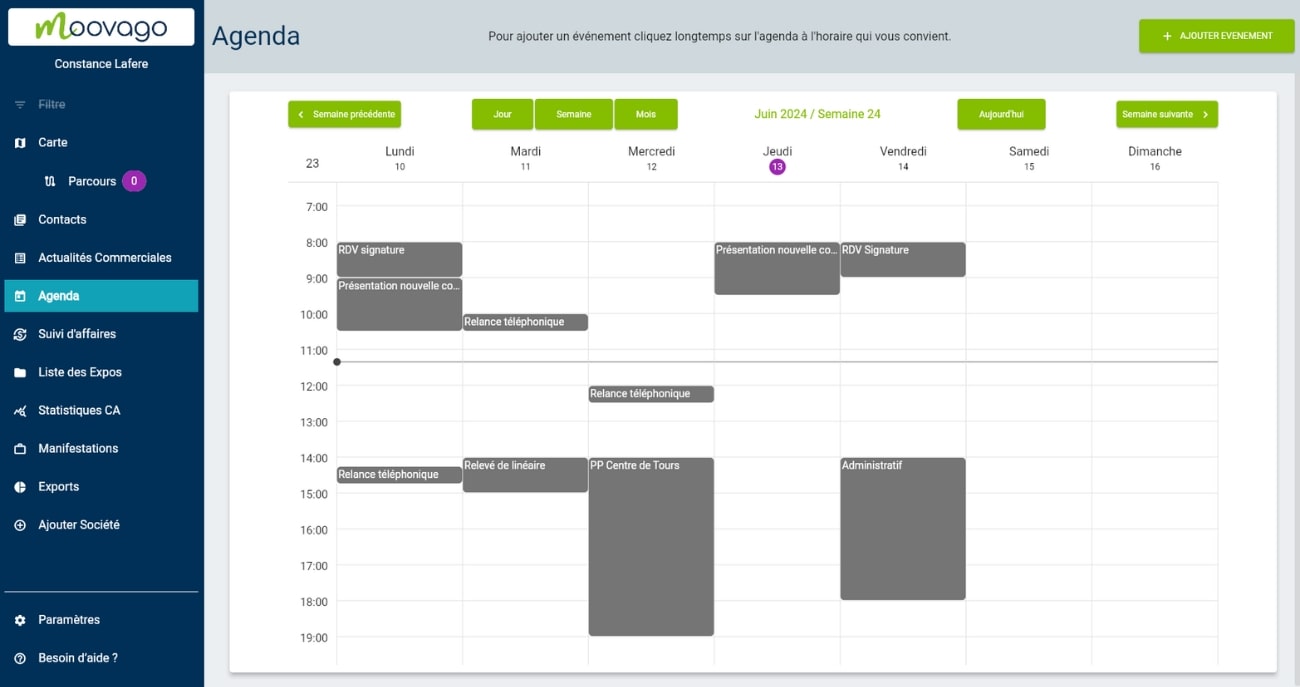
As a result, your Moovago calendar (in the “Agenda” tab of the menu) will display all synchronized calendar events in gray. A change in the Moovago calendar or Outlook calendar will trigger the same action in the other tool.
How can I remove calendar synchronization between Moovago and your Outlook calendar?
Calendar synchronization can be stopped at any time by returning to the same Settings screen.
To do this, click on the red “Delete synchronization” button.
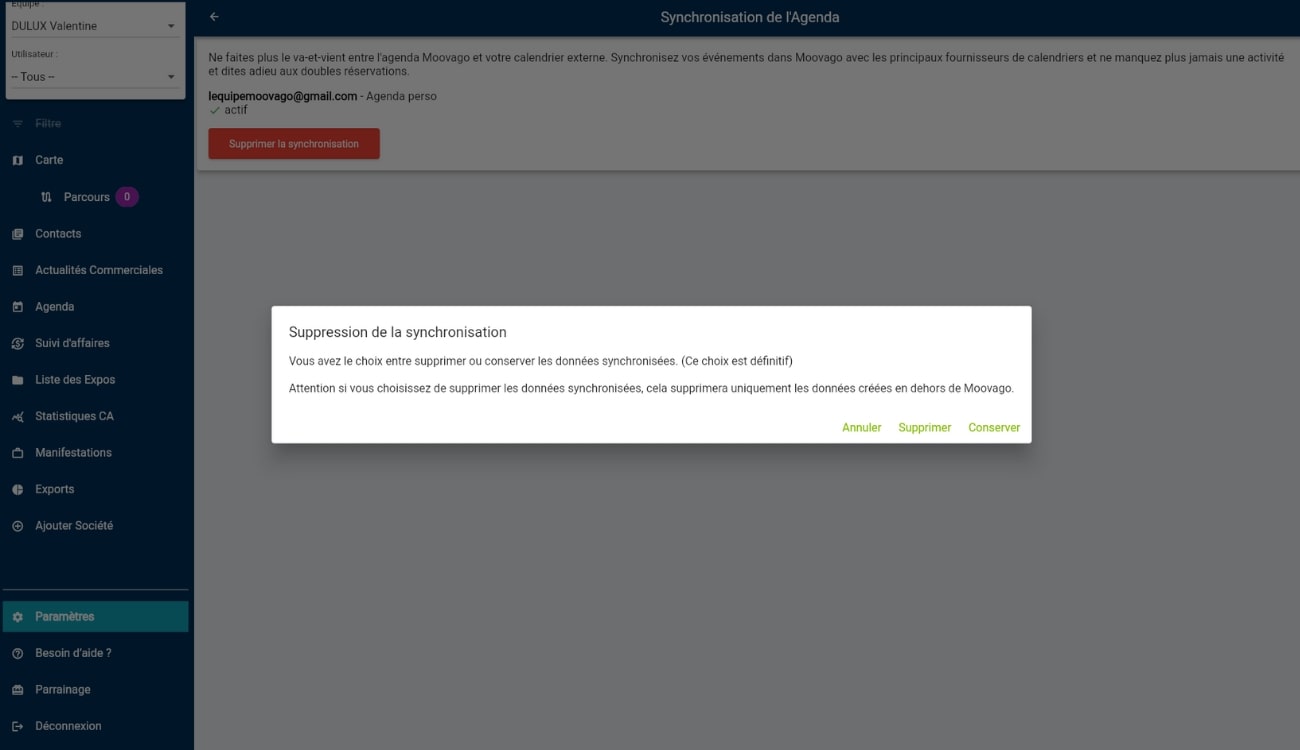
You have several choices:
- Click on “Delete”. This will delete the synchronization as well as the data created in Outlook.
- Click on “Keep”. You will delete the synchronization but keep the synchronized data in both calendars.
- Click on “Cancel”. You cancel your action and go back.
After deleting the calendar synchronization, it will no longer be displayed on the screen. Instead, you’ll see the same screen as before. You can set up another synchronization if you wish.
