Updated on 17/11/2025.
Sales routes are a key concern for traveling sales representatives!
Moovago’s tool for organizing sales routes is called “Routes”. Let’s take a look at what you need to know to get the most out of this tool.
Routes, the sales routes feature
What is Routes?
From the map or a list of customers, the Routes feature lets you create sales rounds, and optimize them to save the maximum amount of time on the road and fuel.
The aim of this tutorial is to show you how to get started with Routes.
What can you do with Routes?
Here’s a non-exhaustive list of quick features and actions to use within Routes, with links to articles that will take you further in its use:
- Create a sales round (a route) and save it,
- Add stages / companies to visit to a route (via map, company files, Google search or the lasso tool),
- See the route and optimize your trip,
- Modify or delete a route,
- Import appointments from the calendar,
- Export a route to Excel,
- View a route in Moovago or on Google Maps,
- Quickly find the mileage of one or more rounds,
- Use the route recorded during the round (on mobile).
Preparing a round in 5 steps with Routes
Open the Routes window
First of all, go to the Routes tab (accessible from the left-hand navigation menu).
You can quickly access a split view between the Routes window on the left and the map on the right. You can edit your route while browsing the map for new stages to add.
Create a route
Here’s how to create a route quickly:
1. Select companies to visit and add them to your itinerary.
You have several options:
- Select a marker already saved on the map and add it to your route from the pop-up window on the right,
- Add a company to the Route from its company file (green “Add route” button),
- Select all companies in an area with the Lasso tool,
- Find a new company to approach via a Google search and add it,
- Enter and add an address not yet registered in Moovago
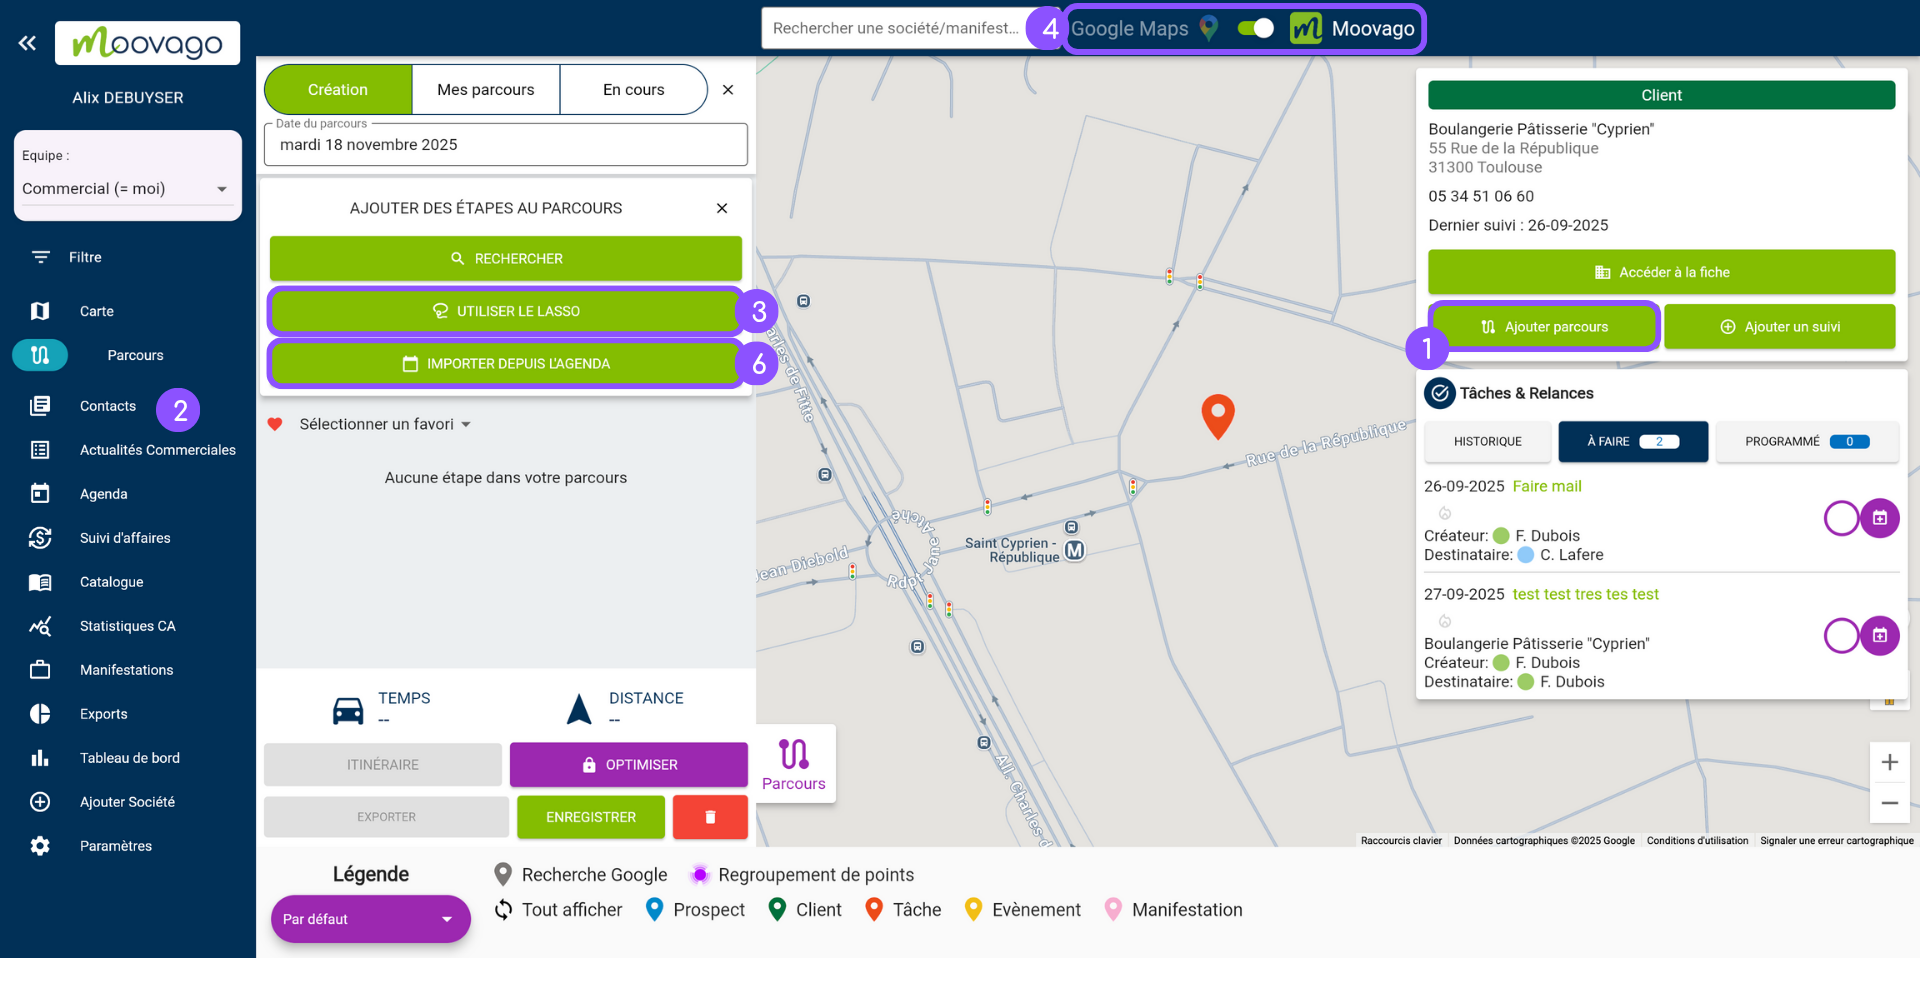
Tip #2: If you want to more easily search for certain types of customers, feel free to use custom map legends. This feature lets you customize the map legend according to your segmentation in Moovago (for example: all clients met at trade shows, or all prospects from a specific area…).
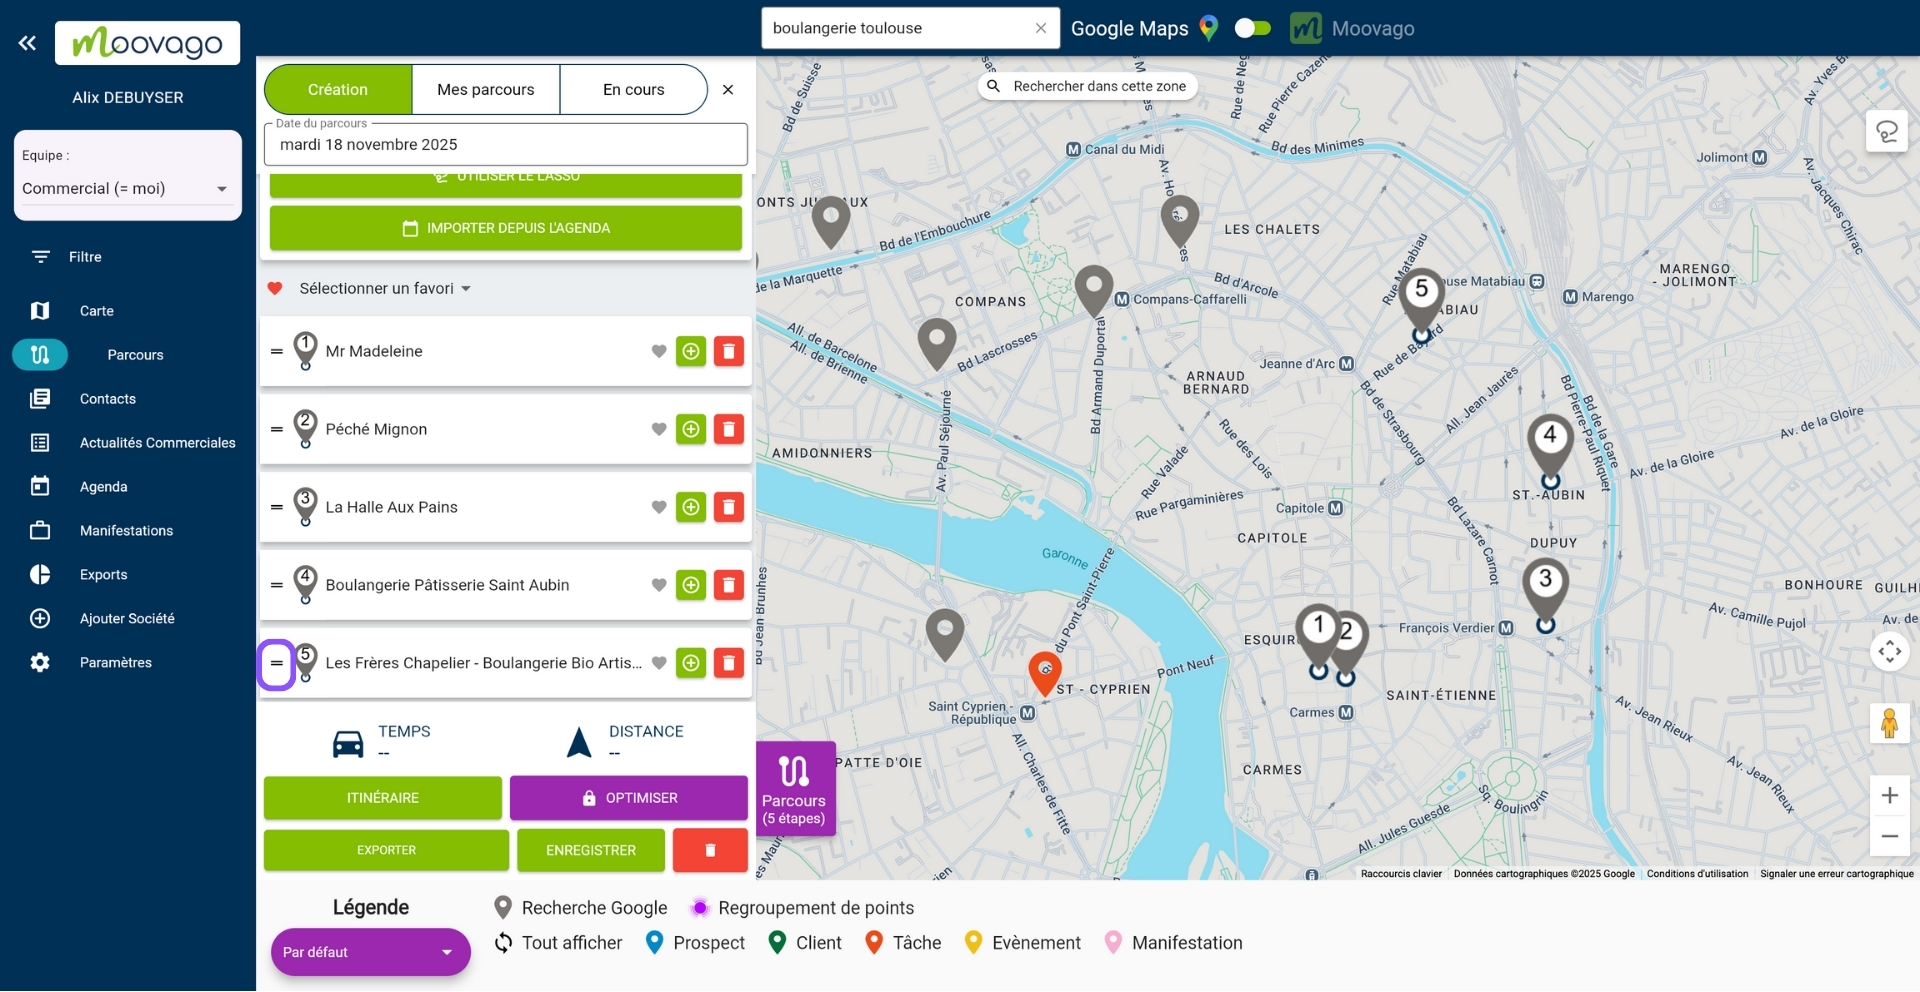
2. Companies added to the route are visible in the Routes window on the side. You can reorder the steps at any time by long-clicking the “=” icon next to a stage, then releasing it at the desired position in the stage list.
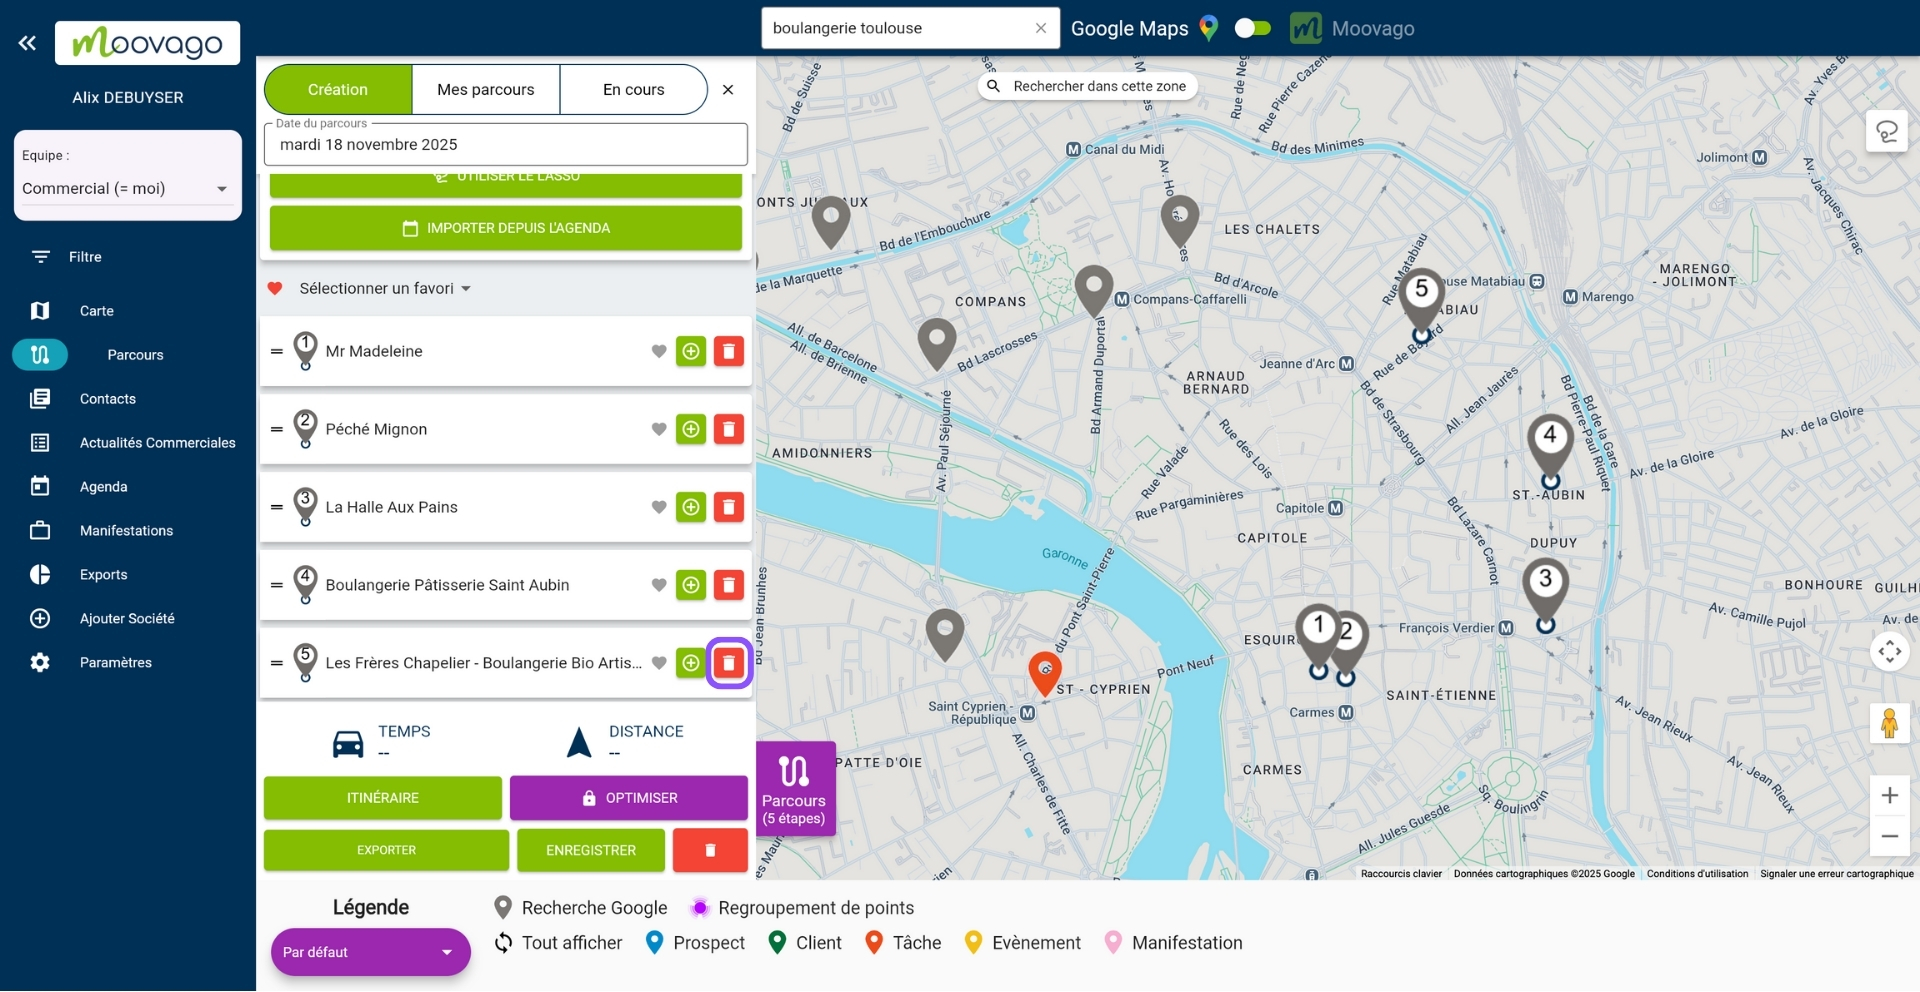
Use the trash can icon to delete a step :
3. Then click on “Itinerary” to see the route on the map, and have Moovago calculate journey times and distances for you.
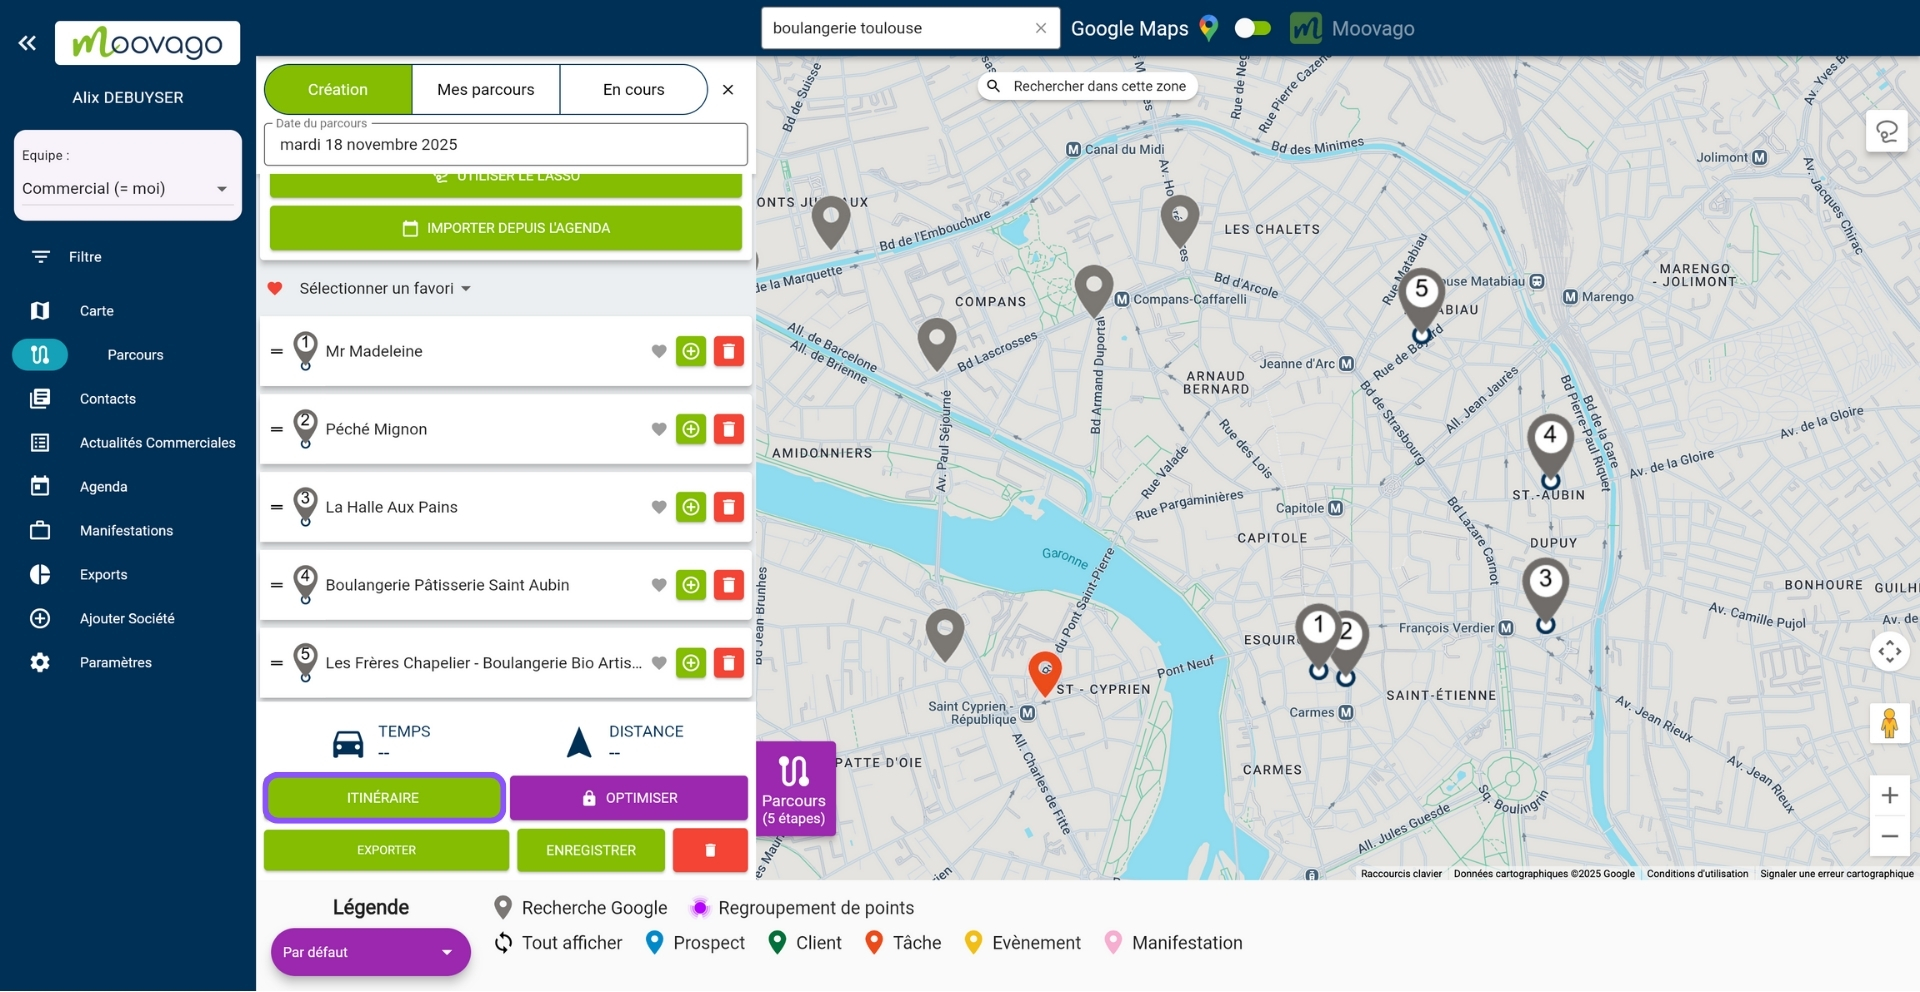
Two elements then appear: the itinerary of the Route on the map, and the information linked to this route (i.e. travel time and distance to cover in kilometers):
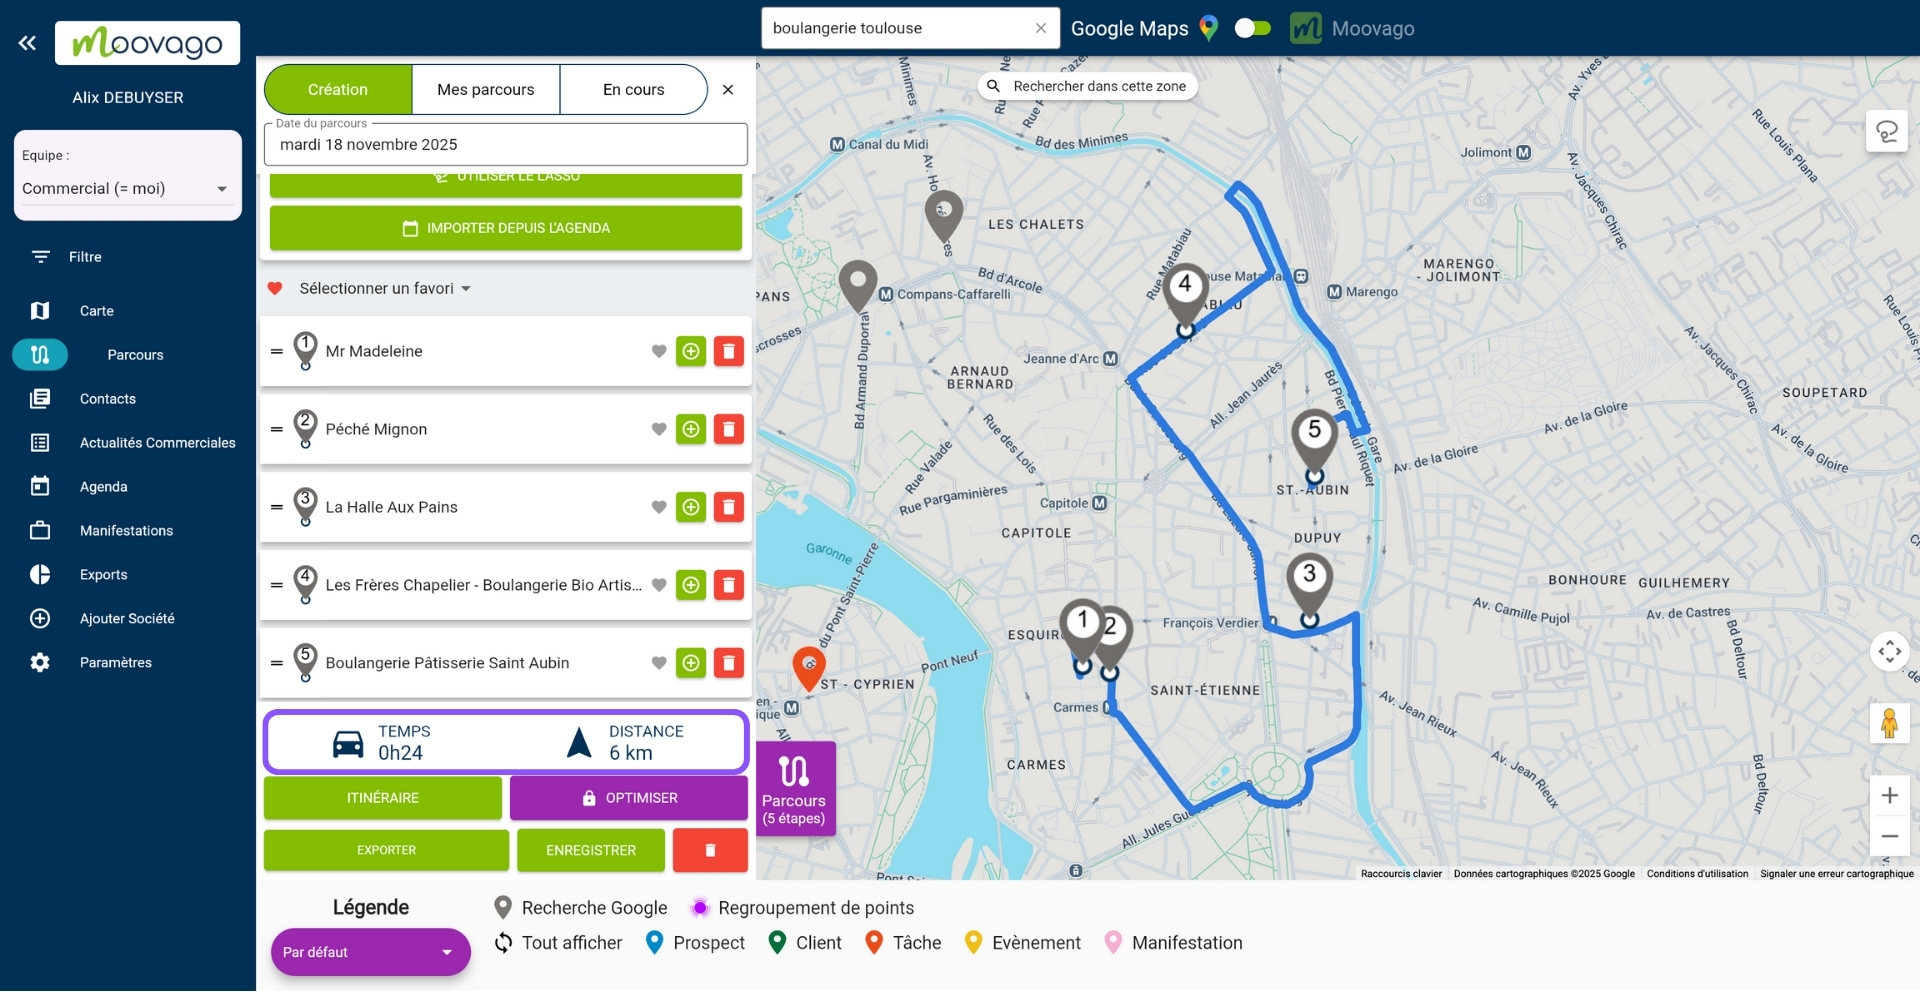
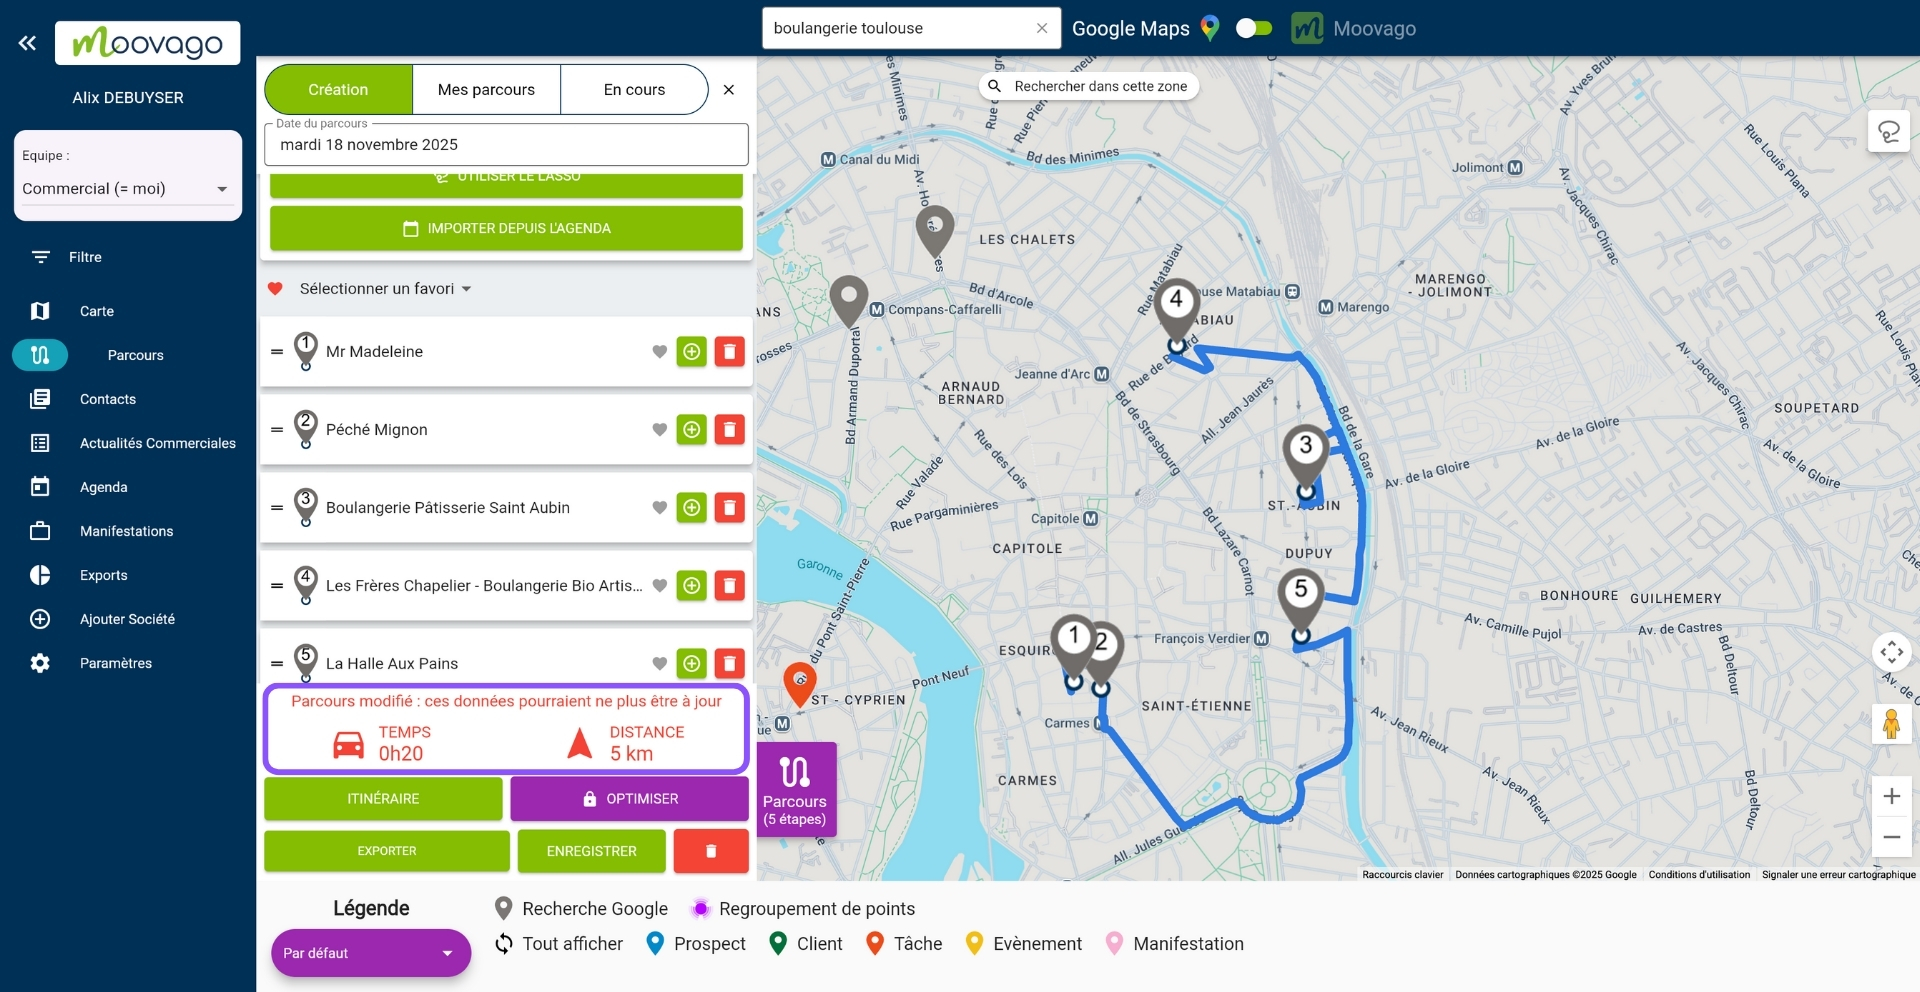
4. If the itinerary doesn’t make sense to you (for example, if it requires you to take detours or turn back), you can always optimize the order of the companies you visit by dragging and dropping.
Please note, however, that in the event of a modification, the route and route information will not be automatically refreshed. A message appears: “Route modified: this data may no longer be up to date”. To update them, click on “Route” again.
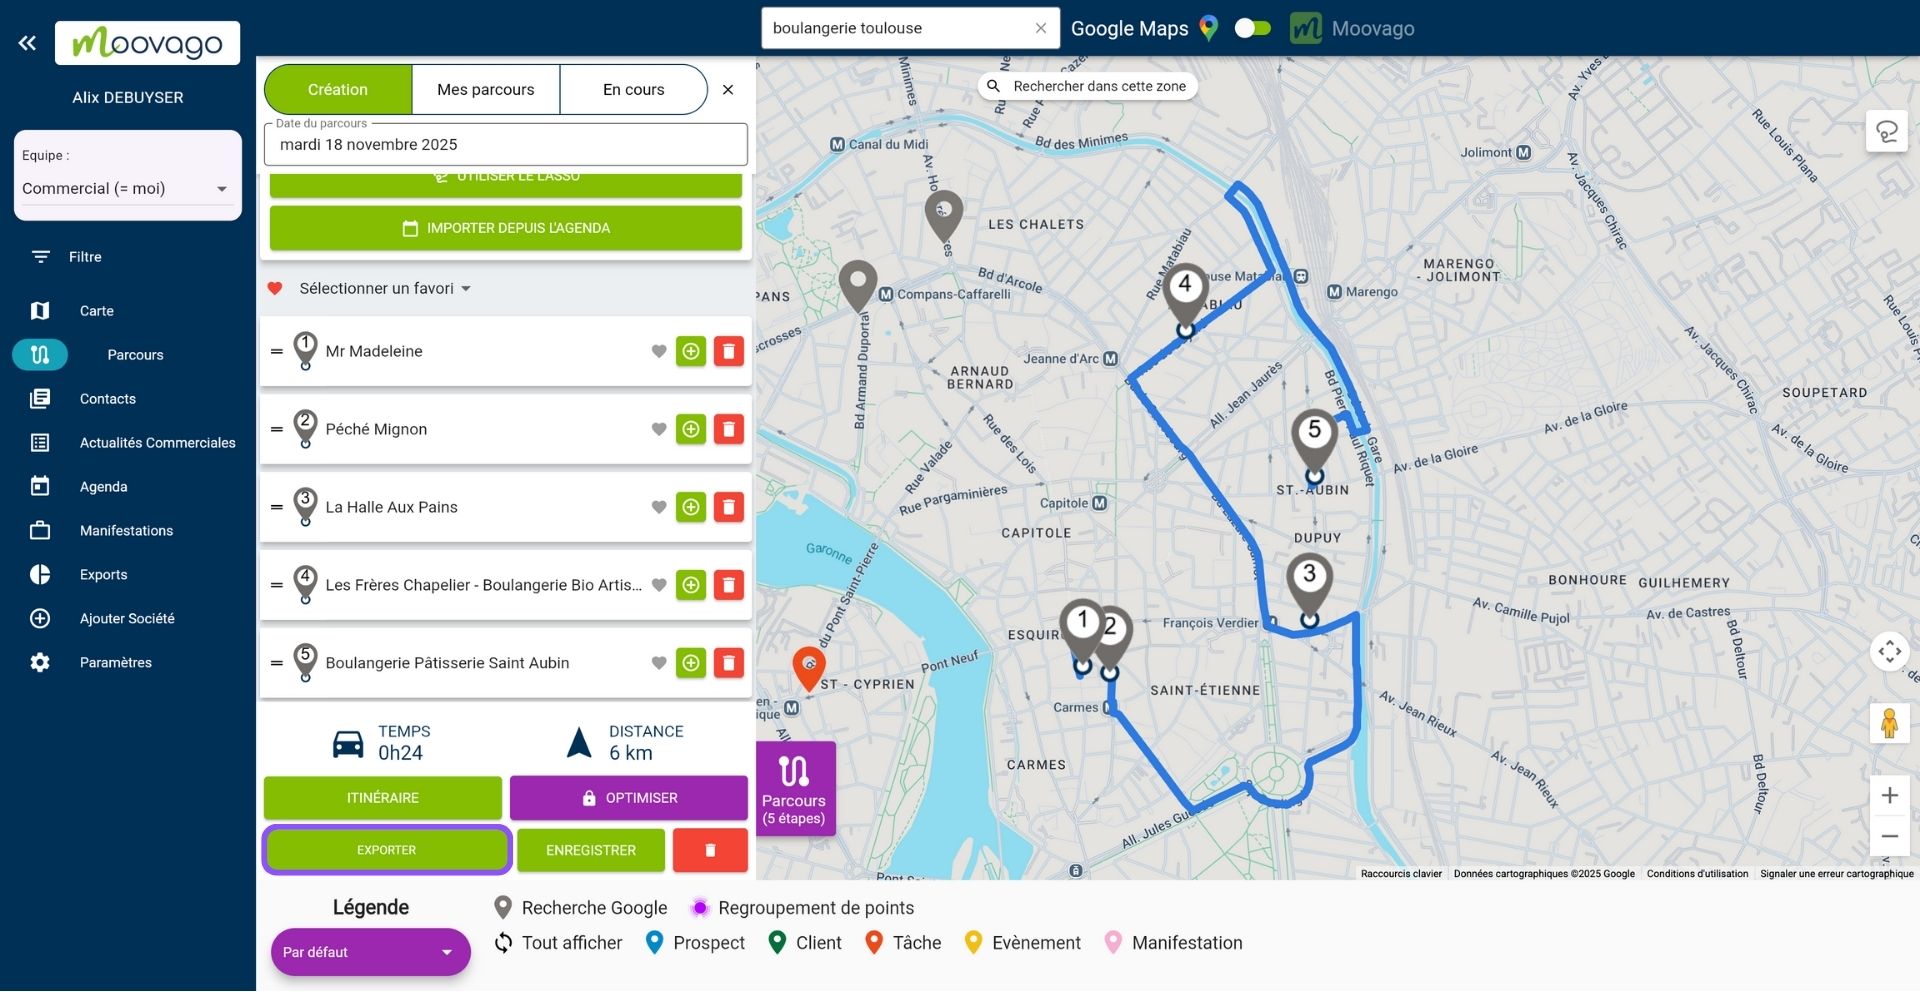
5. Once you’ve finished preparing your route, don’t forget to click on “Save” at the very bottom.
If you’ve made a mistake and want to start again, click on the red trash can icon at the bottom of the Route window. Please note that you will lose all the stages added to your route, the route information and the itinerary on the map.
Export the itinerary of a route to Google Maps or your calendar
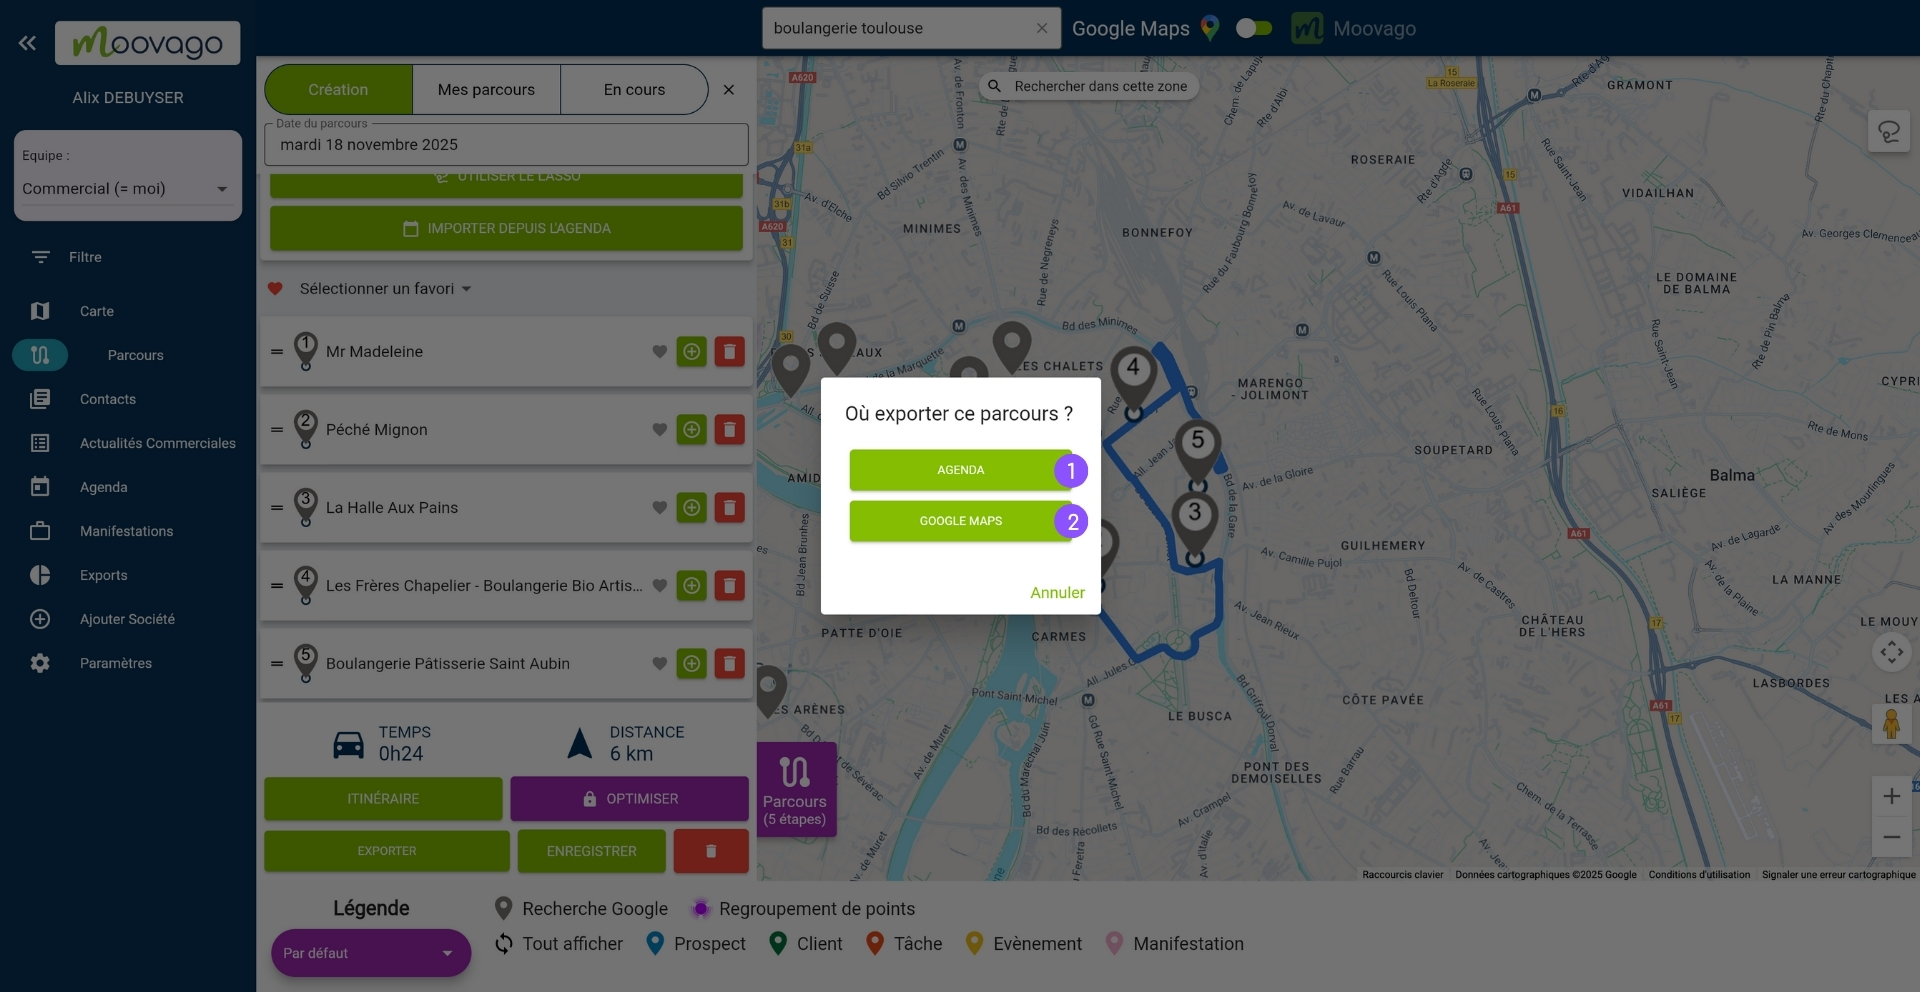
If you wish, you can view the itinerary of a route in Google Maps or in your online diary, by clicking on “Export” at the very bottom of the route window.
A pop-up window will then open, and you’ll be asked to choose whether you want to export your itinerary to a Calendar (1) or to Google Maps (2).
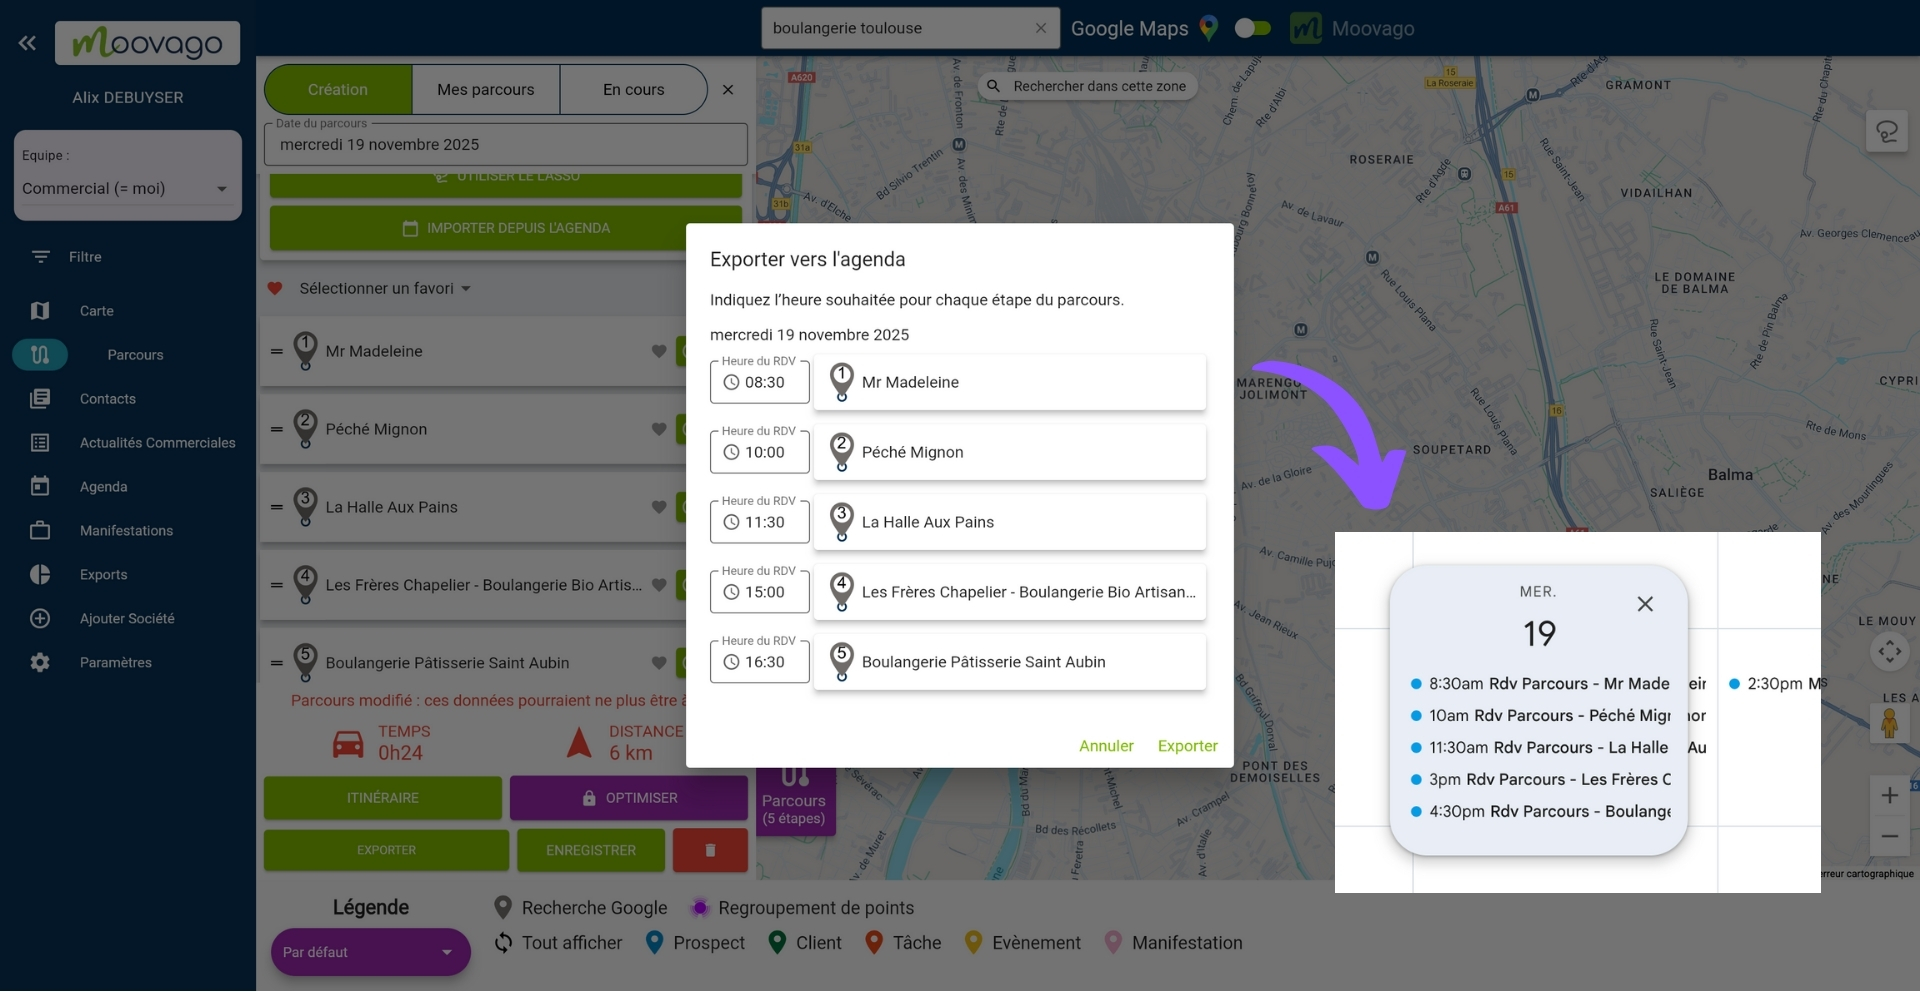
After clicking on “Calendar”, a window opens with details of your route. If you haven’t yet entered the times of your various stages, now’s the time to add this information.
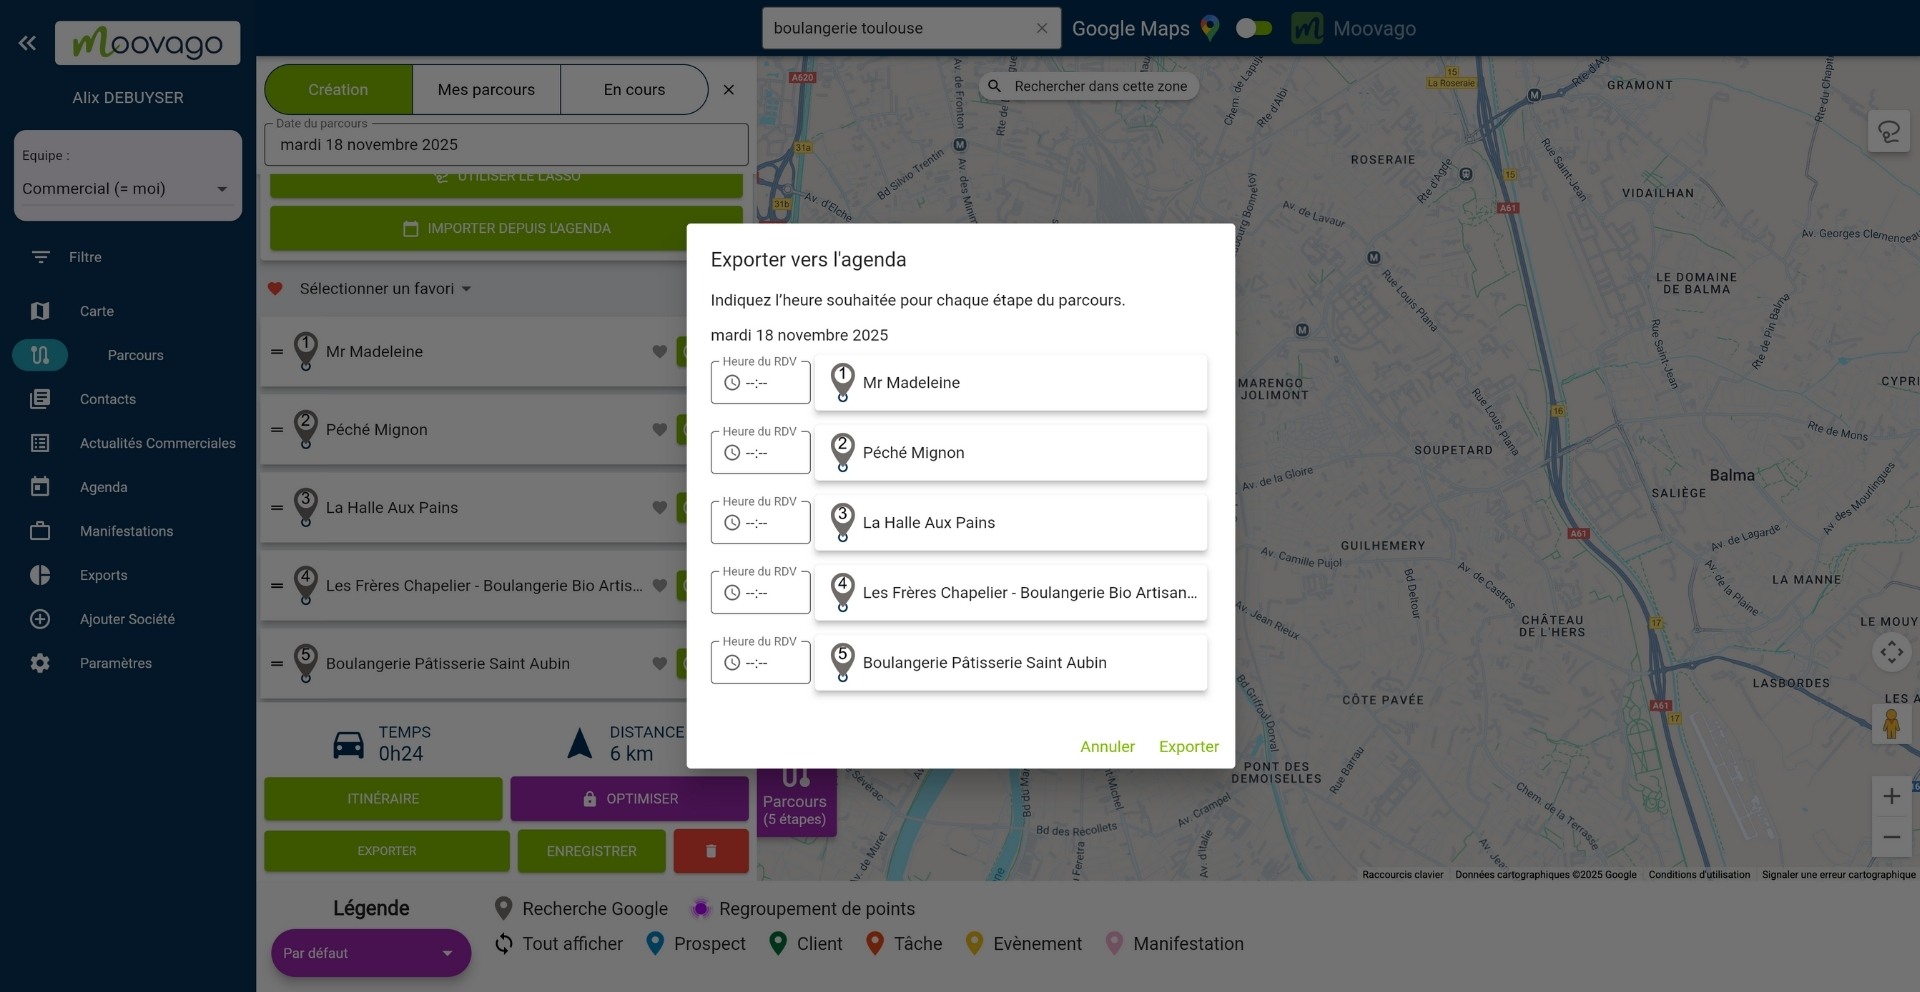
Then click on “Export”. Check your calendar before doing it a second time: you won’t be redirected, but the appointments have been exported.
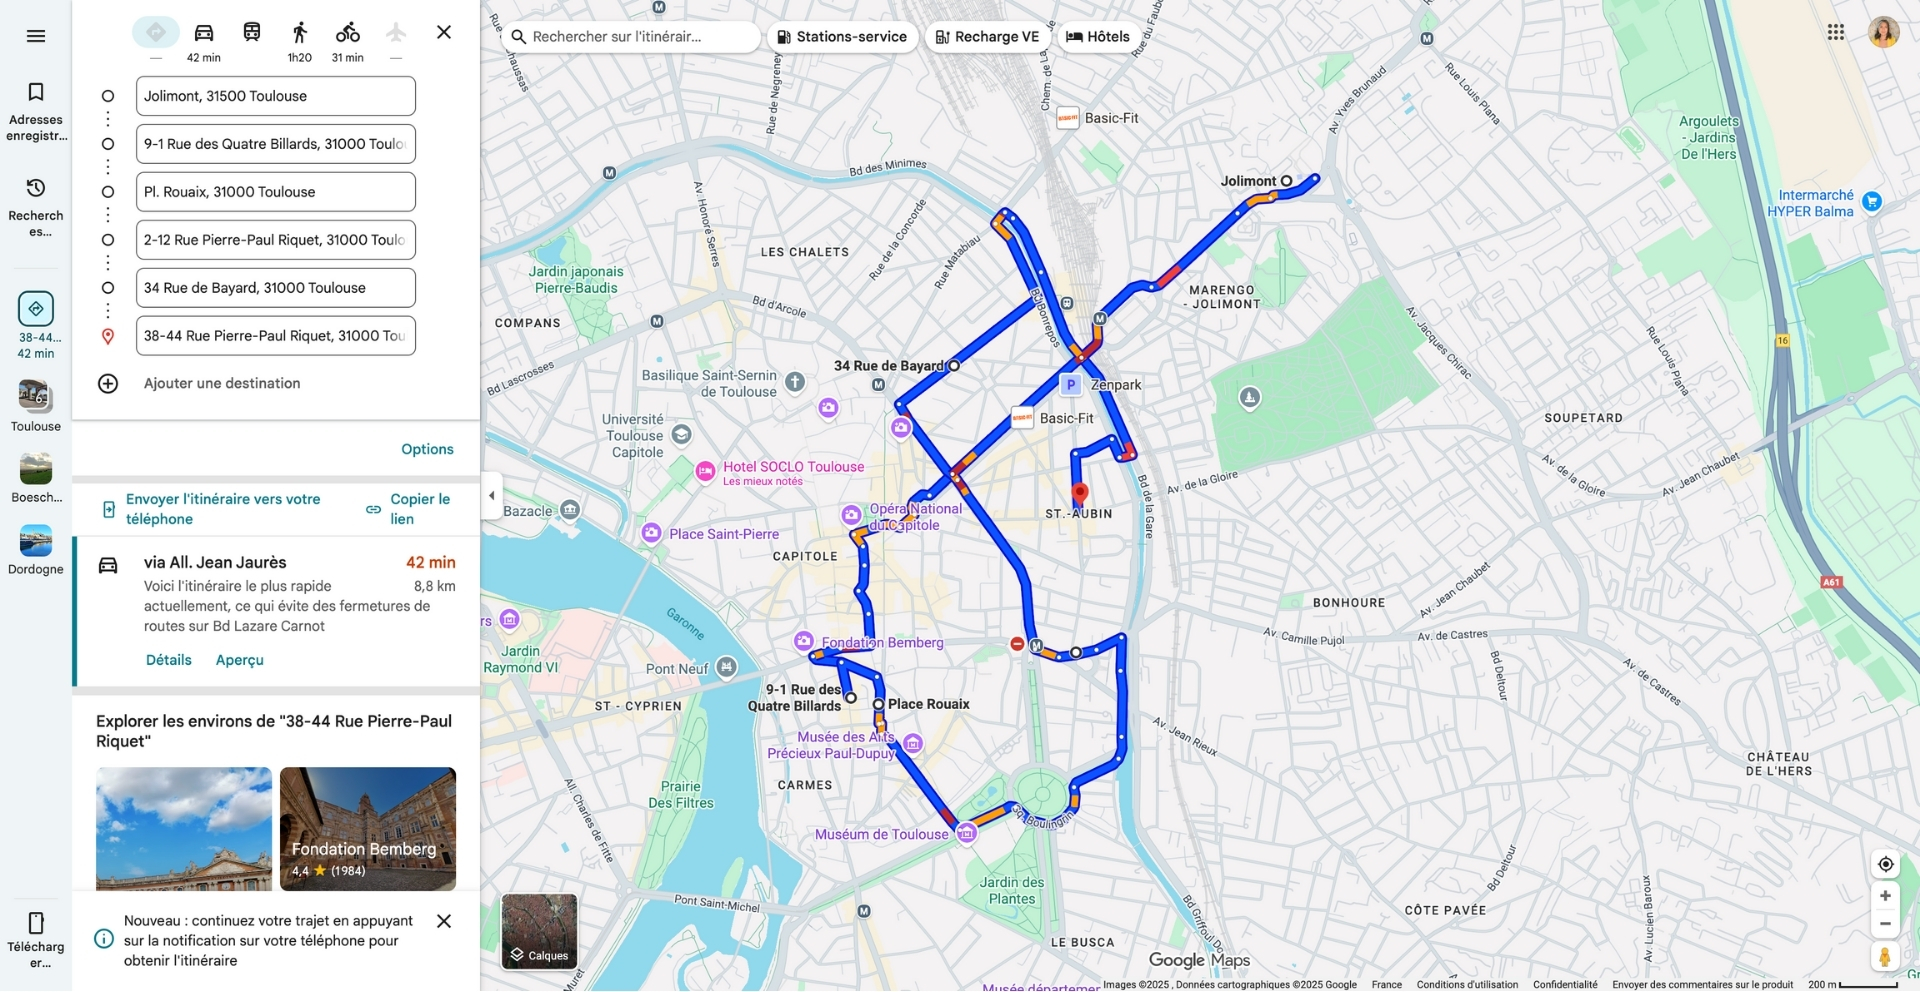
If you choose “Google maps” from the options after “Export”, you’ll be automatically redirected to Google Maps.

This feature displays your route points directly in Google Maps.
Modify a route
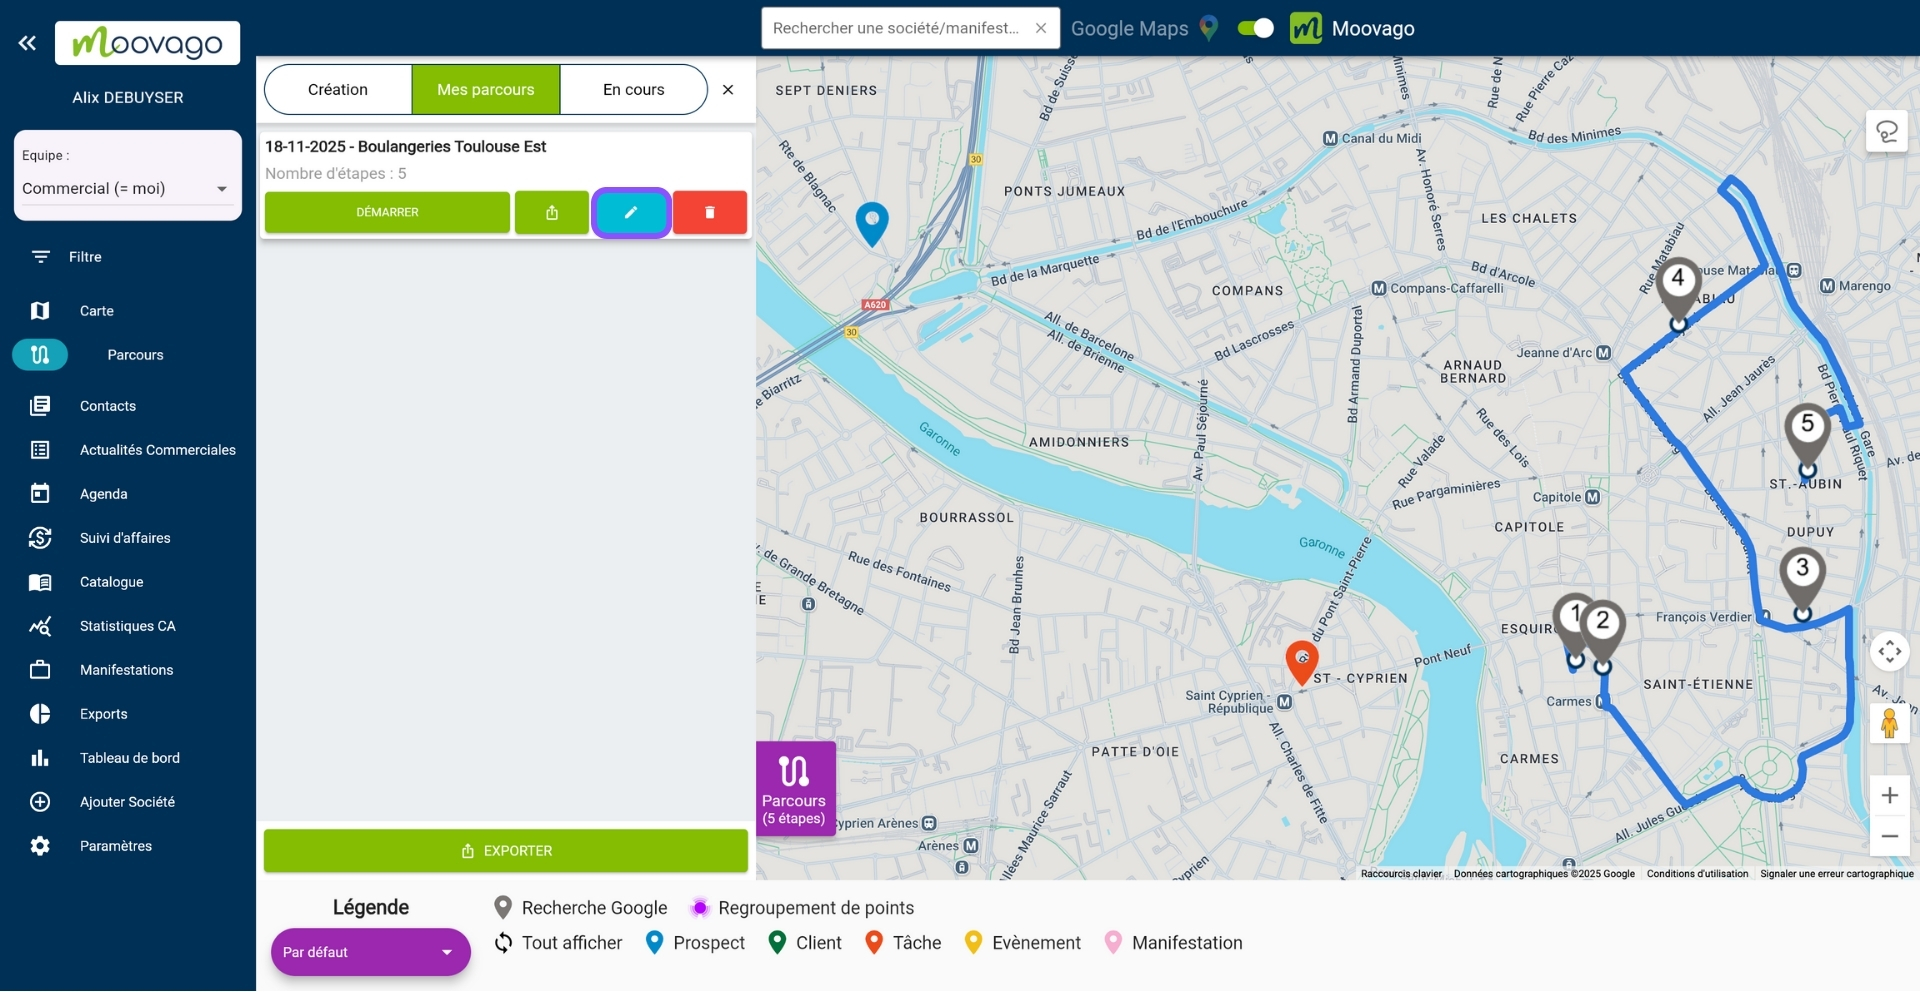
To modify a route, go to the route window, then to the “My routes” tab.
Locate the route you’re interested in, then click on the blue button with the pencil icon. The route then opens in the Creation tab, giving you access to tools for adding, deleting or moving stages.
Optimize your itinerary
You can also optimize this route by clicking on the “Optimize” button. If you don’t already have the “Optimized route” option, there will be a padlock on the button. Find out more about how to use “Optimized Route” here.
The optimization of a sales route enables you to reduce the mileage of your routes, thus saving fuel and time on the road.
Without this option, route optimization is possible manually by rearranging the itinerary’s steps according to what makes the most sense to you. If you notice that the Route is forcing you to retrace your steps or make unnecessary detours, you can rearrange the order of the companies to be visited by simply dragging and dropping.
Delete a route
To delete a route, go to the route window, then to the “My routes” tab (previously “Saved”).
Find the route you want to delete, then click on the red icon with a trash can.
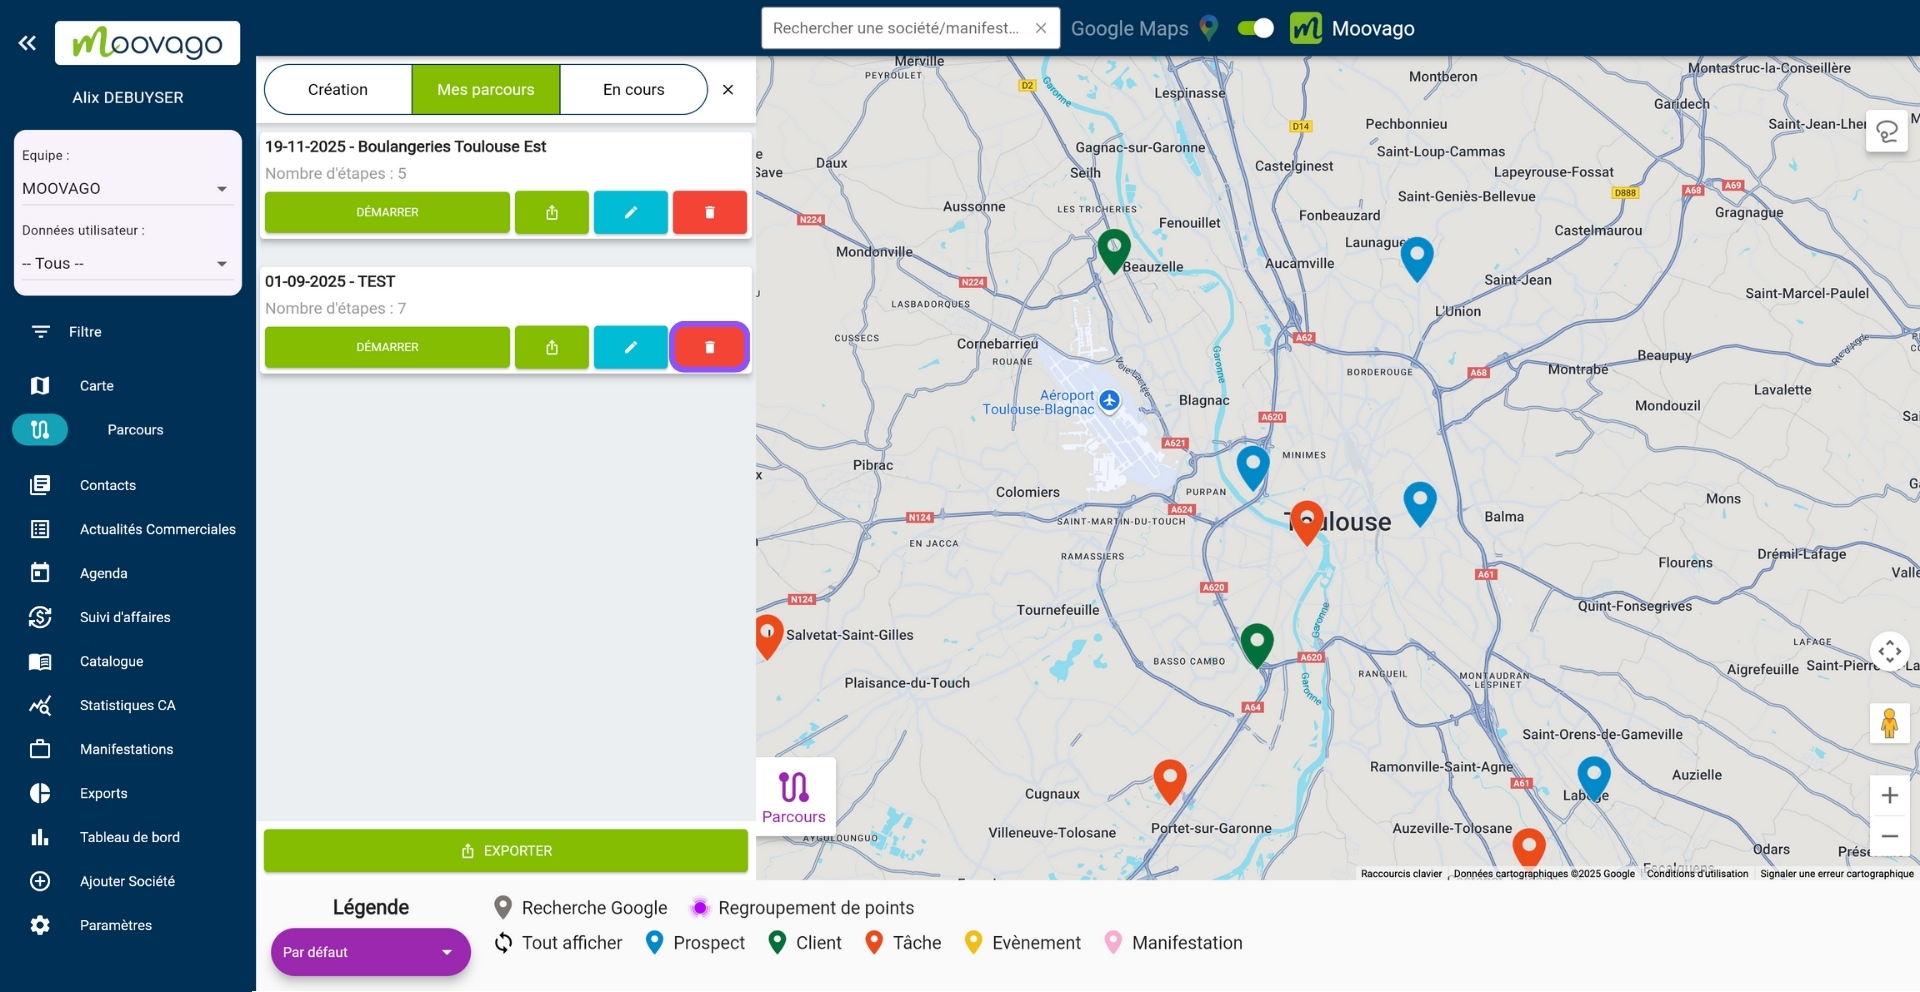
You will be asked to confirm your request. Please note that this deletion is final. We recommend that you do not delete any routes you have already completed, as it is worth keeping them in order to quickly calculate your mileage costs at a later date.
Export a route
Once you have completed your Route, you can export it in csv format to share it with your colleagues or managers.
To do this, go to the“My routes” tab, then click on the button with the export icon under the name of the course you wish to export.
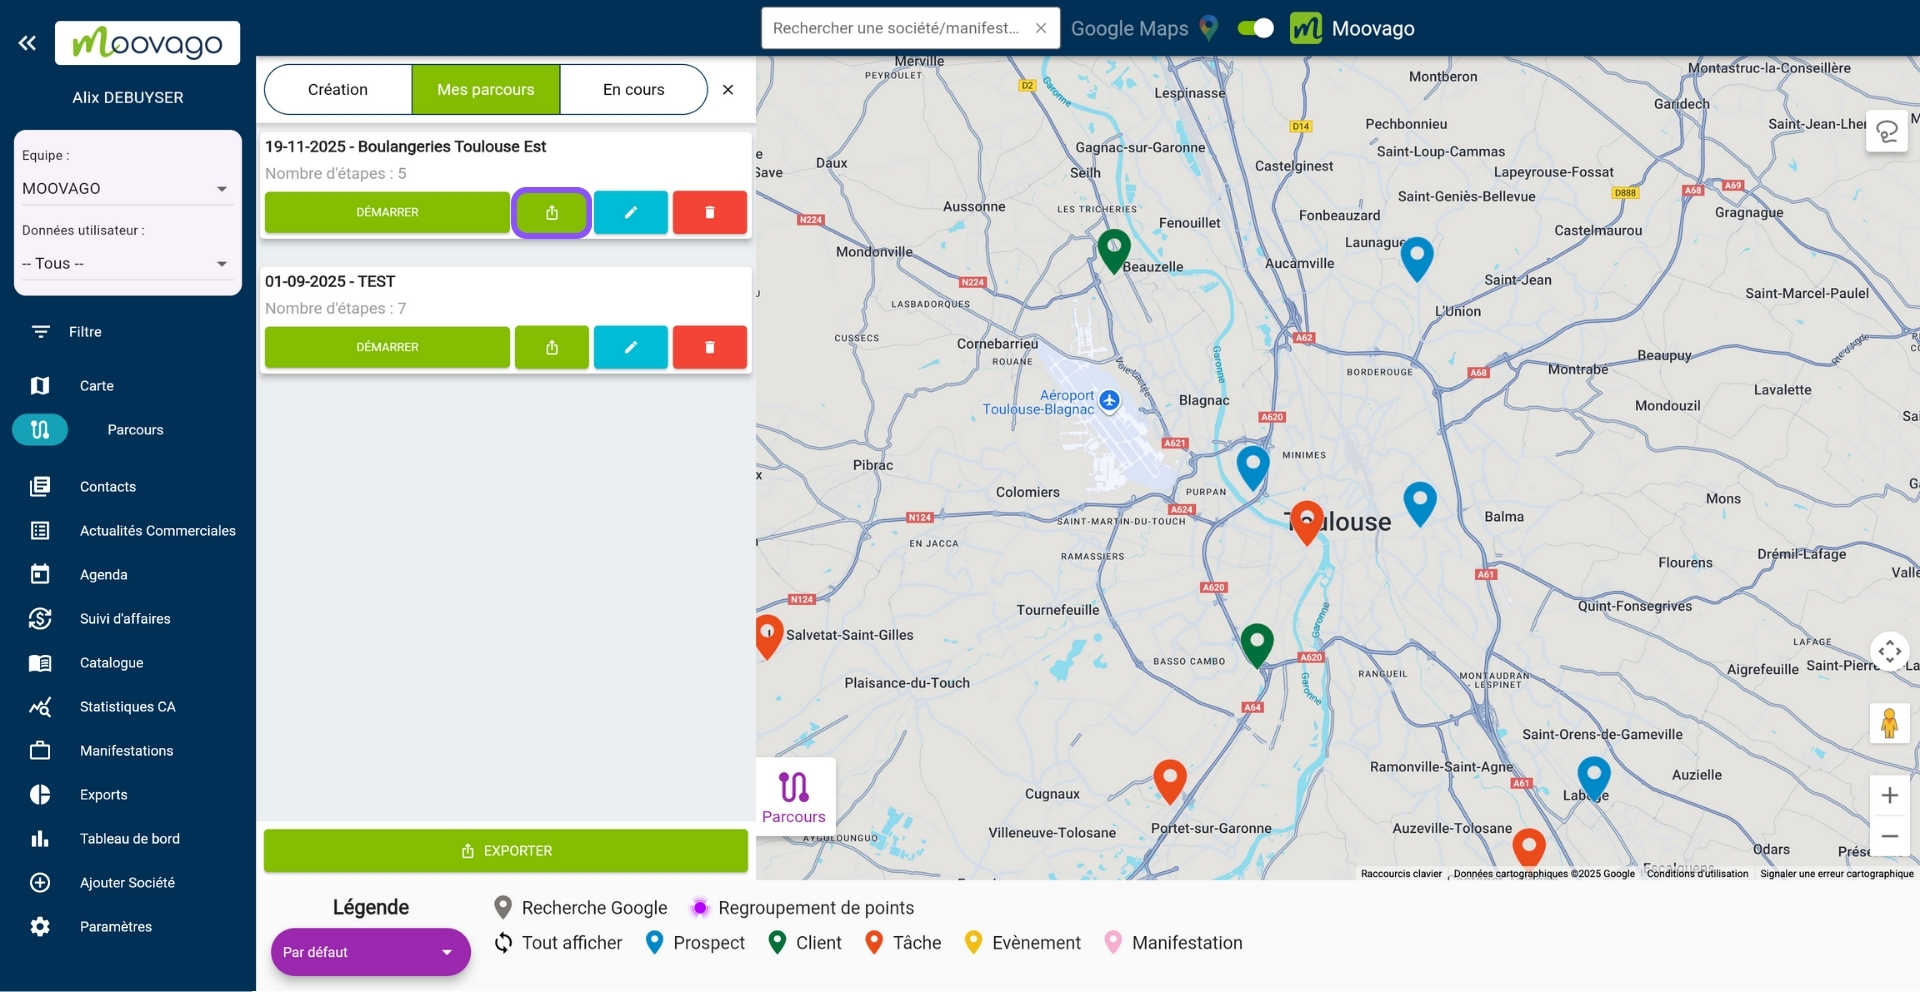
You can then indicate the elements you wish to find in this file (which will correspond to the columns in your csv file), then click on “Export”.
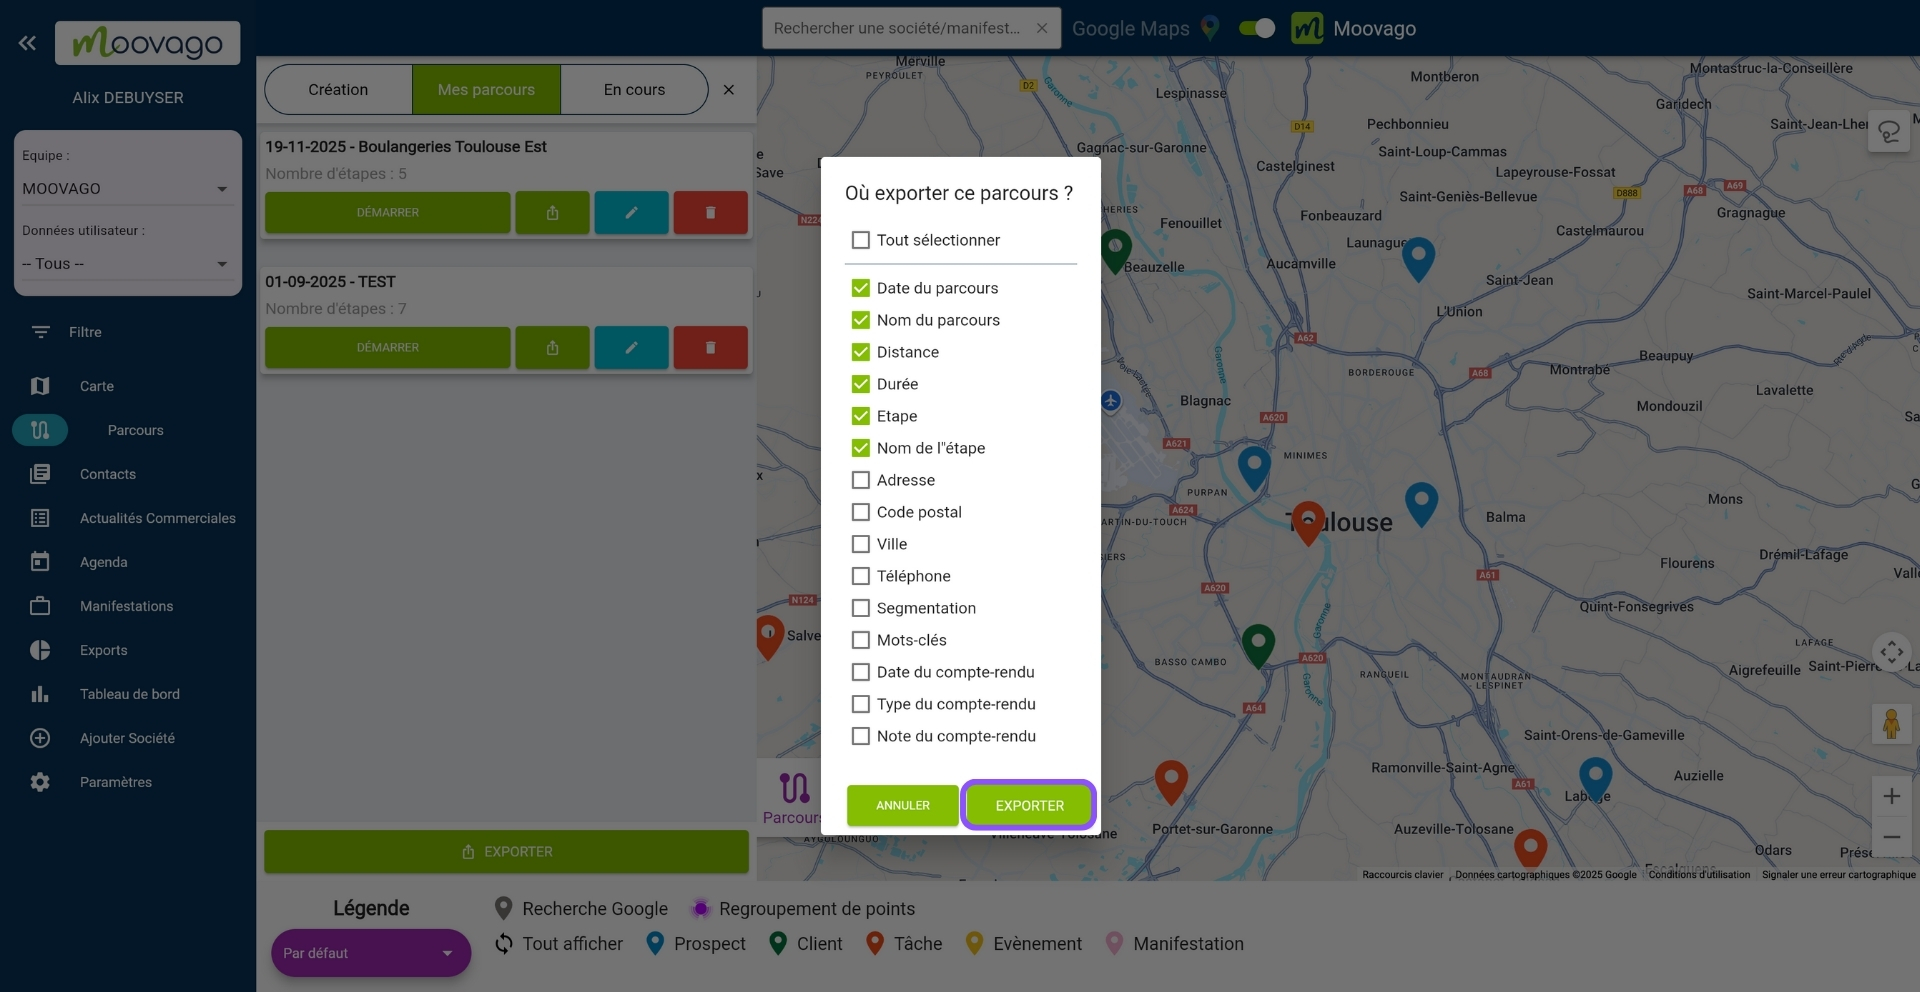
It is also possible to export all routes via the “EXPORT” button at the very bottom, which is very useful for obtaining the mileage of your routes (for mileage costs).
