Updated on 12/11/2025
Moovago map: use & features
- Geolocate all contacts in a portfolio of customers and prospects on a map,
- Interact with these contacts from the map (find tasks, calendar events, consult records, etc.),
- Filter contacts displayed via segmentation in the legend or via an advanced filter system,
- Search for new companies via Google and add them to your Moovago customer file,
- Organize sales rounds.
Map presentation: interface and zones
The Moovago map interface is divided into different zones. Here are the different zones, from top to bottom:
- An area dedicated to research,
- An area with map, navigation tools and shortcuts,
- An area with the map legend.
Zone 1: An area dedicated to research
At the very top of the map, a blue banner features a search bar, with a toggle pointing to “Google” or “Moovago” right next to it.
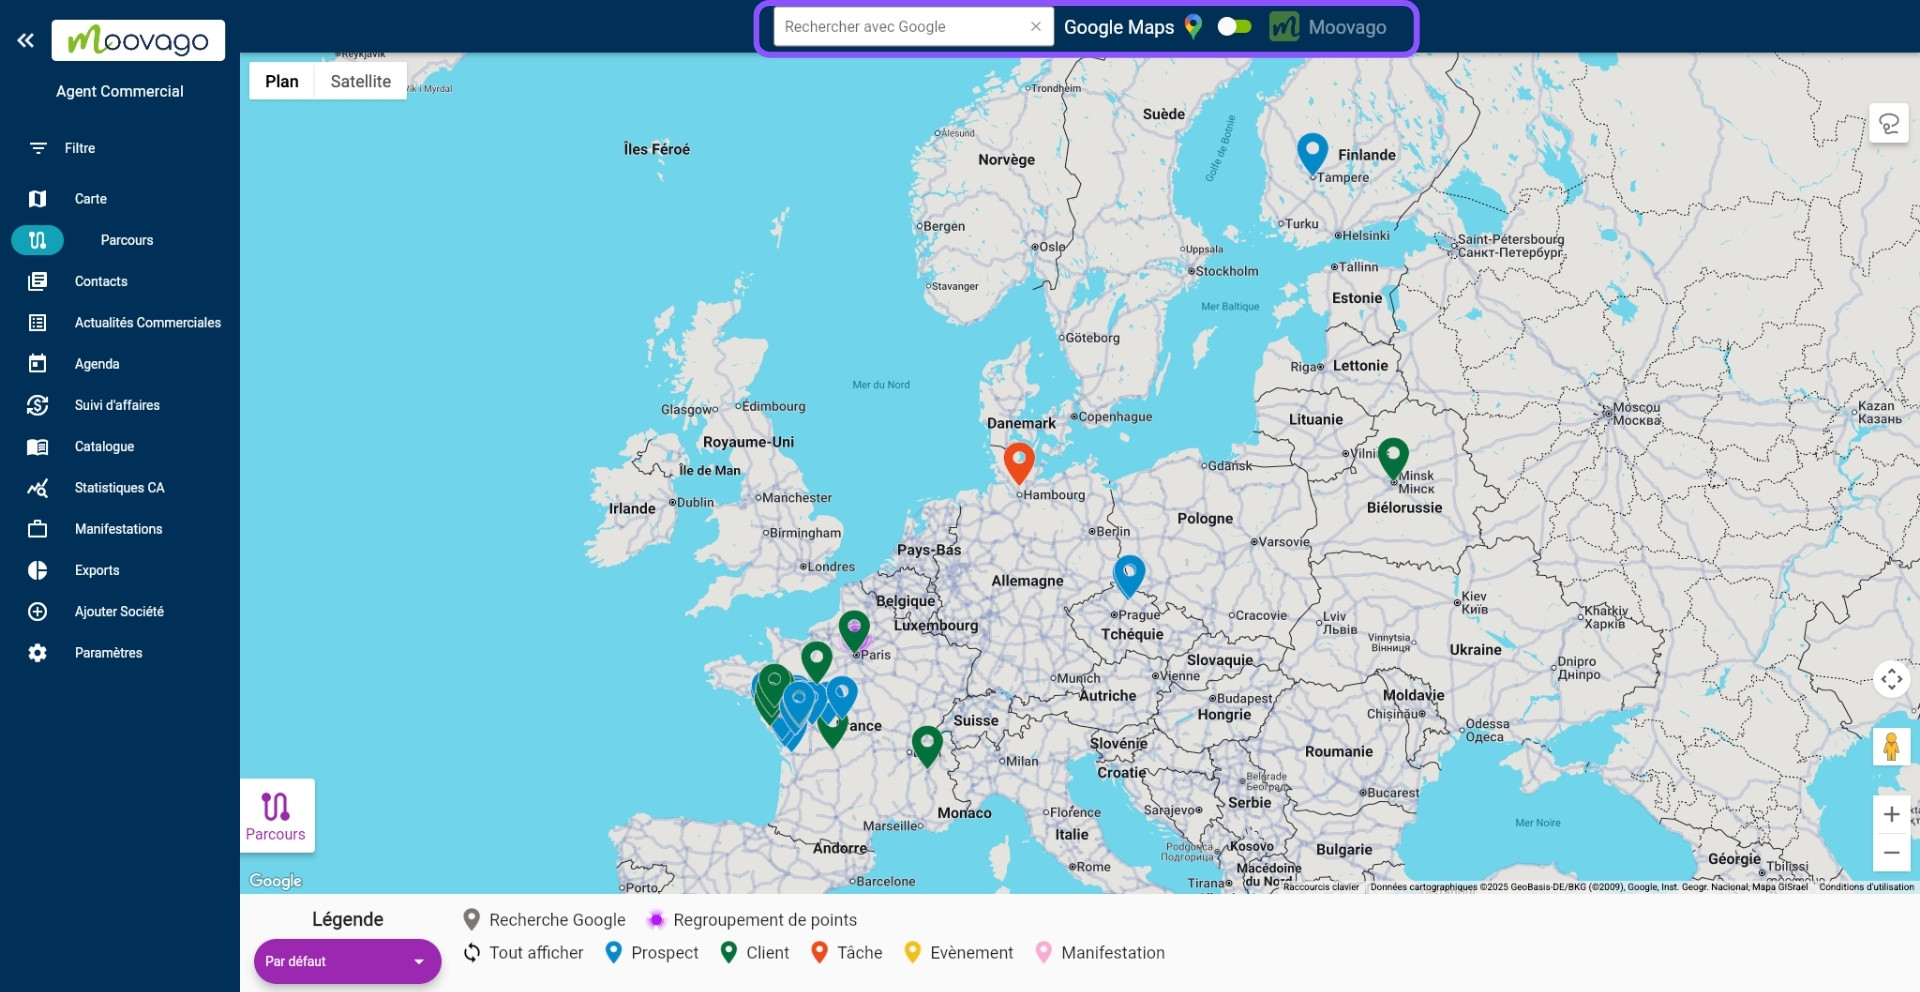
With this search, you can find and display contacts on the map in a matter of moments. This search can be performed in two different databases:
In your own customer file (your Moovago database) to find a customer or prospect who has already registered (using a company name, city name or zip code).
In the Google database, enabling you to locate companies on the map that are not yet in your Moovago customer file. Here are a few concrete examples:
- Find new prospects by typing in a keyword, company or brand name,
- Geolocate a postal address (i.e. assign it geographic coordinates and position it on the map),
- Find a customer or prospect with whom you are already in contact (but have not yet registered in Moovago).
It is possible tosave companies found via Google search. Moovago will then retrieve all the information available on this establishment from Google and import it into the file created for this contact.
Zone 2: Map zone (and its various shortcuts)
At the center of the screen is the map. By default, all your contacts are shown on the map as markers. The color of the markers corresponds to the legend at the bottom of the screen (see next section).
It is of course possible to filter the contacts displayed via the “Filter” section or via the customizable legend (see next section).
Various tools and shortcuts are also available at the edges of the map.
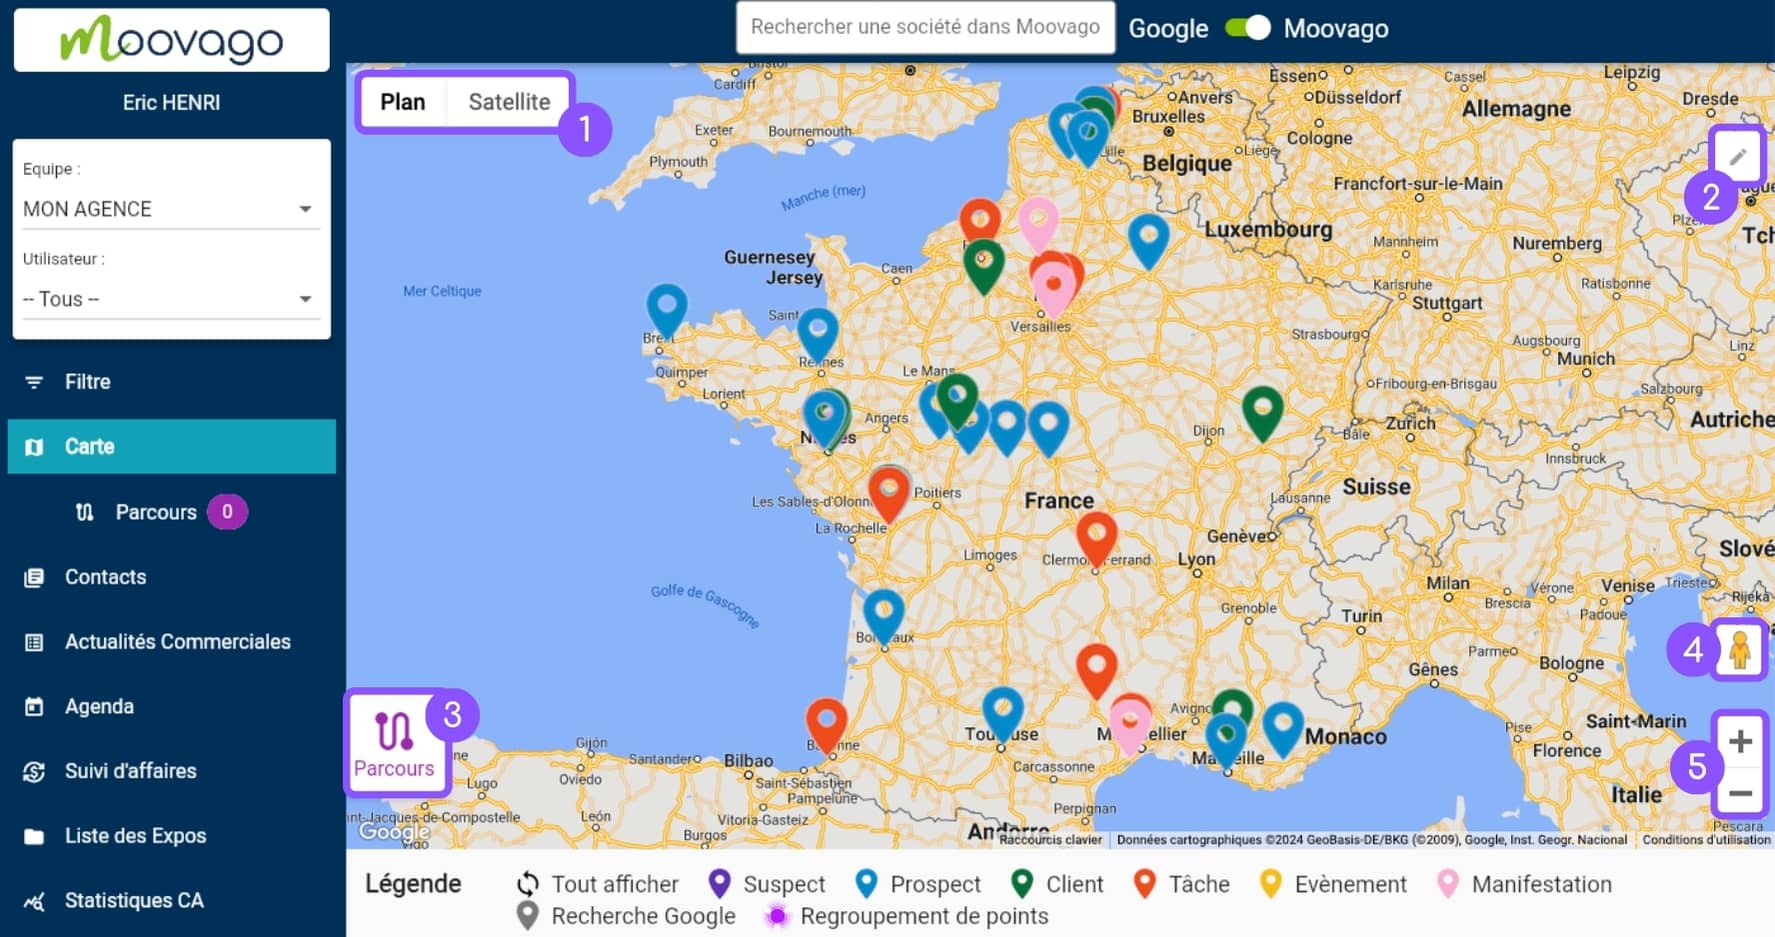
Tools for navigating the map :
1/ Change view: plan view (default) or satellite view (to see the map’s relief),
4/ Access Streetview, for a 360° view of an area. To use it, click with the mouse on the little yellow character (Pegman) and release it at the desired location (on the roads highlighted in blue on the map). You can then move around the area as if you were there, following the white arrows. To return to the classic Moovago view, click on the arrow at the top left of the map.
5/ “+” and “-” buttons to zoom in and out on the map, respectively. Note that you can also use other methods to perform these actions:
- On the web, using the mouse wheel,
- On a cell phone, place two fingers on the card and pinch or spread them apart.
Tools linked to the Pathway :
3/ The “Route” insert, which opens the “Route” window for organizing sales rounds. See our full tutorial on this feature here.
2/ The lasso tool : allows you to quickly select all the companies in a zone by circling them, then add them to a round.
Zone 3: The legend with customizable view
Finally, at the very bottom of the map is the map legend, with a drop-down menu (shown below).
By default, it allows you to easily visualize and distinguish your customers, prospects, tasks and events on the map, thanks to distinctly colored markers.
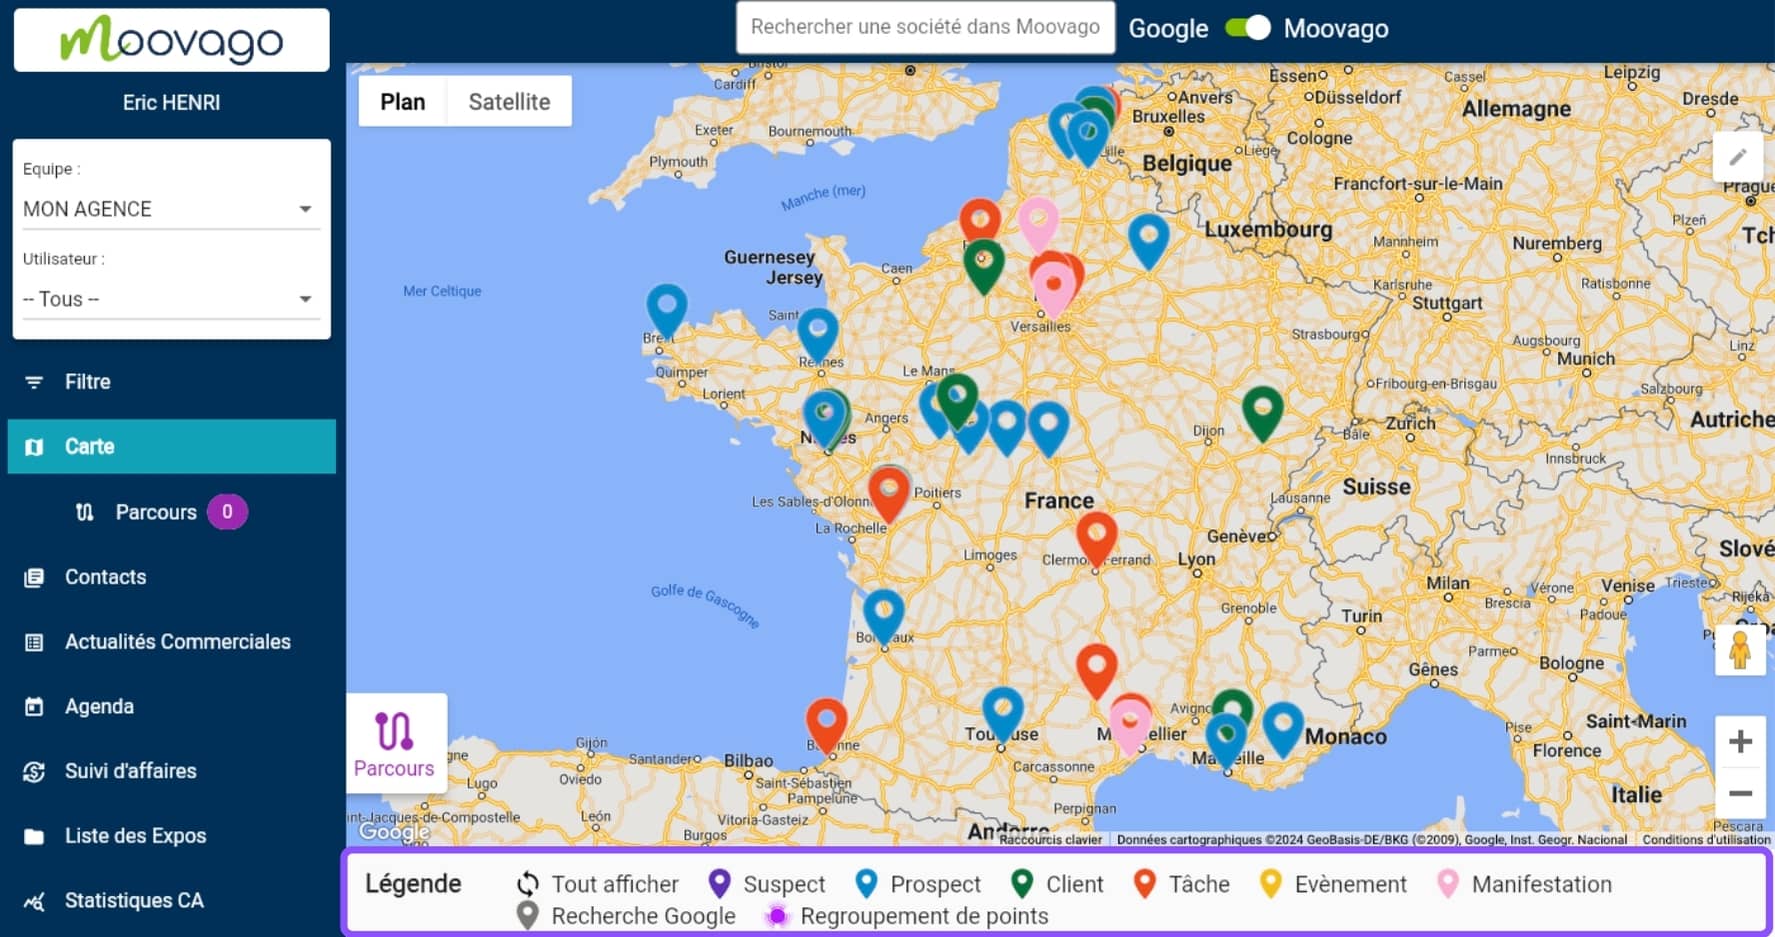
By default, the various legend elements are :
- Prospect or Customer, which are defined by the contact’s “Status” in the Moovago database (entered and modifiable in each file). Suspect can also be displayed, if the option is activated in Settings.
- Task, for contacts who have at least one task overdue or to do during the day,
- Event, for contacts who have an event to attend during the day,
- Tradeshow (if activated on your session), which corresponds to an event such as a trade show, expo, etc.
- Google search, which are the markers displayed when searching on Google via the search bar at the top of the map.
- A grouping of points, more an indication than a marker.
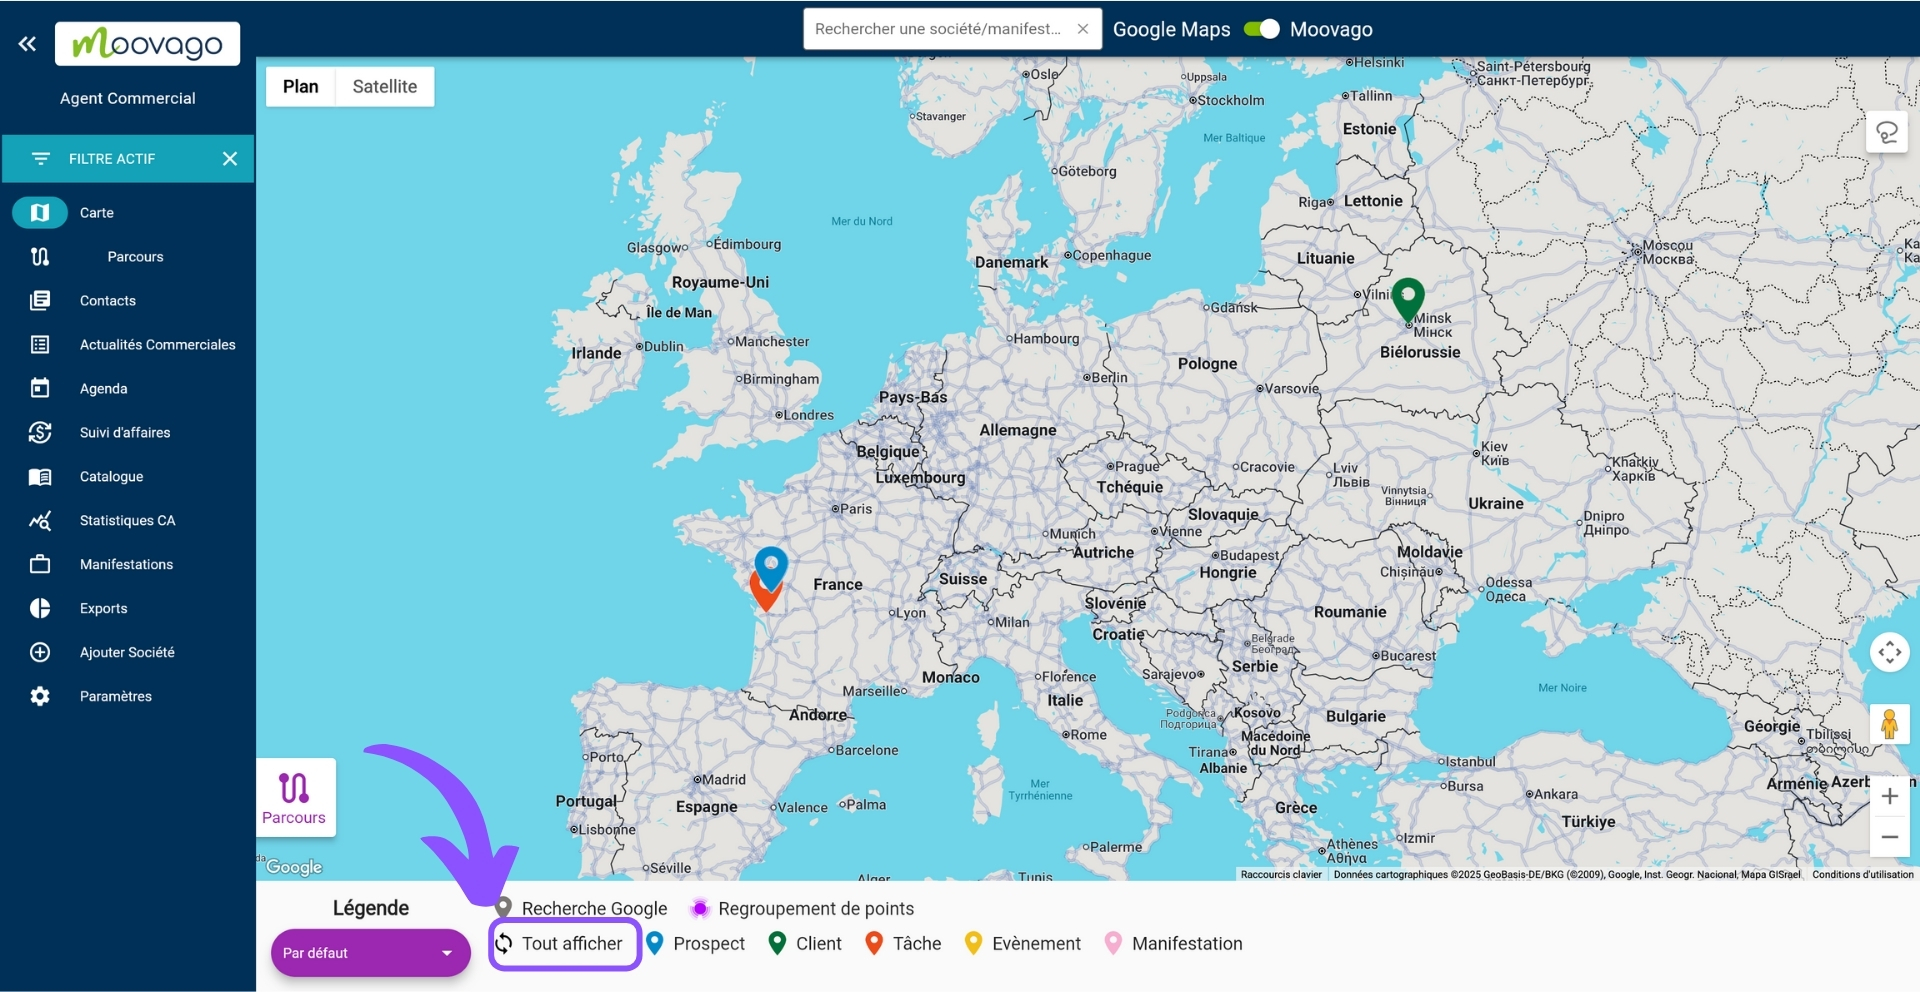
As well as making it easier to read the map, the legend also lets you filter the contacts displayed on the map to show only one type of marker at a time. For example, if you click on “Customer”, you’ll only see records with the status “Customer”.
Note: If a marker has an event and a task to complete today, priority will be given to the task (and the marker will therefore be displayed in orange).
Another example: if a marker has the status “Customer” but has a task in progress, it will still be displayed when you click on “Customer”, but in orange, to indicate that a task is in progress for this contact.
At any time, clicking on “Show all” will display all markers on the map again.
Change the information presented in the legend
When you click on the drop-down menu under “Legend”, you can customize the map legend, changing the default view.
The choices you are then presented with correspond to the various questions you may have entered in “Segmentation” (Settings). This menu allows you to display customers and prospects on the map in different ways: for example, according to store type, company size, or sales revenue.
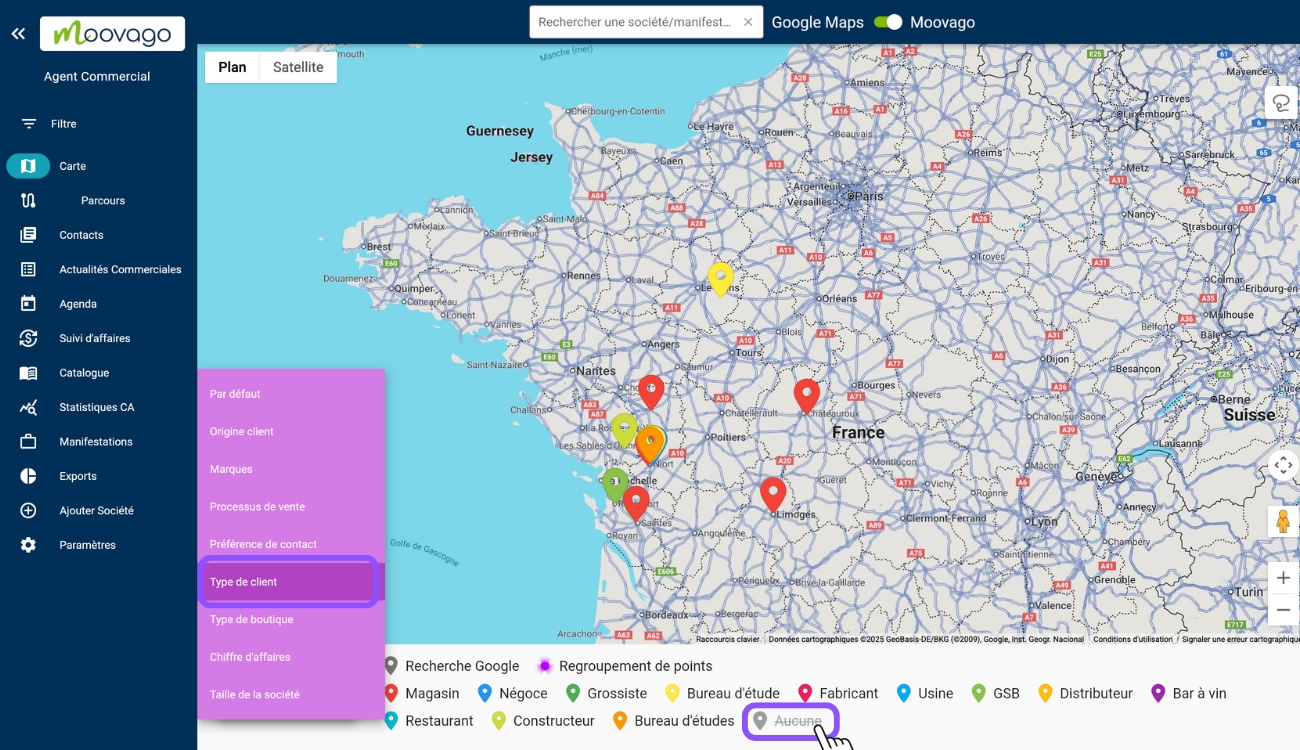
Note: the legend for segmented views behaves differently from the default.
When using a custom view, if you click on an item in the legend, it appears as “crossed out”, and the corresponding markers disappear from the map.
If you wish to make these markers reappear, simply click on the crossed-out item.
How do I manage markers on the map?
Of course, you can also interact with the markers on the map.
Here are the possible actions and how to carry them out:
Click on a marker to view its information: this displays an insert containing various information about the marker (company status, name, address, telephone number, as well as current and scheduled tasks).
Save a marker for contacts found via a Google search, using the “Add a record” button on the same insert.
Add a marker to a Route using the “Add to Route” button, also in this section.
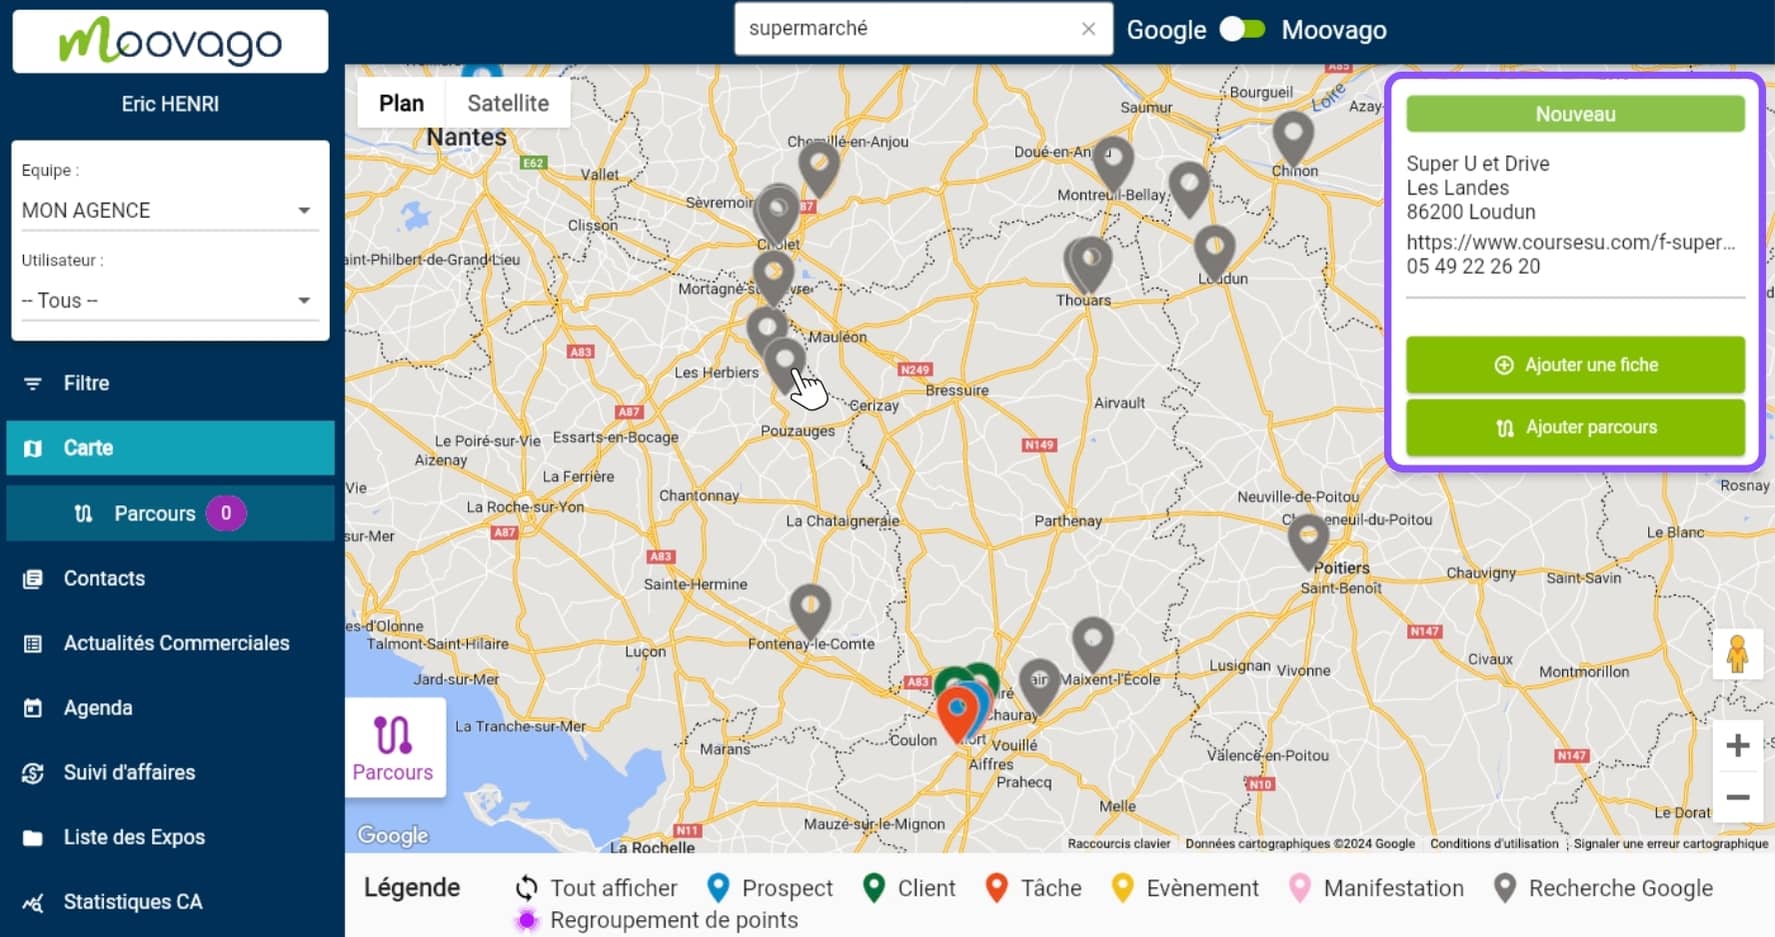
Filter the markers on the map via the legend as explained above, or via the filters.
Create a new marker at a specific location on the map, i.e. create a new company card from the map. To do this, right-click on the desired location on your computer, or hold down with your finger on your cell phone.
