


Updated on September 7, 2026
Would you like to check out this tutorial for the web version of the Moovago application? Click here!
Sales routes are a key concern for traveling sales representatives!
At Moovago, our round planning and optimization tool is included in all our packages. Welcome to this comprehensive guide to your new favorite tool: Optimized Routes!
Organize your client visits, easily plan your itineraries, and save time when planning and carrying out your rounds.
Introduction to Optimized Mobile Experience
Using a map or a customer list, Optimized Routes lets you create sales rounds and then optimize them to save as much time on the road and as much fuel as possible. Here’s everything Optimized Routes lets you do in Moovago:
- Create a sales round (routes) and save it,
- Add stops or companies to visit to a route (via the map, company profiles, Google Search, or the lasso tool),
- View the itinerary and optimize your trip,
- Edit or delete a route,
- Import appointments from the calendar,
- Export routes to Excel,
- View the itinerary of a trip in Moovago or on Google Maps,
- Quickly find the mileage of one or more rounds,
- Use the route recorded during the round (on mobile).
- Calculatethe fastest itinerary,
- Calculate detailed information for the entire round and between stops: distance between stops, driving time, any waiting time, etc.
- Analyze the feasibility of your rounds and identify factors that make a round impossible (business hours of the companies you plan to visit, scheduling constraints, etc.)
- Create more complex rounds: multi-day rounds, with starting and/or ending points, time constraints, etc.
Overview of the Optimized Routes Interface on Mobile
Go to Parcours Optimisé
- From the “Routes” tab on the “Sales news” screen,
- Or by clicking the chevron in the lower-left corner of the Moovago map
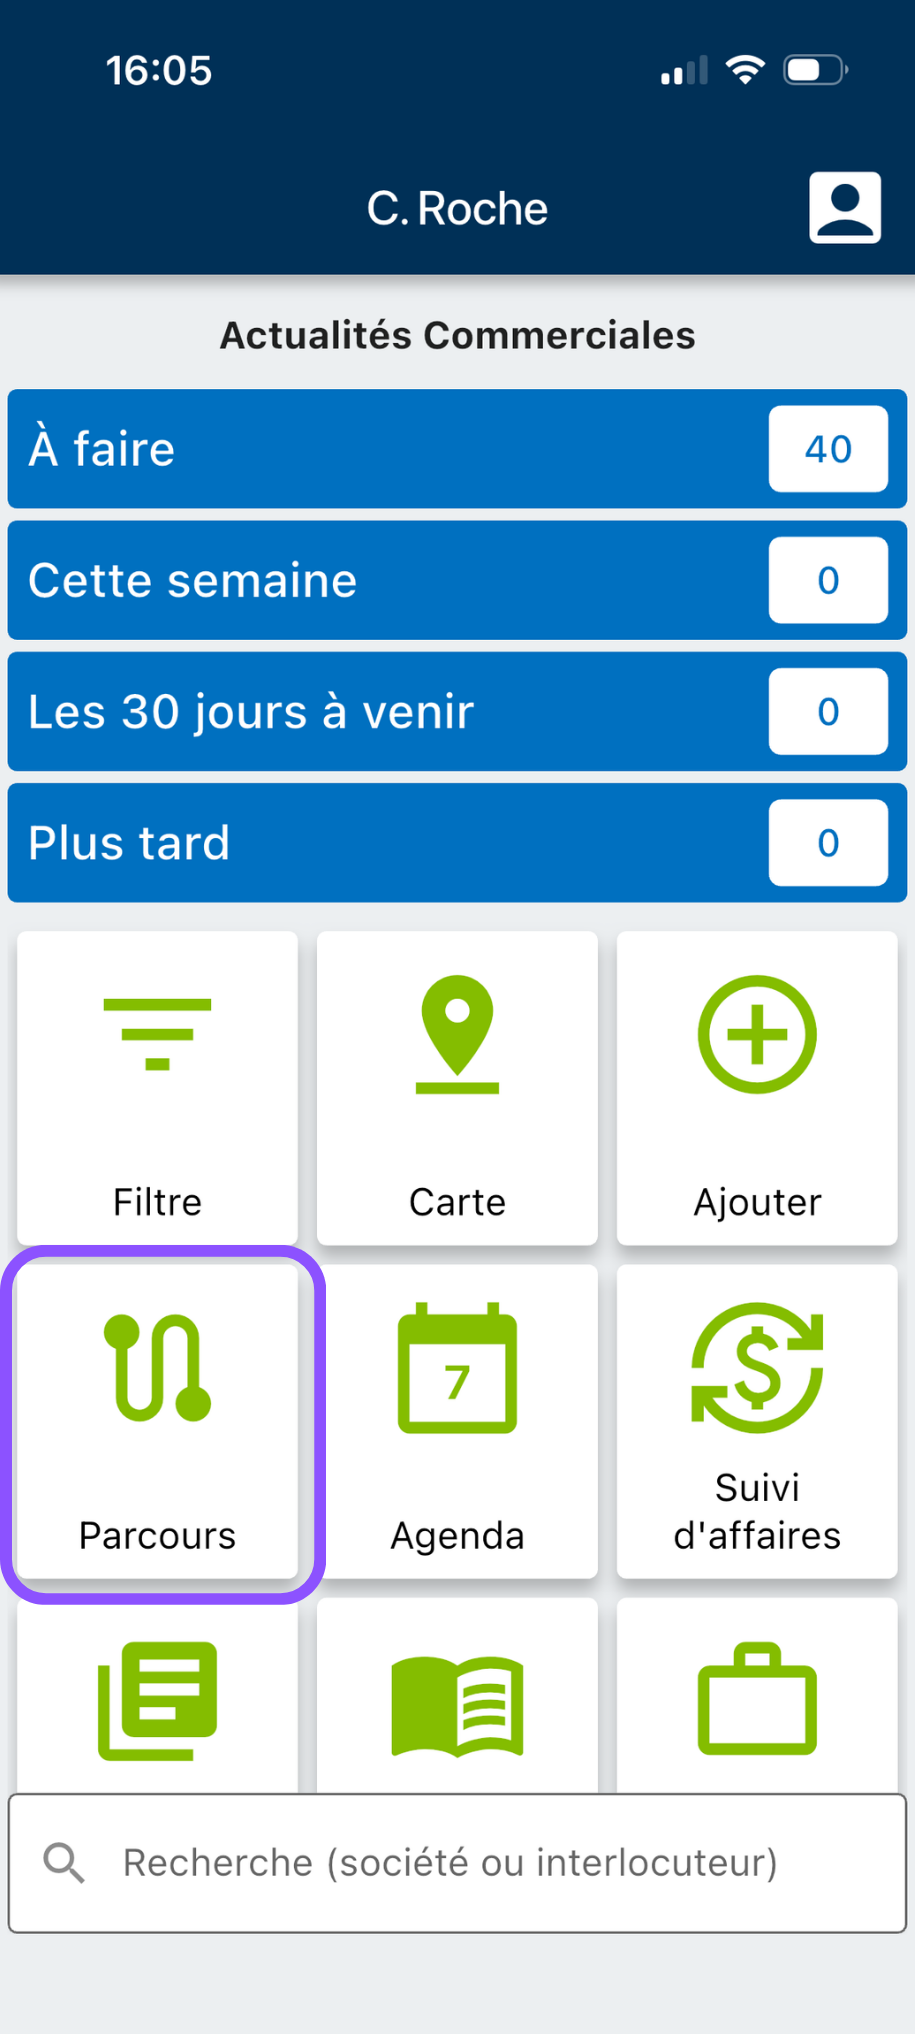
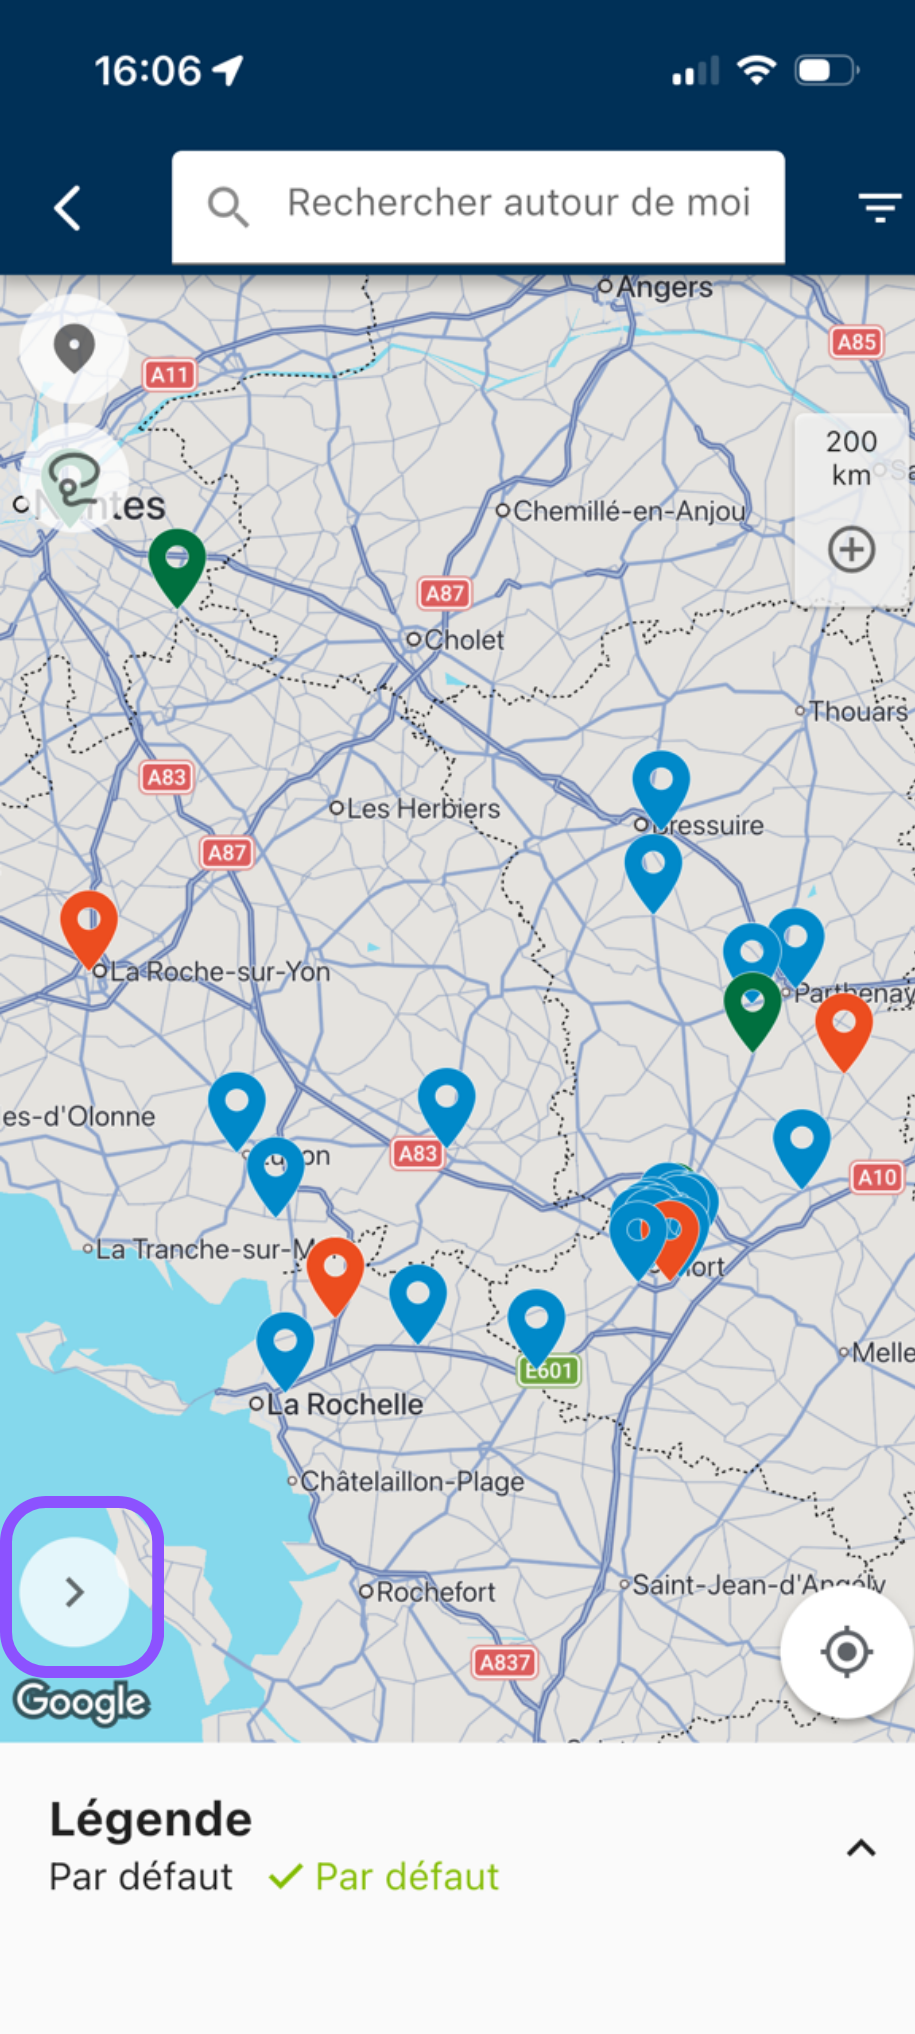
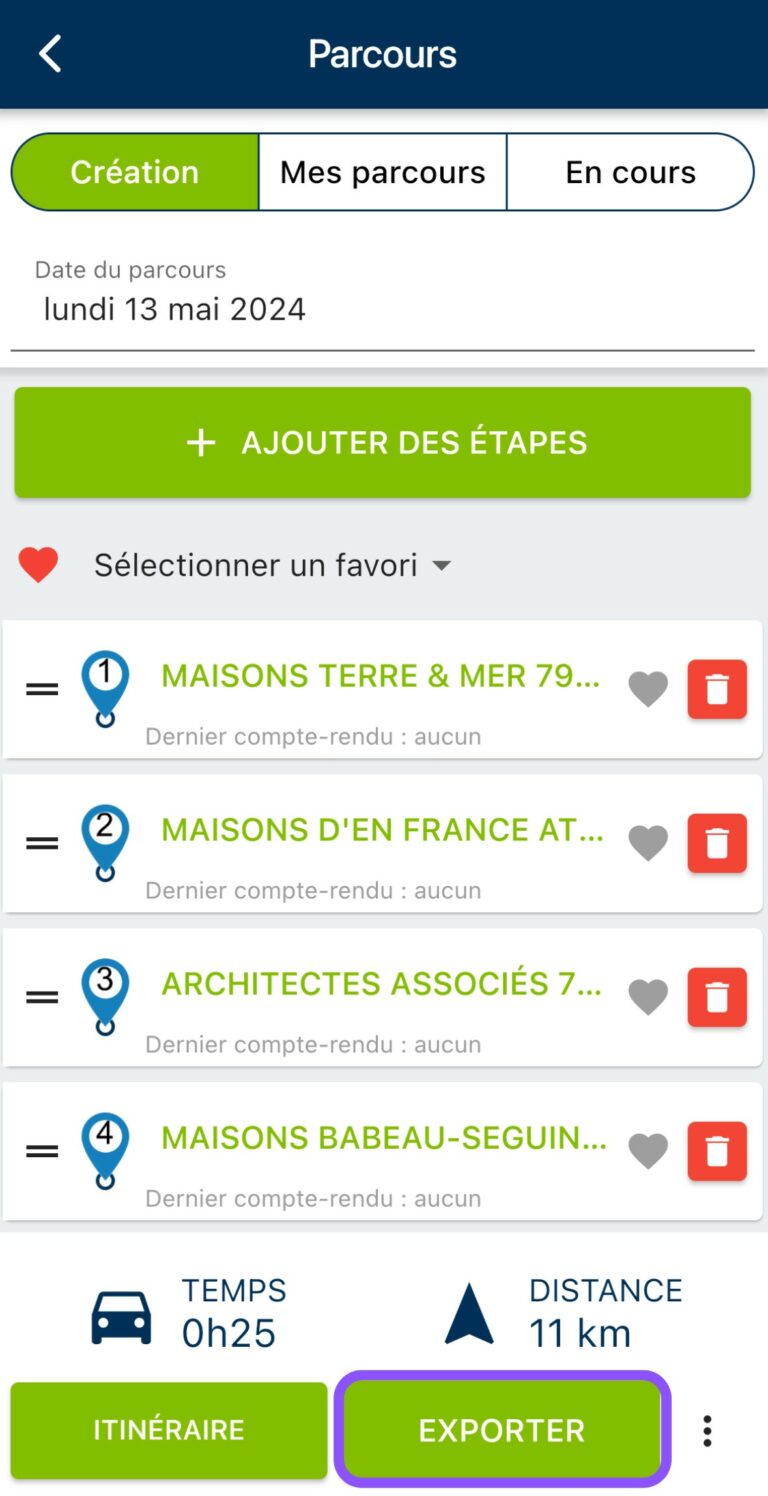
In summary, here’s what you’ll find in this interface:
- A navigation menu with three tabs: “Creation” to modify or organize a new tour, “My Routes” to consult tours already prepared and saved, and “In Progress” to track the progress of your tour in the field.
- The field for entering the day and the start and end times of the round
- The ability toadd stages in different ways.
- The list of companies to visit for the round is being created/edited.
- The information calculated by Moovago for this round, available once the optimization process has started.
- A group of action buttons to act on your round:
- “Optimize” to launch the calculation of the optimized round,
- “Save” to save the round
And behind the three dots to the right of the block:
- “Send to Calendar / Send to Google Maps” to view the round on Google Maps, or export the round to your calendar,
- The Delete button
Note: you can navigate through all the application’s tabs (map, company list, business news, etc.) without losing the changes you’ve made to your current Route. Your information will remain in memory until you log out.

Before optimizing, start by creating a Route
Find the customers you want to visit
In Moovago, you can use filters to display only the contacts corresponding to a specific segment of your customer file, such as :
- customers you haven’t visited in 1 month,
- prospects from a specific business sector,
- prospects you’ve never canvassed,
- customers who have been introduced to your company at a trade show,
- etc.
Create mobile routes in Moovago
Then you need to add these companies to your sales round.
As a reminder, these points on your Route are called stages. Each stage corresponds to a customer you’d like to visit, or a desired point of departure, such as your company office, hotel or home.
The process for quickly creating a sales round, which we’ll call “routes”:
You have several options:
- Select a registered business and add it to your routes from the map,
- Select a registered company and add it to your routes using the Moovago search,
- Add a company to the Route from its file (“Add to Route” button),
- Select all companies in a sector with the Lasso tool,
- Find a new company to approach via a Google search and add it,
- Enter and add an address not yet registered in Moovago,
- Import a route stop from your calendar.
- Select a company saved as a favorite
N.B.: From the calendar
It is also possible to create a round from appointments already in your diary. To import appointments, click on the “Add steps” button, then “Import from calendar”. Choose the desired day and event owner (if you have more than one user), then confirm your selection. Your appointments will be added with the appointment time indicated on your steps.


You can mix and match these different addition methods according to your preferences and/or needs. Visit this article to find out all about adding companies to a Route.
Time-saving tips
Tip #1: You can add locations to your favorites (by clicking the heart icon next to a stop on a route) to make it easier to find specific places, such as your office, your home, your favorite hotel, or even clients you visit very regularly.
Tip n°2: if you want to search for certain types of customer more easily, don’t hesitate to use the customized legends. This feature allows you to modify the map legend according to your segmentation in Moovago (e.g.: all customers met in a salon, or all prospects in a certain sector…).
2. The companies added to the routes appear one by one in the Routes window (which, as we saw, can be accessed via the “Routes” drop-down arrow in the lower-left corner of the map).
On mobile, we recommend first adding all the companies you wish to visit via the map or the company list, then optimizing the order of the stops from the Route window.
Moving stages
The whole point of Parcours Optimisé is to help you find the best itinerary for your round.
Moovago’s algorithm will calculate the best possible itinerary for you and rearrange the stops accordingly. However, you can move the stops around as you like by dragging and dropping them using the “=” icon to the left of each stop.
You can also delete steps as needed by clicking the three dots to the right of the step, then clicking “Delete.”

There is another way to delete a step. From the map, click on the icon you want to remove, then click the “Remove from Routes” button.

Add constraints to your round
In order for Moovago to calculate the fastest itinerary for your round while meeting your requirements (round duration, departure or arrival location, mandatory appointments, work schedules, duration of your visits, business hours of the companies included, etc.), you’ll need to provide these parameters.
“Optimized Routes” allows you to optimize a round over one or more days (up to 7).
Set departure and/or arrival times
Time constraints can be defined for the entire round:
- departure date and time ,
- the date and thetime the round ends
To enter them in your Route, click on one of the fields (“Departure date” or “End of round date”) at the top of the “Creation” tab in the Route window.


Moovago will start the round at the indicated departure date and time, and will alert you if the added stages cannot be visited before the arrival date and time.
Please note that departure and arrival times can be set by default in the Moovago settings.
In the left-hand side menu, click “Settings,” then “My Session Settings,” and finally “Routes.” In the “Restrict Routes by Schedule” section, you can customize the default departure and arrival times for each day, or even disable certain days if needed.
These schedules will be used to customize the timetables for all the days of your rounds (overall for the round, or day by day for multi-day rounds).

Define time spent on site / duration of stages
The “Duration (min)” field corresponds to the duration of your visit. Moovago will use this data to find out how long you need to stay before you can get back on the road.
By default, the value of this field is set to 60 minutes.

To save time when organizing your optimized rounds, we recommend that you customize this duration in your settings. You can do this by following the same path as described earlier for the departure and arrival times: “Settings” > “My Session Settings” > “Routes”.
This means it will be applied by default to all stages of your routes. Of course, you can still customize it at any time on a case-by-case basis through the Routes interface.

Define start and/or end points
With Route Optimization,you can also specify one stop on the round as the starting point and another as the destination. If you don’t specify either, the optimization will arrange the stops to provide the fastest itinerary.
To designate a stage as a start or finish, click the blue “Start” or “Finish” buttons. This will open a window where you can select the location from your favorites, your Moovago business database, or via a Google search.
Please note that if you are organizing a multi-day round, you can add several arrival stages (one for each day). The “Duration” field disappears for this type of step.


Please note: If you’re planning a multi-day round, you canadd multiple arrival destinations (one for each day). To do this, add an address (such as a hotel) as a stop on your route, click the three dots to the right of it, and select “Set as arrival + today’s date.” The “Duration” field will disappear for this type of stop.
The end of one day is then the starting point for the next day.

Set an arrival time for certain stages
You can also set specific times for certain stops in Moovago’s optimization algorithm.
For example, you know you absolutely must arrive at Client A’s location at 10:40 a.m. So click on “Scheduled Time” to make the “Arrival” field clickable. Then enter the desired time in that field—that is, 10:40 a.m.

When you add a stage to your Route, this “Arrival” box is not filled in. It will be filled in automatically when the optimization is calculated, to let you know what time Moovago expects you to arrive at this stage.
Special case: If you import an appointment from your calendar, the step based on that event will automatically use the appointment’s scheduled time (as well as its duration). This time will be locked so that the optimization process takes this requirement into account. However, you can click “Fixed Schedule” again to change the appointment time.
If you have modified one or more events imported from the calendar, we strongly advise you to update your calendar! Moovago lets you do this quickly by clicking on “Export” and then on “Agenda”.
Taking into account the business hours of the companies visited
If you’ve entered the business hours of the companies you plan to visit in your Moovago database, the algorithm will take this into account during the optimization process. This will prevent you from arriving only to find the doors closed!
The more you enter these schedules in your company profiles, the more effective Optimized Routes will be.
Note: If you added a business via Google Search in Moovago, and its hours of operation are available on Google, they are automatically added to the business listing in Moovago.
Optimize Your Round with Route Optimization on Mobile
Start round optimization
Once you’ve added your steps and constraints, it’s time to move on to optimization!
To do this, click on the “Optimize” button at the bottom of the Route window:
If no errors are detected in your routes, the routes are optimized “normally.” PSeveral things then happen on your screen:
- Your various stops are rearranged to form the fastest itinerary based on your constraints,
- Various pieces of itinerary information are calculated at the round level, at the leg level, or between legs,
- The map displays your itinerary, showing the optimized itinerary.
Generating calculated information
Route optimization gives you access to several features:
- Breakdown of stages for each day of the round (1),
- Road times and mileage between each stage (2),
- Waiting times, if any (3),
- Estimated times of arrival at each stage (4),
- Overall duration of the round (including travel time and the duration of each visit) (5),
- Estimated end-of-day date and time (6),
- The total distance traveled on routes in km (7).


And finally, if Moovago considers that your round is not feasible (time conflicts, not enough time to complete all the tours, stops too far apart, etc.), you will be warned and the errors detected will be displayed in red.
You can then decide to remove stops to fit within the round dates, or add days (up to 7).
Manage errors detected in your Journeys
Parcours Optimisé helps you to check the feasibility of your rounds and keep your data up to date. Here are the 4 types of messages that Optimized Route can display.
Modified round
Moovago may display an error message in Route when it detects modifications that may distort the calculation information previously generated. For example, you may have added a stage to your round, but not restarted the optimization.
To resolve this error, run the optimization again to update the data.
Changing the Date of a Course
As explained earlier in this tutorial, you can enter a departure and arrival date at the top of the Itinerary window. When these are filled in and then modified, Moovago advises you tore-import the calendar appointments corresponding to this date.
Time conflicts and impossible rounds
When Moovago determines that your round is not feasible based on the constraints you entered ( number of days on the round, number of stops, duration of visits, estimated travel time, desired arrival dates and times, work schedules, company business hours), it will display the following message: “The optimization contains errors.”
To fix these errors, look for the step marked in red in your routes (the problematic step is often located at the end).

In most cases, the problem arises from time conflicts imposed on the round as a whole, or at stage level. For example, Moovago detects that it will not be possible to visit all the stages of the Tour within the time constraints indicated.
Alternatively, certain stages with fixed arrival times (appointments imported from the calendar or stages set manually) come into conflict because it is not possible to respect all these constraints, given the estimated driving time between stages and/or the duration of appointments.
Too many stops on your round
“Optimized Routes” are limited to 24 stops.
If you add more than 24 stops to your Optimized Route, a message will alert you. Optimization cannot be performed as long as the round has more than 24 stops. To resolve this, simply remove a few stops and then click “Optimize” again.
Export an itinerary from Google Maps or your Calendar
If you’d like, you can view a route’s itinerary in Google Maps or in your online calendar by clicking the three dots to the right of the “Optimize” and “Save” buttons, then selecting “Send to Calendar” or “Send to Google Maps”.

Warning: before exporting to the calendar
Before you can export your routes to your connected calendar, you must first sync them with Moovago. To do this,you need to be using the web version of the application. Go to “Settings,” then “My Session Settings,” and finally “Calendar Sync.” There, select your calendar and follow the steps to grant the necessary permissions. Learn more in this tutorial.
After clicking “Send to Calendar,” a window will open showing the details of your routes.

Then click “Export” in the upper-right corner. Check your calendar before doing this a second time: you won’t be redirected, but the appointments have been successfully exported.
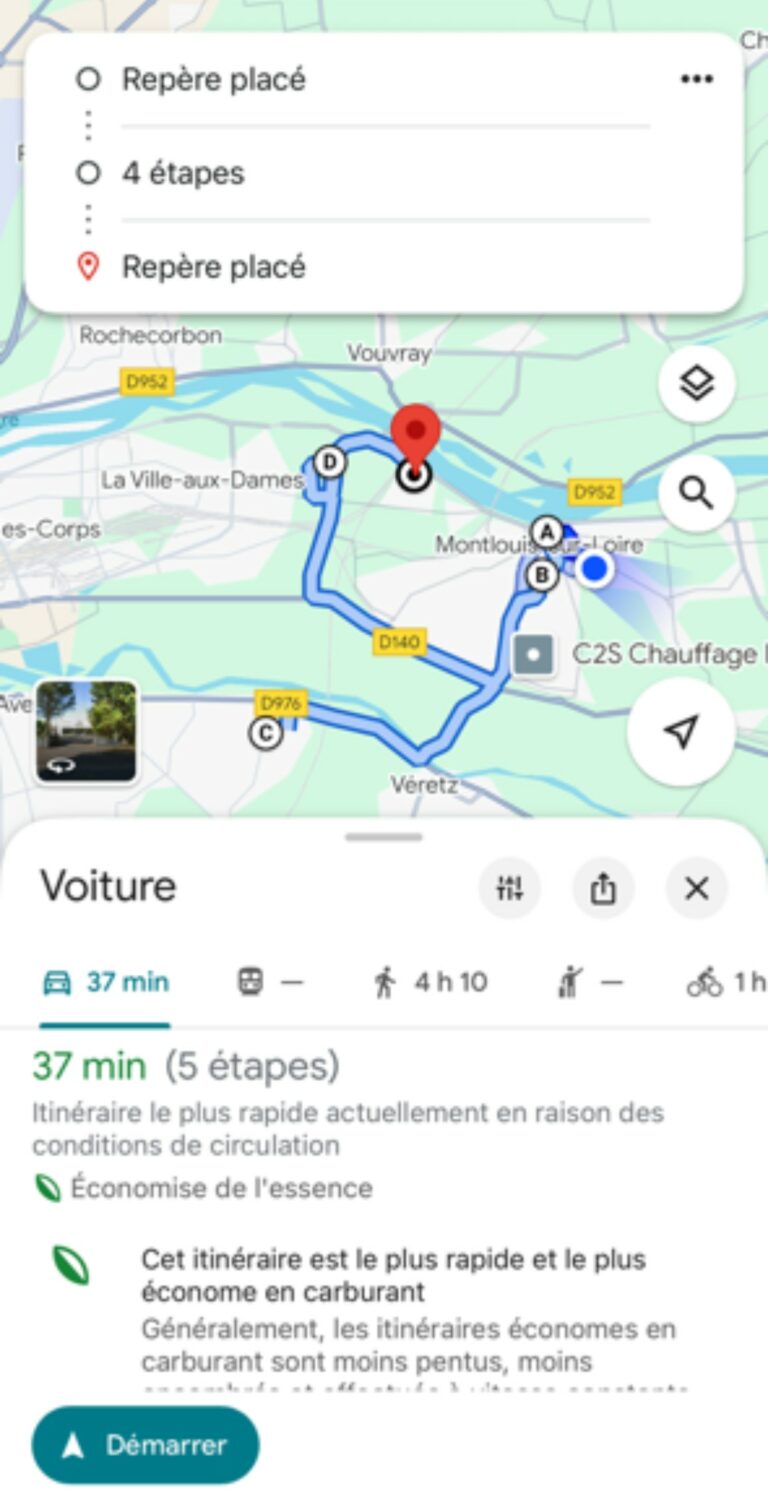
If you select “Send to Google Maps,” you will be automatically redirected to Google Maps.
This feature displays the points on your itinerary directly in Google Maps.
Here is an example of an itinerary displayed as follows:
Edit a route
To modify a route, go to the route window, then to the“My routes” tab.
Find the route you’re interested in, then click the three dots to the right of the block. You’ll then be able to select “Edit.” When you click the button, the routes open, and you’ll have access to tools for adding, deleting, or moving stops.

Before you leave, don’t forget to save your routes.
Delete a route
To delete a route, go to the route window, then to the “My routes” tab (e.g. “Saved”).
Find the routes you want to delete, then click the three dots to the right of the block, and then click “Delete.”
You will be asked to confirm your request. Please note that this deletion is definitive. We advise you not to delete any routes you have already completed, as it is worth keeping them to calculate your mileage expenses at a later date.

Export a route
Once you have finished your route, you can export it in csv format to share it with your colleagues or managers.
To do this, go tothe “My Routes” tab (formerly “Saved”) in the Routes window. Click the three dots to the right of the route block you want to export, then click “Export.”
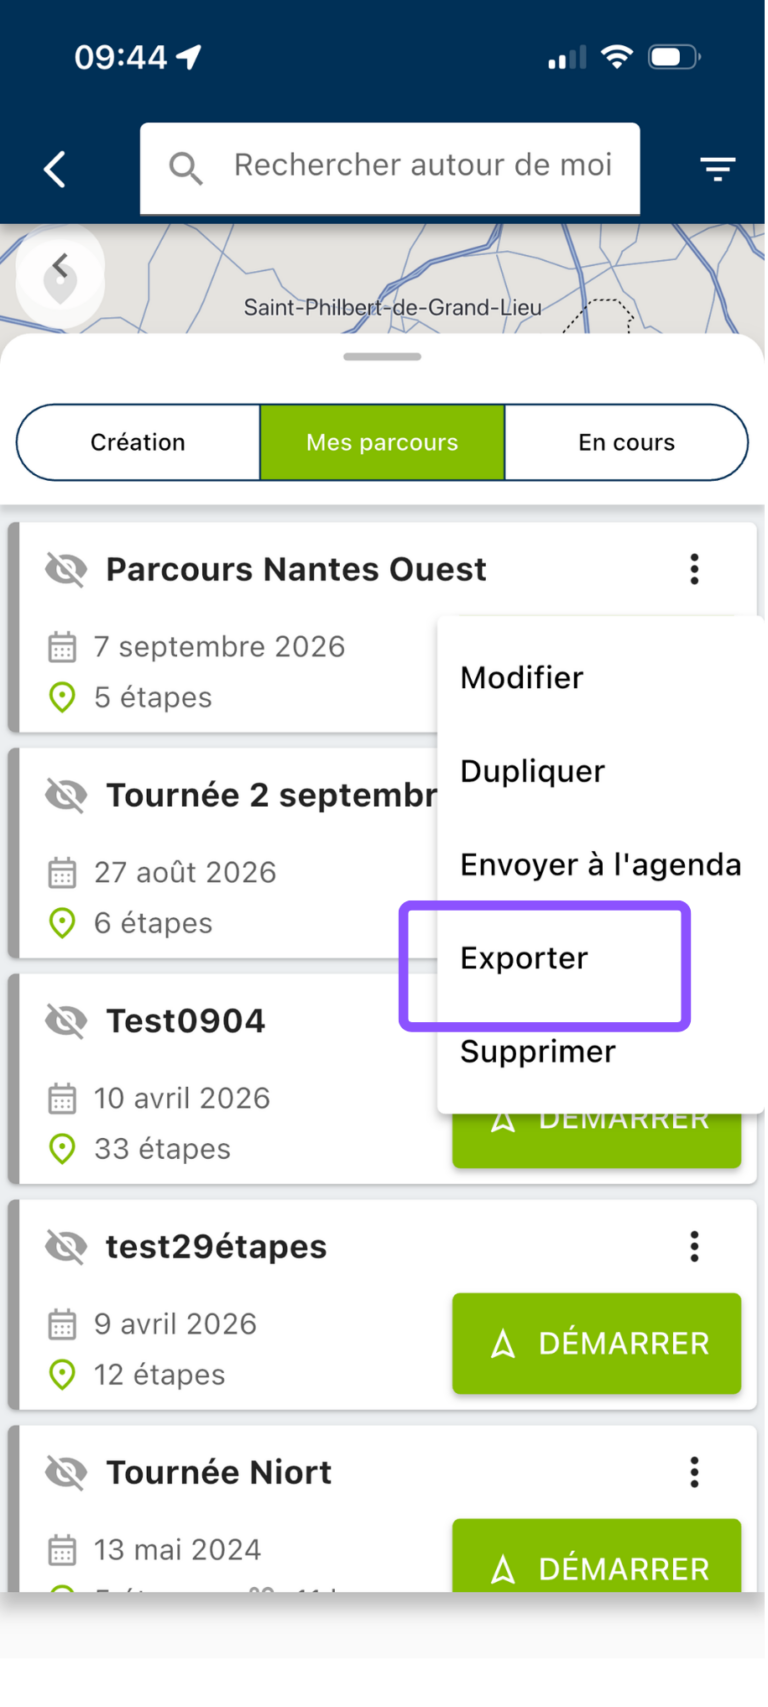
You can then indicate the elements you wish to find in this file (which will correspond to the columns in your file), then click on “Export”.
You can also export all your routes by going to the “Exports” tab in the left-hand menu, then to the “Routes” tab within that menu—which is very useful for determining the mileage of your routes (for mileage reimbursement).
Check out our detailed tutorial on exporting routes!
Need to know more about calculating mileage costs with Routes? Discover our article dedicated to Routes export.
Using a Route on a sales round
Moovago has been designed to enable you to retrieve a planned route, and quickly create reports, tasks and events following each appointment or stage of the itinerary.
To do this, follow the detailed tutorial!